
Sunday September 27, 2015
After searching for what seems like months now for the perfect refrigerator for Daze Off, we have come to one conclusion. Â Although it would be soooo nice and sooo easy to buy a pre-made one that we just slide into place and plug in, there seems to be two definite problems with that. Â 1. Â Our hull curves in so much that any of the larger sized fridges could not fit into the space we’re looking for, and if we put it against the flat surface in the center of the boat then the depth came out much further than one would like to have remaining foot space in their galley. Â And 2. Â The ones that would fit either of those areas were too small for our taste.
To go into a little further detail, we would have preferred a pre-fab fridge with drawers, but those all fell in the category of not fitting into the space well. Â All the front open fridges we could find that did work with our hull shape and also the layout we have in mind for our galley usually fell in the 4 cu ft range. Â We had 9 on Serendipity. Â That would be cutting our cold food storage in half. Â Not that we always filled Serendipity’s fridge to the top (unless we were headed out on passage or to the Bahamas), but it became a terrible game of ‘I need what’s sitting under 8 other layers’ the times we did. Â Plus we could only imagine opening the door only to have all of the items inside topple out on us if there were any kind of motion on the ocean.
The only good solution left was to build our own.
A lot of planning went in to this (on Matt’s part, god I love him for figuring all of this out), and once we had our approximate measurements of the outside of the box it was time to head to the hardware store to buy a sheet of 1/2″ exterior plywood to begin the project.
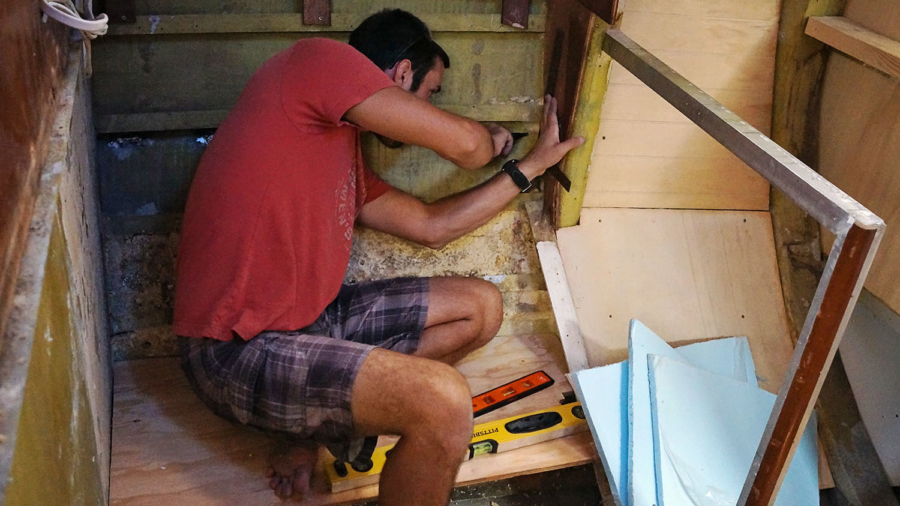
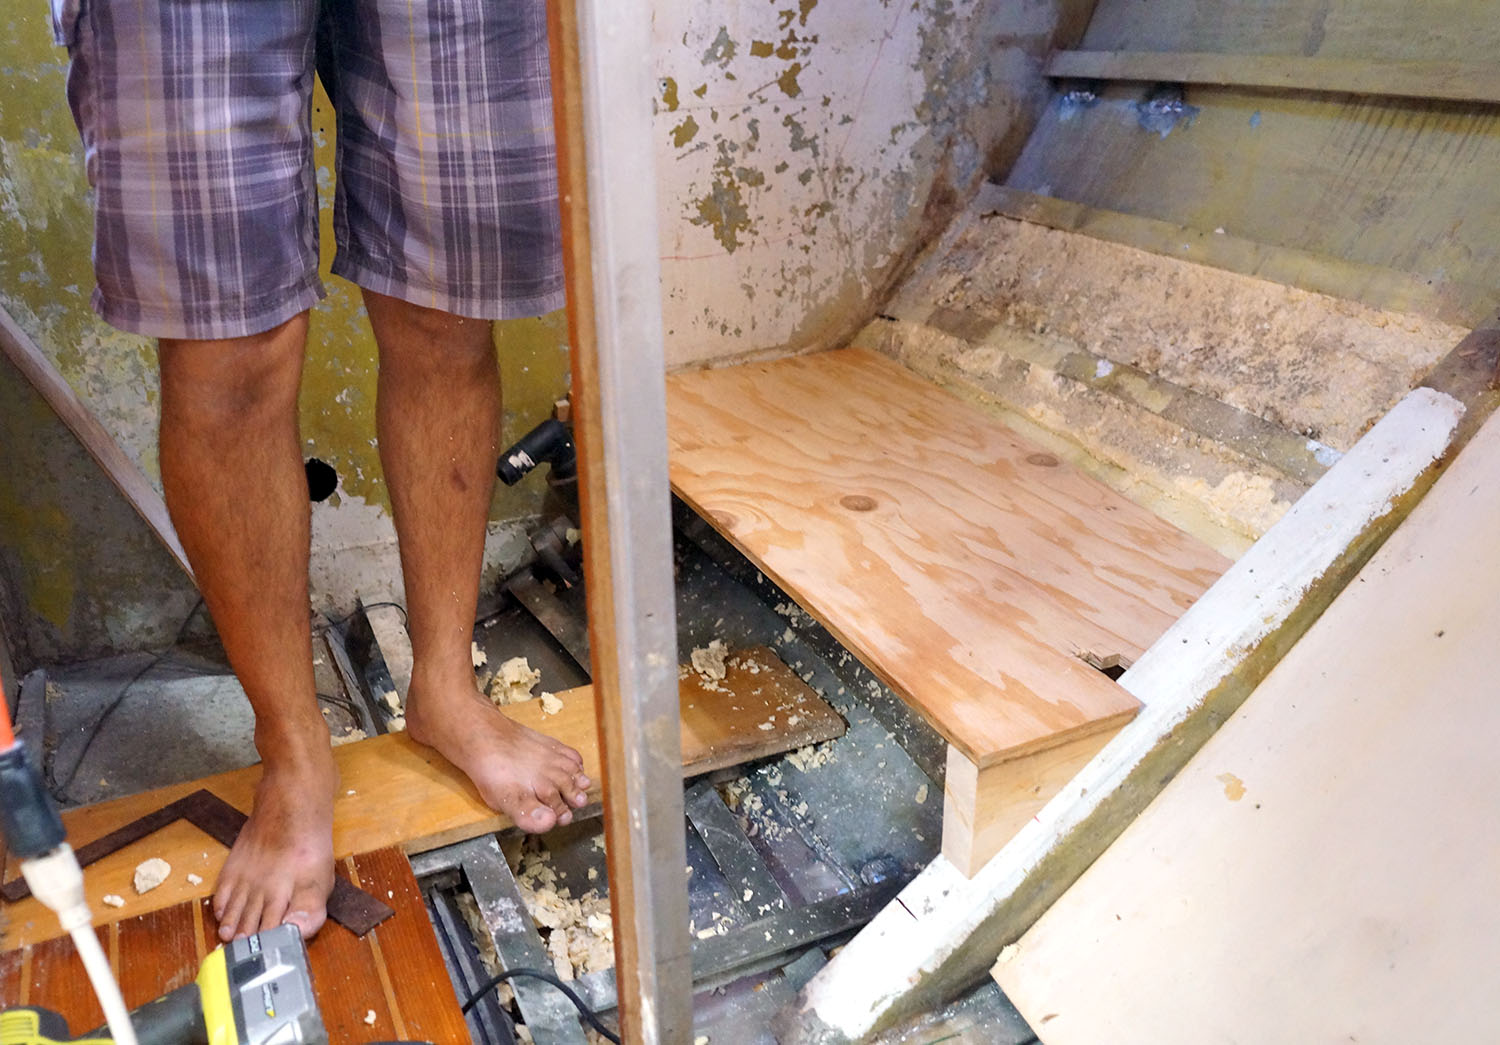
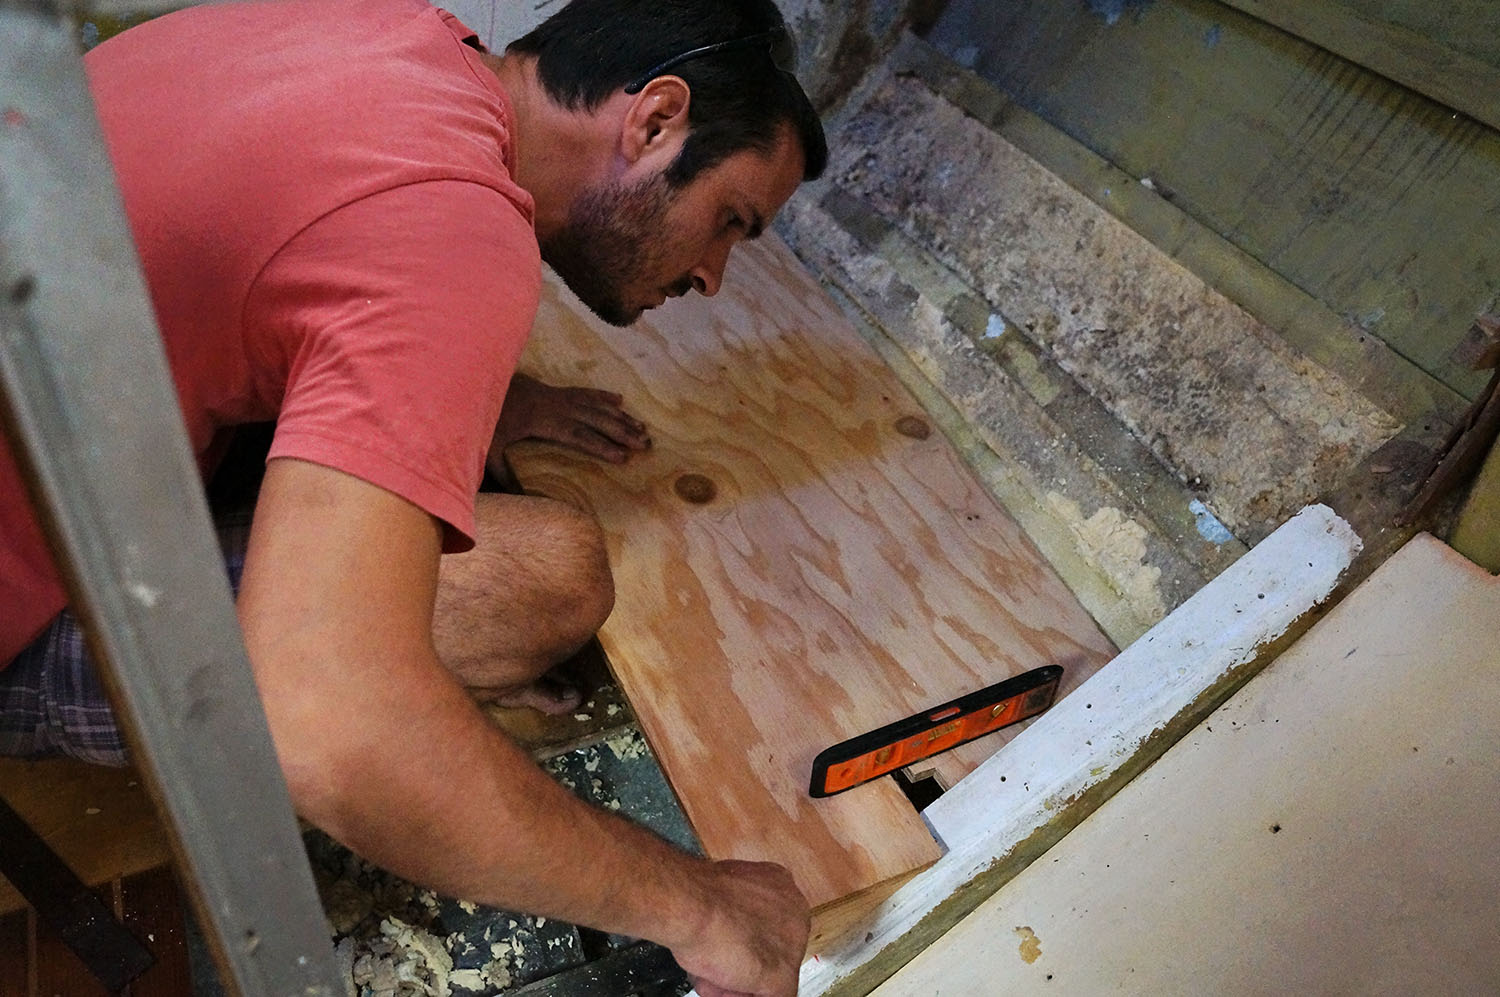
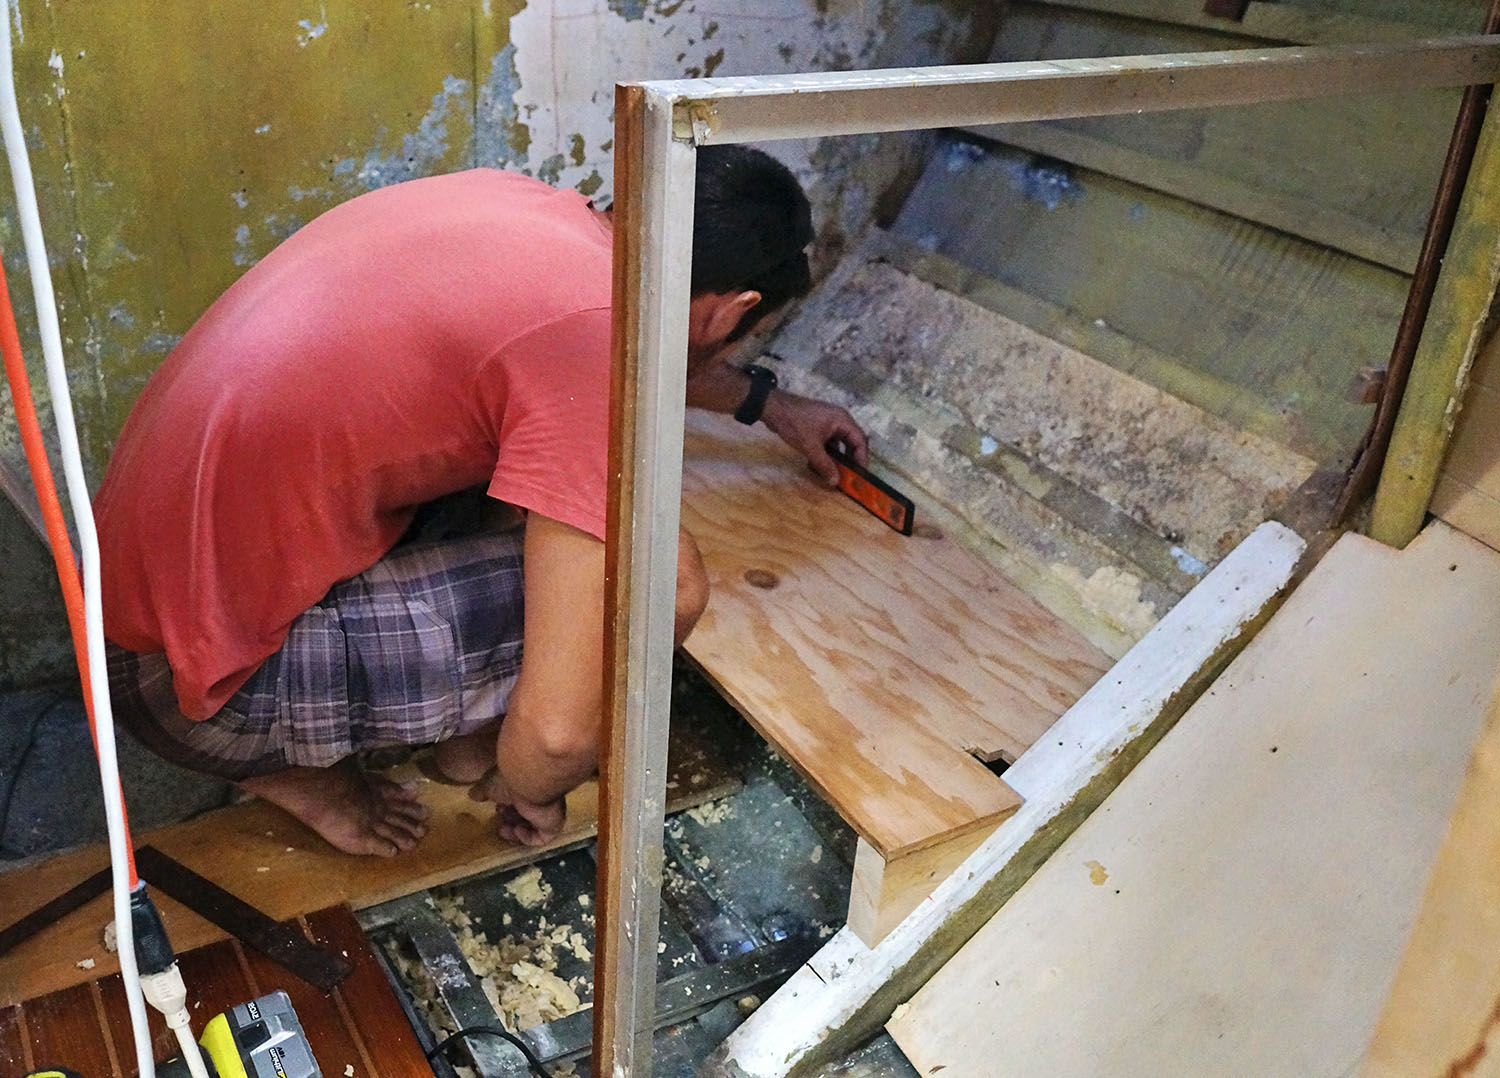
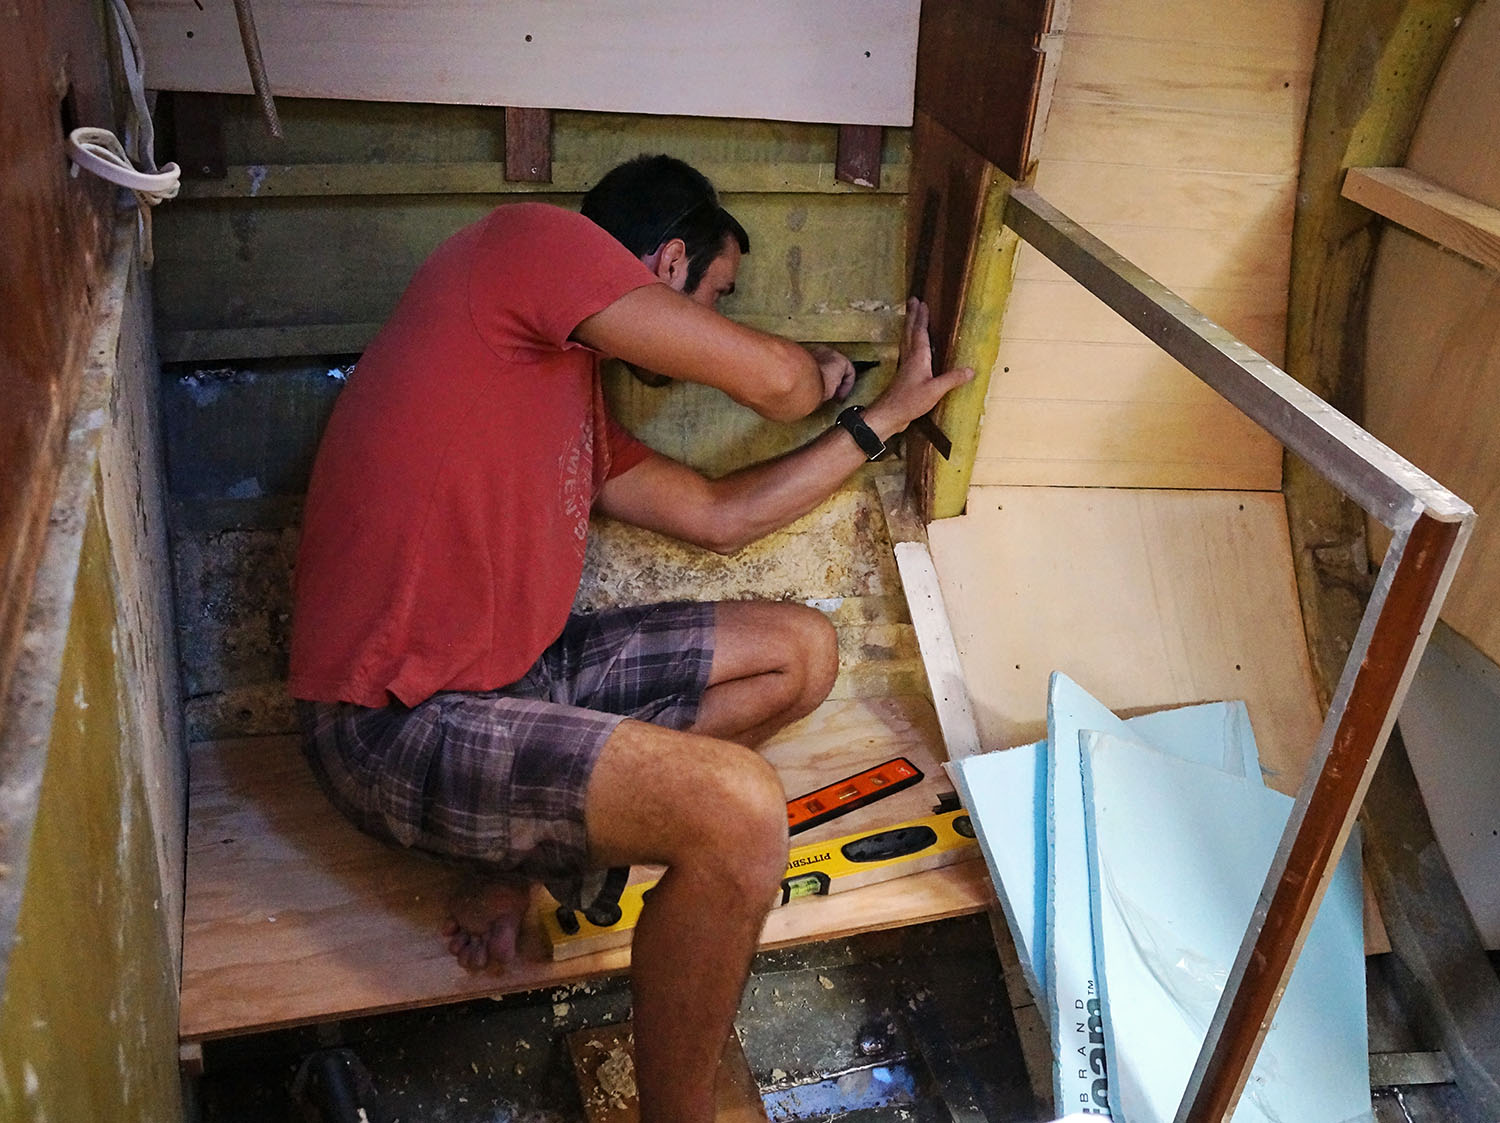
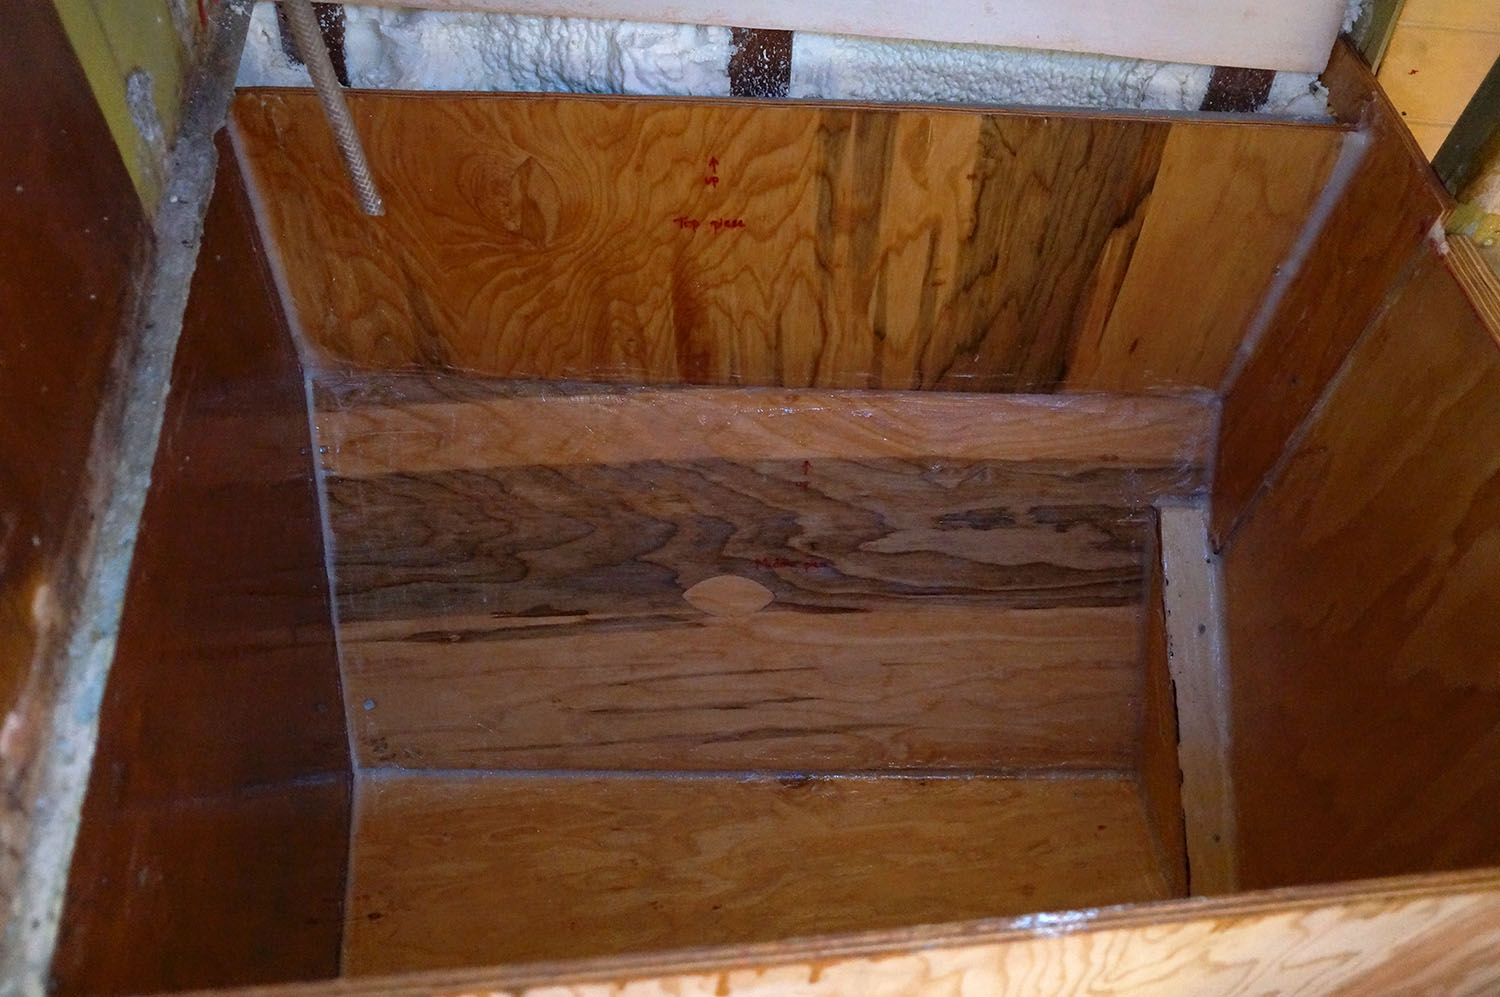
Our first step was making cleats to add on to a few of the aluminum frames that came out on angles from the hull, allowing us to be able to have a level board sit down when we were finished. Â Once the cleats were installed we were ready to cut the bottom board but also had to take into account the frame, slicing a small section out of the plywood’s edge so we could fit the board around it.
The back wall of the box needed to be built in two pieces to allow for the curve of the hull.  We do want to maximize the usable space in this fridge as much as possible which is why we decided not to build it straight up and leave a large gap between the box and the hull. Making sure that everything was level and that we’d be ending at 90° angles, we measured and cut the back two pieces, also having to make an allowance for the frame on the bottom of the two.
I had thought the sides would be much easier to cut but forgot to factor in that they needed to be pentagons to, once again, work with the curve of the hull. Â You should have seen the drawings I had in my notebook as Matt was giving me measurements to write down. Top – 23″; front side 19″, top back side – 8″, remaining – 12″. Â Eventually I had to make drawings to keep it all straight so we could remember what line connected to what when it was time to mark the lines on our plywood.
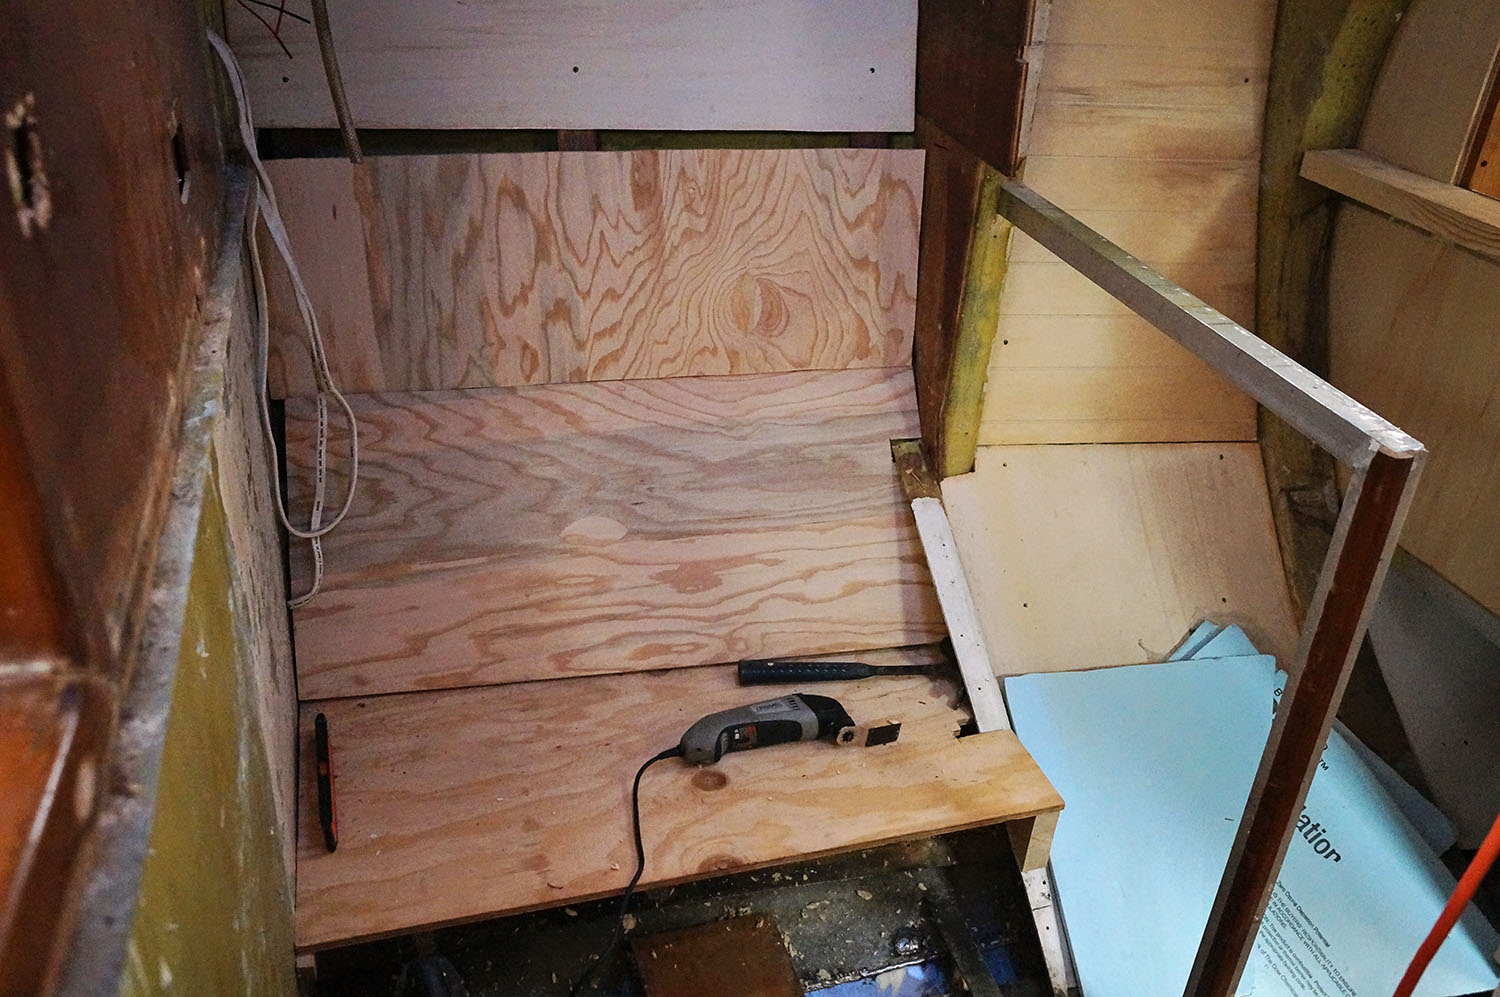
The front was by far the easiest, and once we loosely assembled it together it was nice to step back and say “Wow, look at all we were able to complete in one day”. Â Except, we were still so far from finishing. I had also forgotten that we needed to cover the metal frame that was running through our refrigerator box. Using sheets of Eurolite for this we cut two pieces that covered the top and side and also cut some sheet foam to slide under that area so that once it was closed off it wouldn’t be sucking cold air into a useless area.
That was enough to fill one whole day, but in the end it still felt like we accomplished a lot more than we have on a normal day lately. Â Day two was prepping the wood for final installation and also do all the final prep to that space before the boards were permanently placed, such as insulating and running conduit.
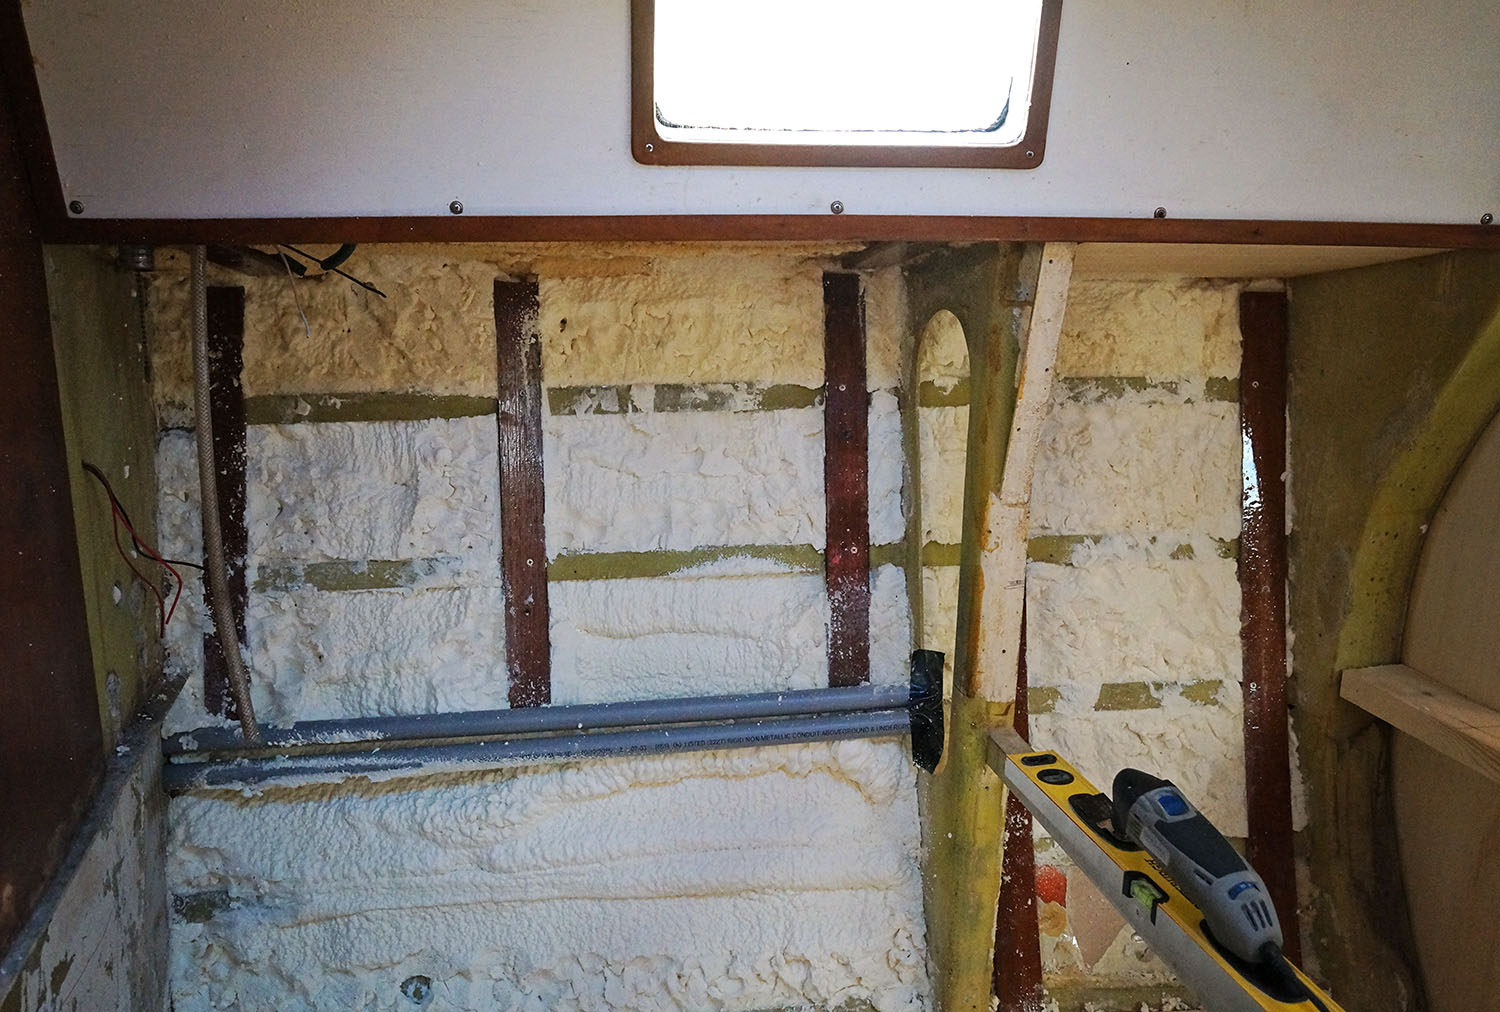
While I was sent outside to ‘epoxy the s#*t’ out of the boards, as Matt put it, he was inside working on more spray foam insulation. It turns out the previous owners of our boat once again had it all wrong. Â Where you’re supposed to have insulation from the overhead leading to the waterline, they instead had bare metal all the way down to the waterline and then decided to insulate from there to the bilge. Â Oh that’s right. Â They needed a place to hide their drugs.
So Matt went through and properly insulated the rest of the hull and made a huge mess in the process when he tried to add a little extra to the existing insulation to the overhead. Â But it was also kind of nice knowing that I’m not the only one who makes big mistakes on this project of a boat. Â So yeah, a lot of my free time is now going to be spent scraping off bubbles of foam from the walls, cabinets, floors, and even the plexi hatch.
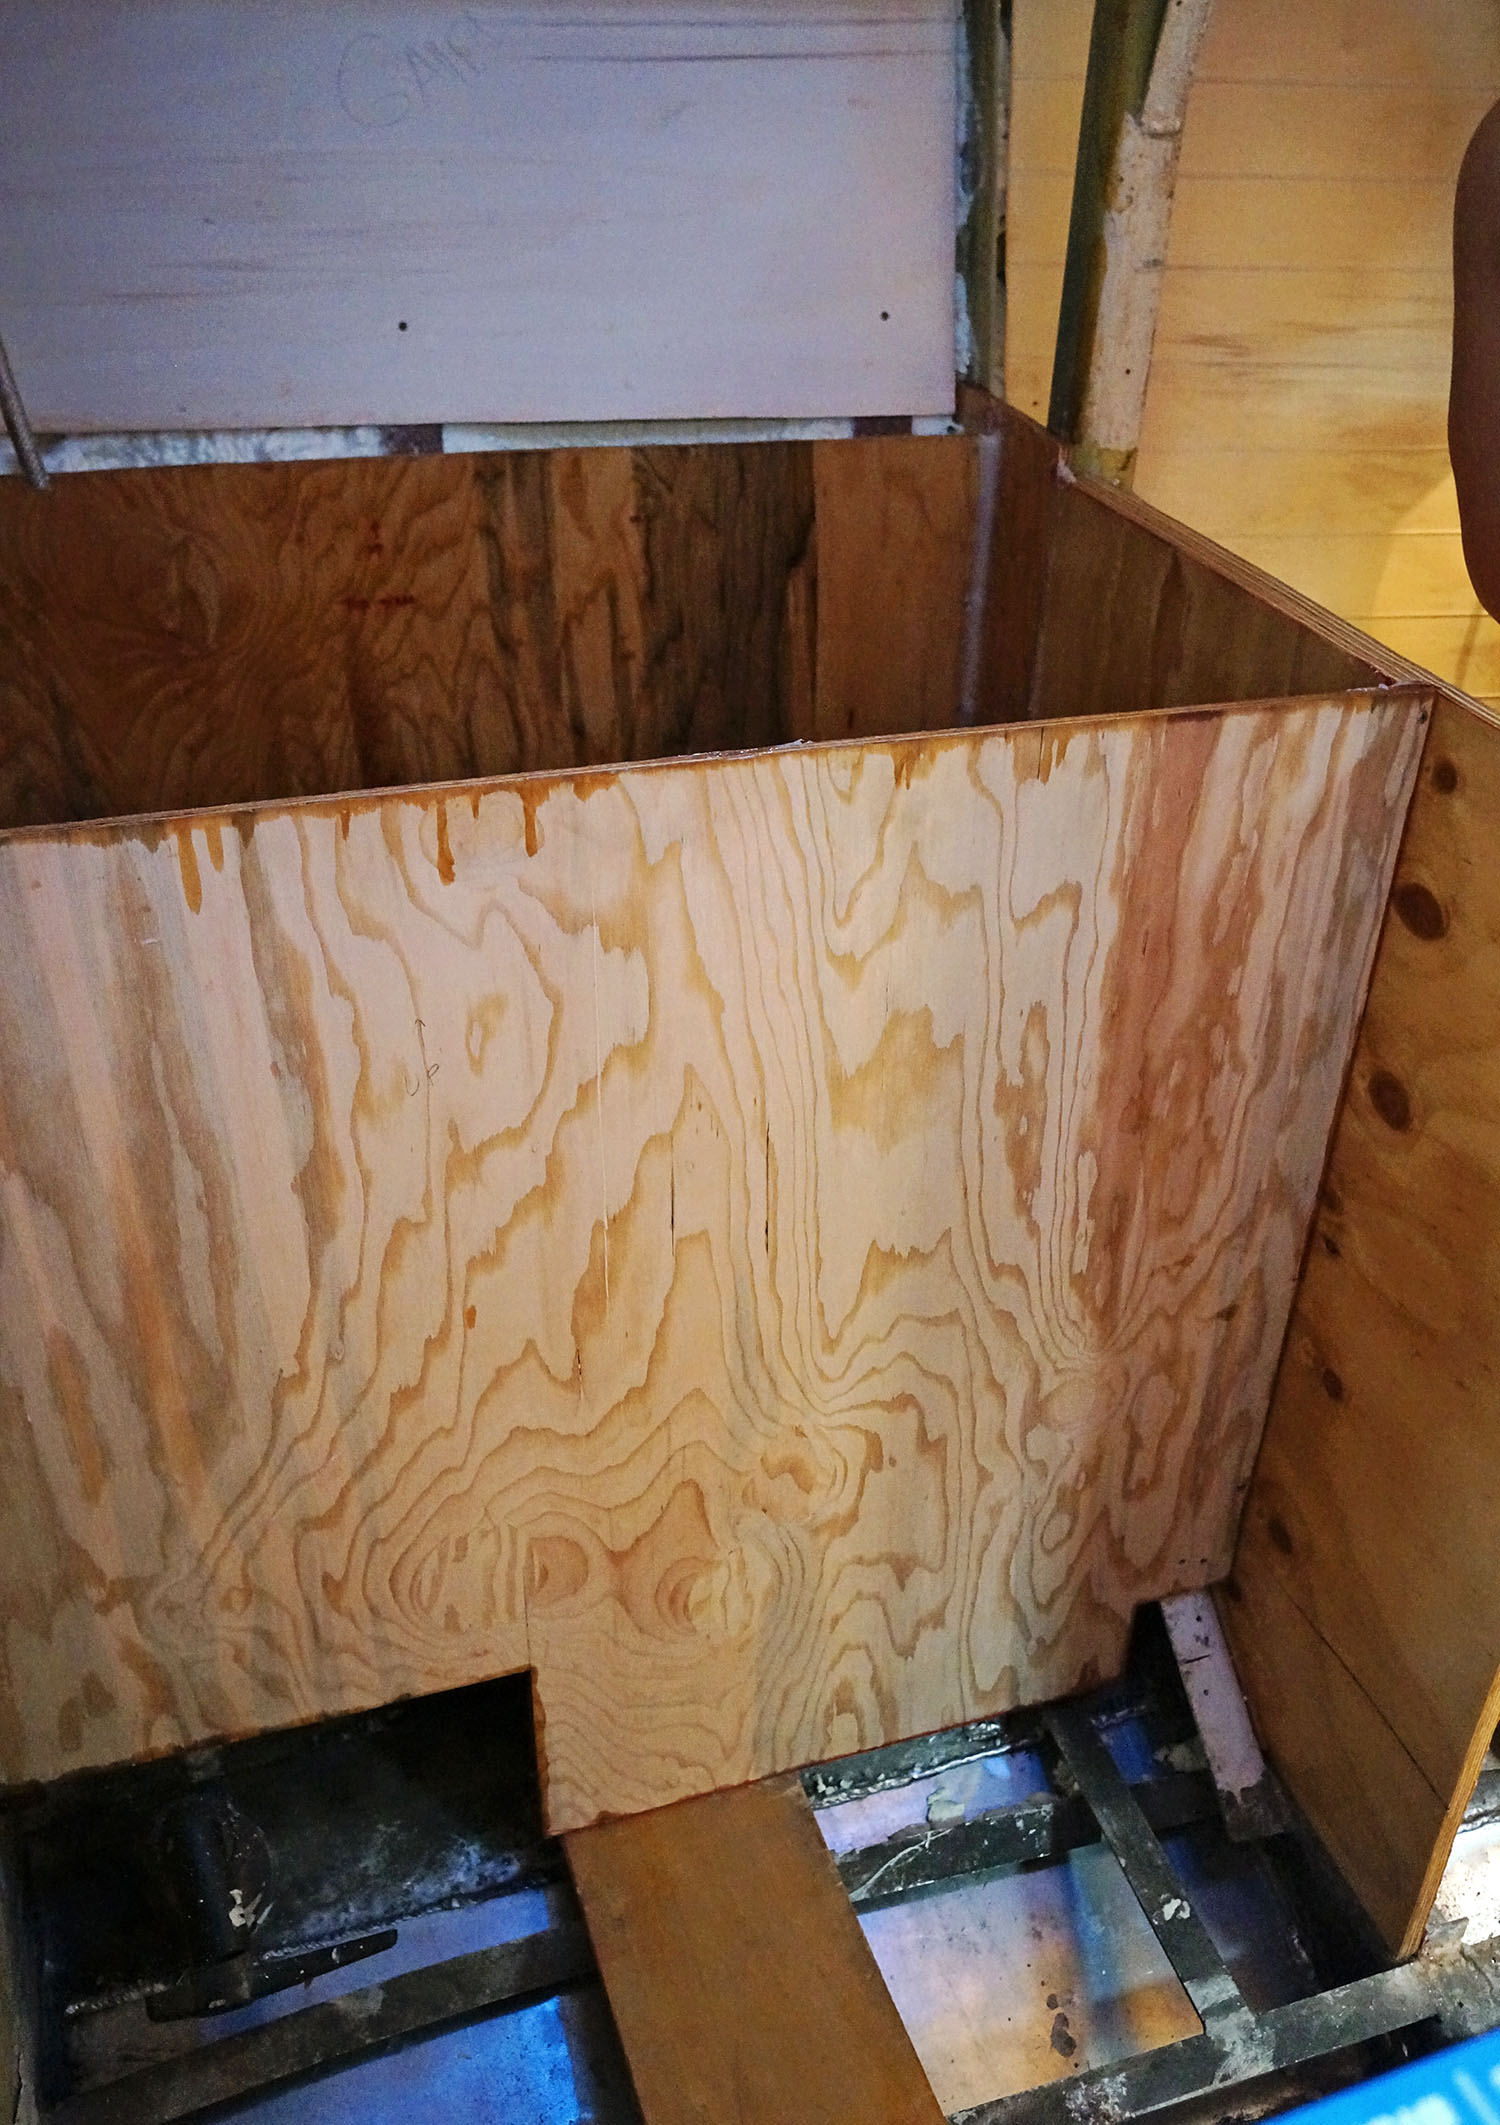
A few days later once the plywood had two coats of epoxy we were ready to screw all the boards in place and fill any gaps. Â Working with my new best friend, epoxy, we added some colliodal silica to make a nice thick paste which we then ran along all the cracks and made sure they were thoroughly filled. Â This should make sure the frame of the box will be completely water tight. Â A very good thing when condensation is a high probability.
So there you have it for stage one of building our own refrigerator box. Â Stay tuned for the next step where we get to insulate! Building this refrigerator box has been a labor of love, a test of patience, and a crash course in DIY engineering. Every cut, screw, and layer of insulation feels like a step toward creating something that truly works for Daze Off. Sure, it’s not as simple as sliding a store-bought model into place, but the satisfaction of crafting a solution that fits our unique space and lifestyle is worth every splinter and epoxy spill. It’s not just about building a fridge; it’s about building a space that works seamlessly with our life on the water.
Of course, no matter how well a project like this is planned, there’s always the reality that things can go awry. Boats have their quirks, and sometimes the unexpected happens—like a sudden change in temperature or a component that doesn’t perform as expected. This is where knowing the right professionals can make all the difference.
When we encounter an issue we can’t tackle ourselves, companies like FixWell Appliance Repair are lifesavers. Whether it’s diagnosing a mysterious noise, fixing a seal that isn’t holding, or fine-tuning the system to keep everything running efficiently, their expertise ensures the time and energy invested in projects like these don’t go to waste. It’s a reassuring safety net, knowing that skilled hands are just a call away when the inevitable happens.
So while we’re deep in the thrill of building, it’s also comforting to know that when our custom creation eventually needs some TLC, there’s support out there.
Ellen introduced us to your blog since we are also refurbishing our boat. I have enjoyed watching your progress. What type of foam are you going to use? I am working up to building a refrigerator and was planning on using extruded polystyrene.
I’ll have to give Ellen a big thanks! For our fridge we used polyisocyanurate foam, and were able to pick it up by the sheet from Home Depot. We went with 3/4″ sheets and used 4 of them for a total thickness of 3″ of insulation.
Wow!! what a great job!! I am totally impressed. The things you covered through the post are impressive @Jessica!! I mean excellent. I have enjoyed reading all of it..Absolutely worth to share!!
I had never thought to build my own refrigerator box. I am impressed that you can customize your refrigerator to have the amount of shelves that you need. It can be so frustrating to not have enough room in your fridge for all your food items, building my own fridge would definitely be a perfect solution!
Your description of how they used bare metal instead of insulation in the appropriate place was a little more than shocking. Having the previous owners of your property be drug users, and feeling the after effects, does not sound like a fun experience.