
A small but important project has been finished! Â We’ve now replaced our hatches with new plexi glass. Â And this time, they’re leak proof.
I can’t remember if I had mentioned this in a post this previous summer, if not it was probably because I was too frustrated by the entire thing, but we tried this project in late August and failed. Â I should correct that statement a little bit. Â Everything that we did was great. Â It was the 90 degree temperatures and high humidity that did us in the first time around.
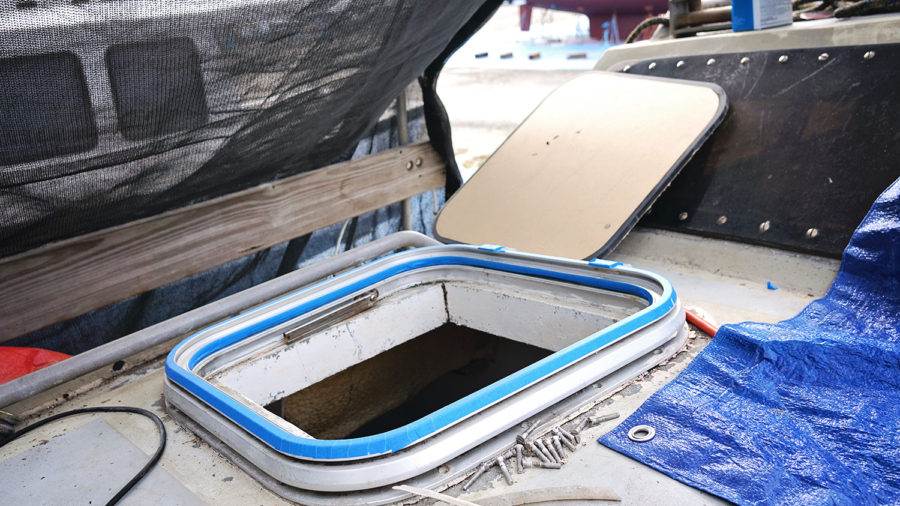
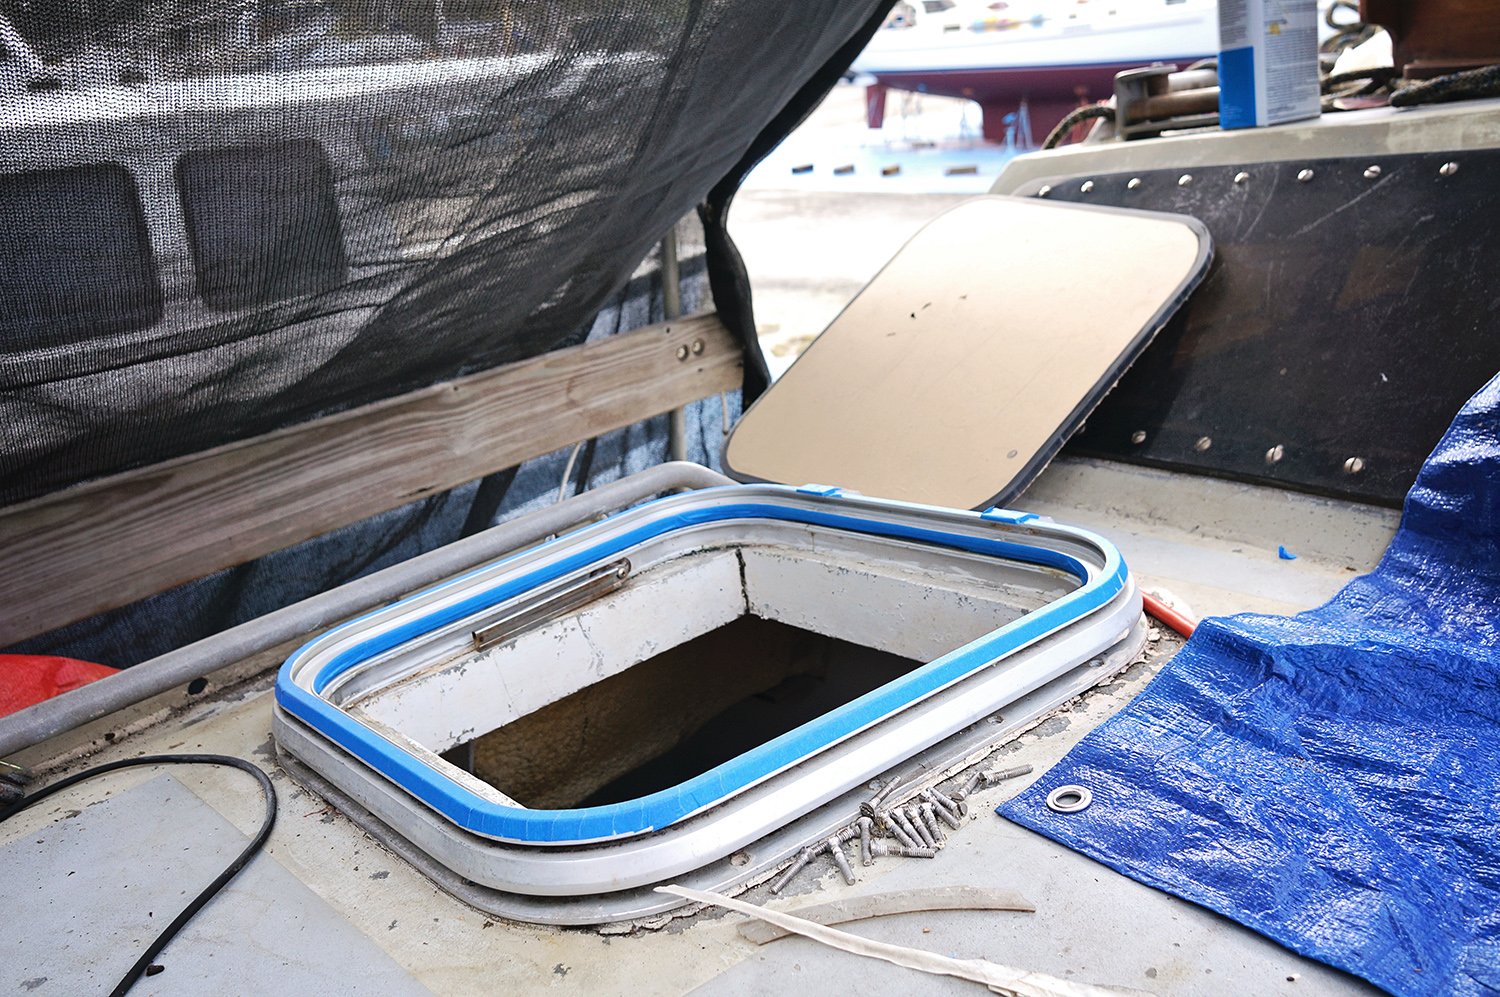
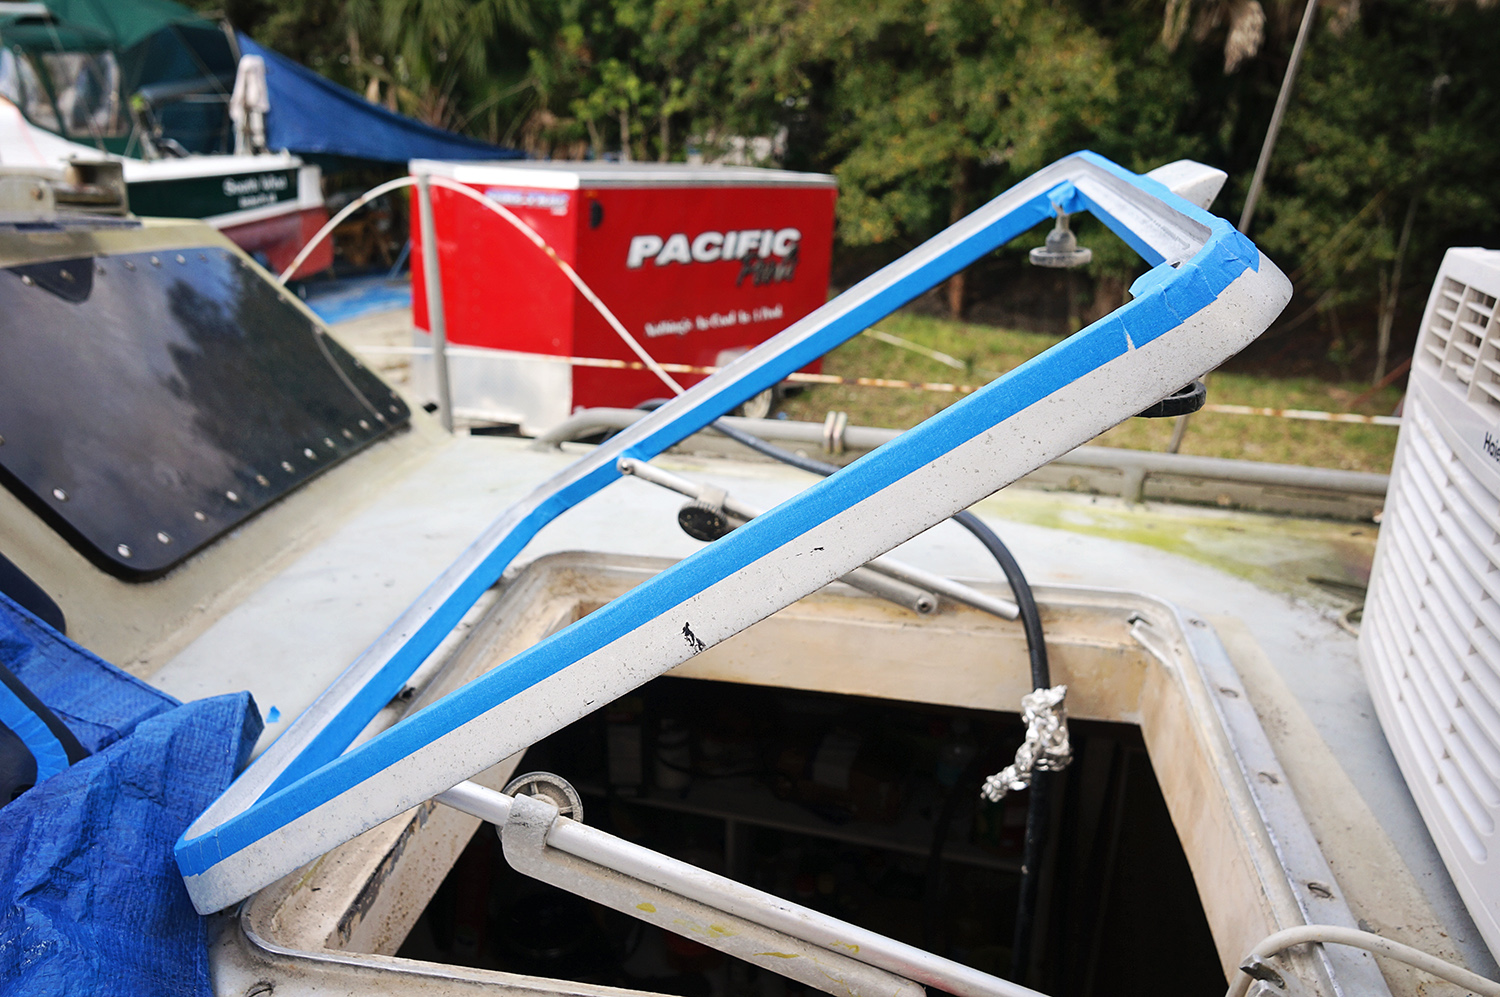
We had spent all morning cleaning and taping the hatch frames, caulking the area, perfectly placing the new plexi glass in, and cleaning the remaining goo that slid off the taped areas. Â This was by far the most difficult and time consuming task of the entire project. Â I must have bathed every hatch frame, as well as myself, in Acetone that day. Â Walking away from it once everything was cleaned up, we were proud of our work and excited that we could finally remove the tarps that had been keeping the inside of the boat water free through the stormy summer.
It wasn’t until we went back a few hours later we found out that due to the incredible heat of the day, the plexi had expanded, pushing out a majority of the caulk we’d sealed it with, and then contracted again leaving gaps where it should have been sealed. Â It was honestly a little agonizing to find out that a project we had been so looking forward to completing was all for nothing. Â It would have to be done again once temperatures cooled down into the 70’s, just to make sure we didn’t have this mistake happen a second time, and until that point the tarps would have to be thrown back on and the inside of the boat would once more be cloaked in darkness.
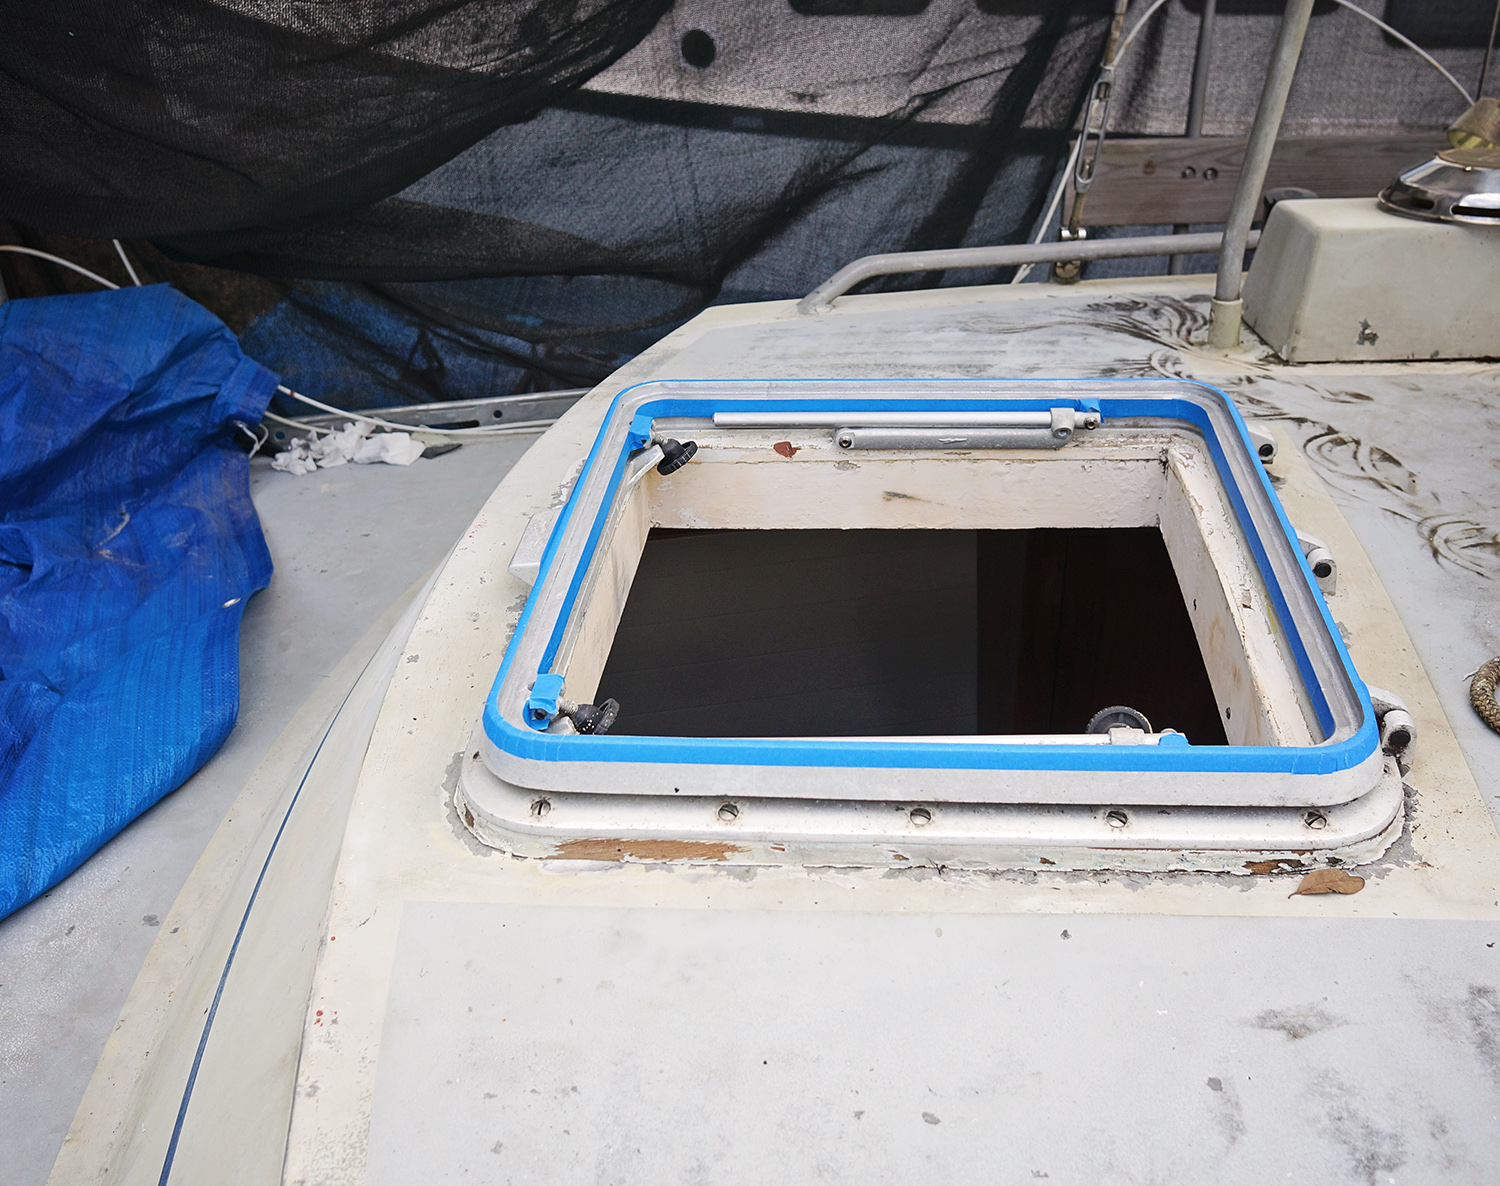
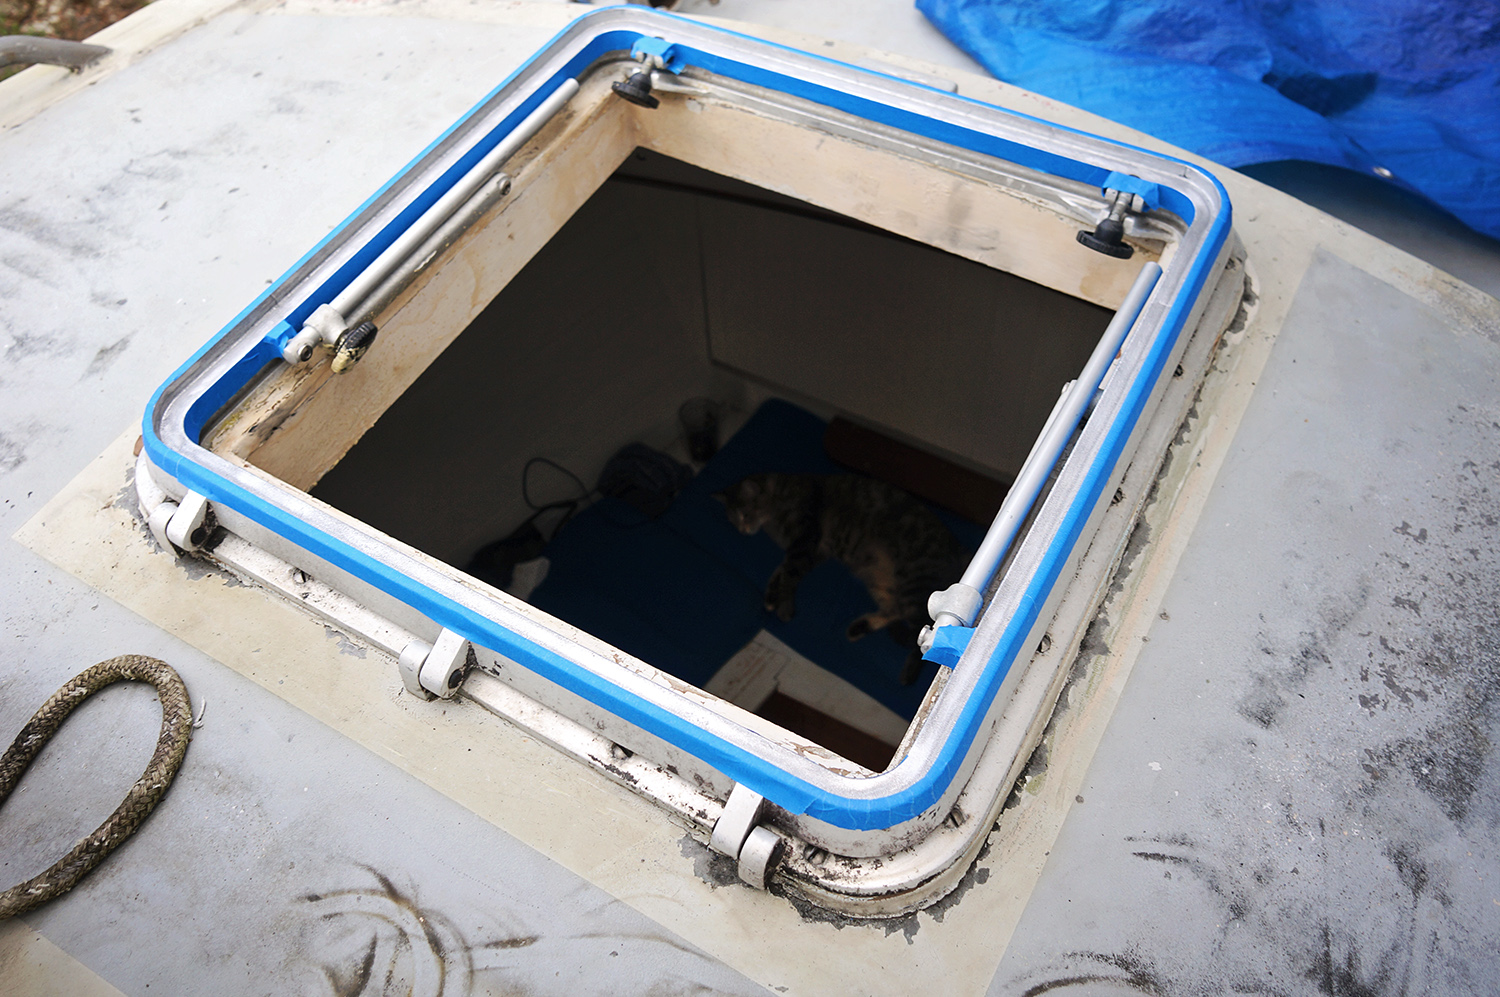
Well, after the summer that would.not.end, we’ve finally gotten to a season where we trust that the Dow 795 we’ll be sealing the glass with will actually stay put this time. Â First there was the preparation of cleaning off all the old caulk until the point there was nothing left and we had a clean surface for the new stuff to stick to. Â Then it was time to go through the process again. So once more I taped the plexi at the edges, taped the hatch frames, and stood at the ready as Matt squirted the black caulk into place.
As we’ve found with a lot of our other projects, it’s always easier the second time around. Â We breezed through all the steps and even clean up was only a minor hassle. Â Making sure to keep the area shaded, we’d check back every few hours to make sure everything was staying put. Â At the end of the day it was so far, so good.
The next day we did a hose test on all the hatches, hitting them full force with water to make sure there were no leaks inside. Â With Matt on deck with the hose and me below looking for any drips of water, it appeared as if we were in the clear. Â We should know for sure the next time a storm rolls though, but it looks as if we succeeded our second time around. Â Let’s hope that’s one of the few projects we have to do more than one round of.
(To replace the old plexiglass we ordered a 4’x8′ sheet of 1/2″ 2064 tint Chemcast plexiglass. Â We used the existing glass to trace the shape onto the new glass, and cut the general shape with our jigsaw, using a blade specific for plastics. Â To get the edges perfect we used clamps to place the old pattern on top of the new one and Matt attached a trim bit to our router, and ran it around the sheet. This gave us exact replicas of what we needed to replace. Using a 5/16 firstner bit we drilled the necessary holes to attach the hardware that opens and closes the hatches.)
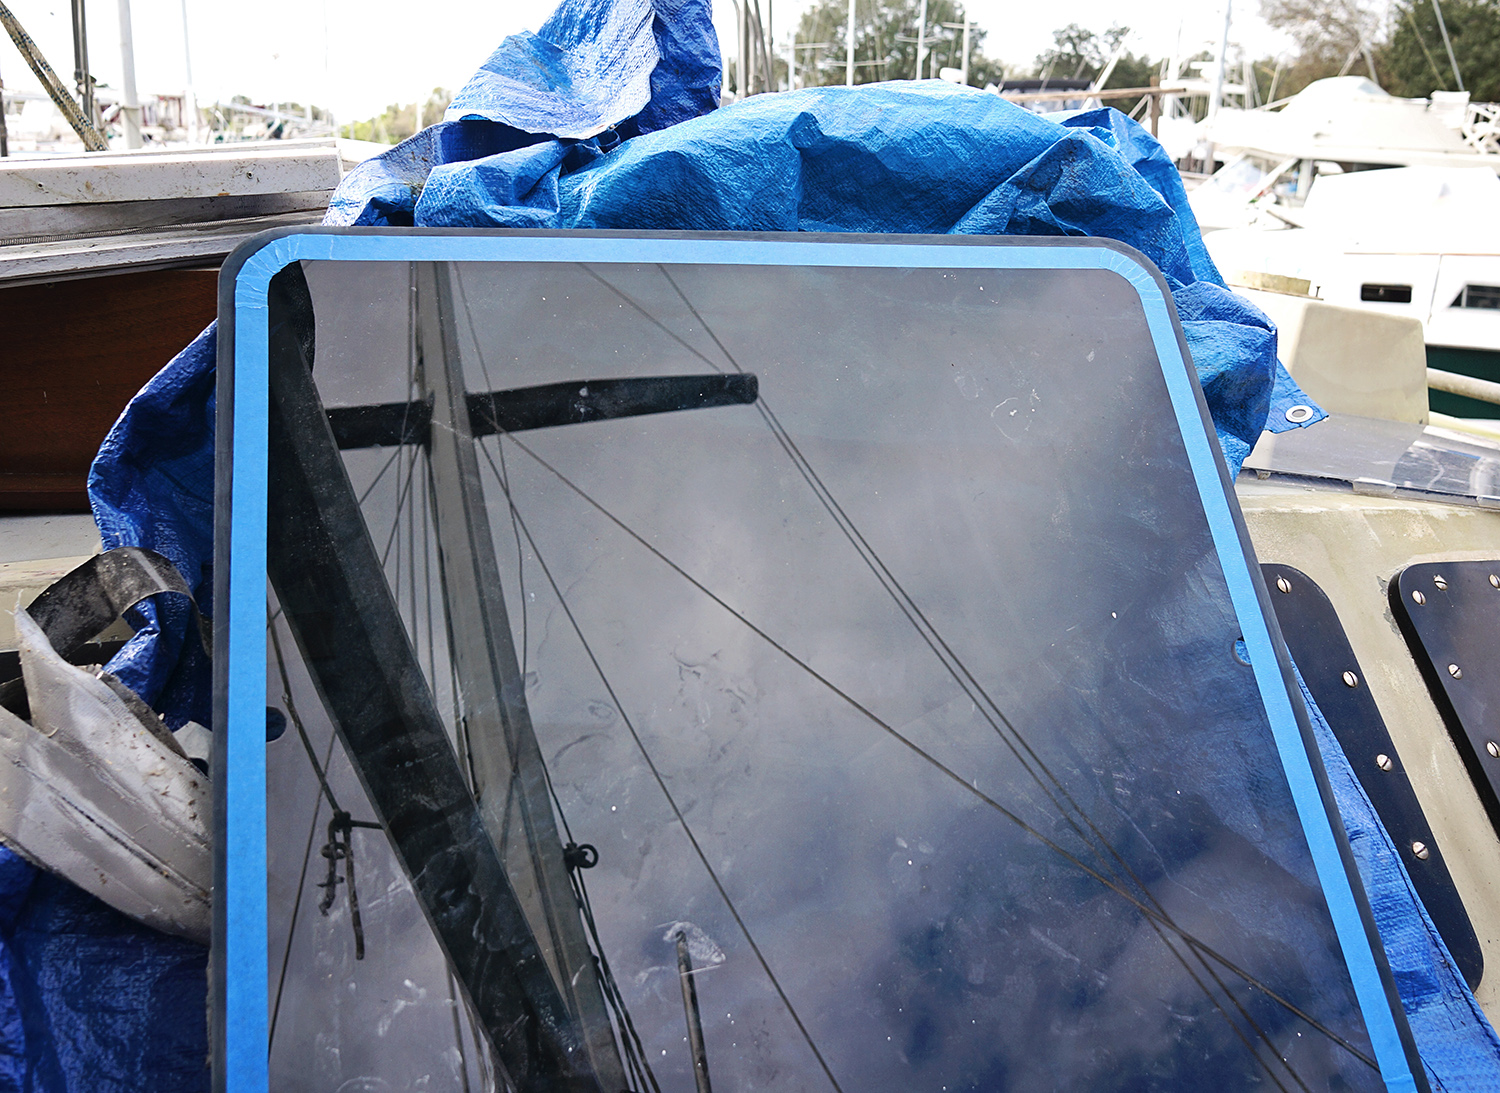

Looks great! Isn’t it amazing how much light comes thru the new glass!?!? We just replaced most of our port lights this weekend, and it’s the first time we can actually see thru them since we bought the boat 2.5 years ago…
And it’s such a great feeling to finally have a project done – even if you did have to do this one twice…
It took us three times to replace our cracked one, so if you got in two, you’re doing great. lol
Those look like the same Goit(sp?) hatches as we have on Redemption.. I have to replace one of the small ones as the lens is cracked letting in water every time it rains. Have definitely been putting it off! I planned on using the Dow sealant too.
I think it looks great. It is amazing the difference it makes. Ours is getting pretty worn and with the season coming up it might be time to replace.