tongue & groove cabinet face

Tongue & Groove

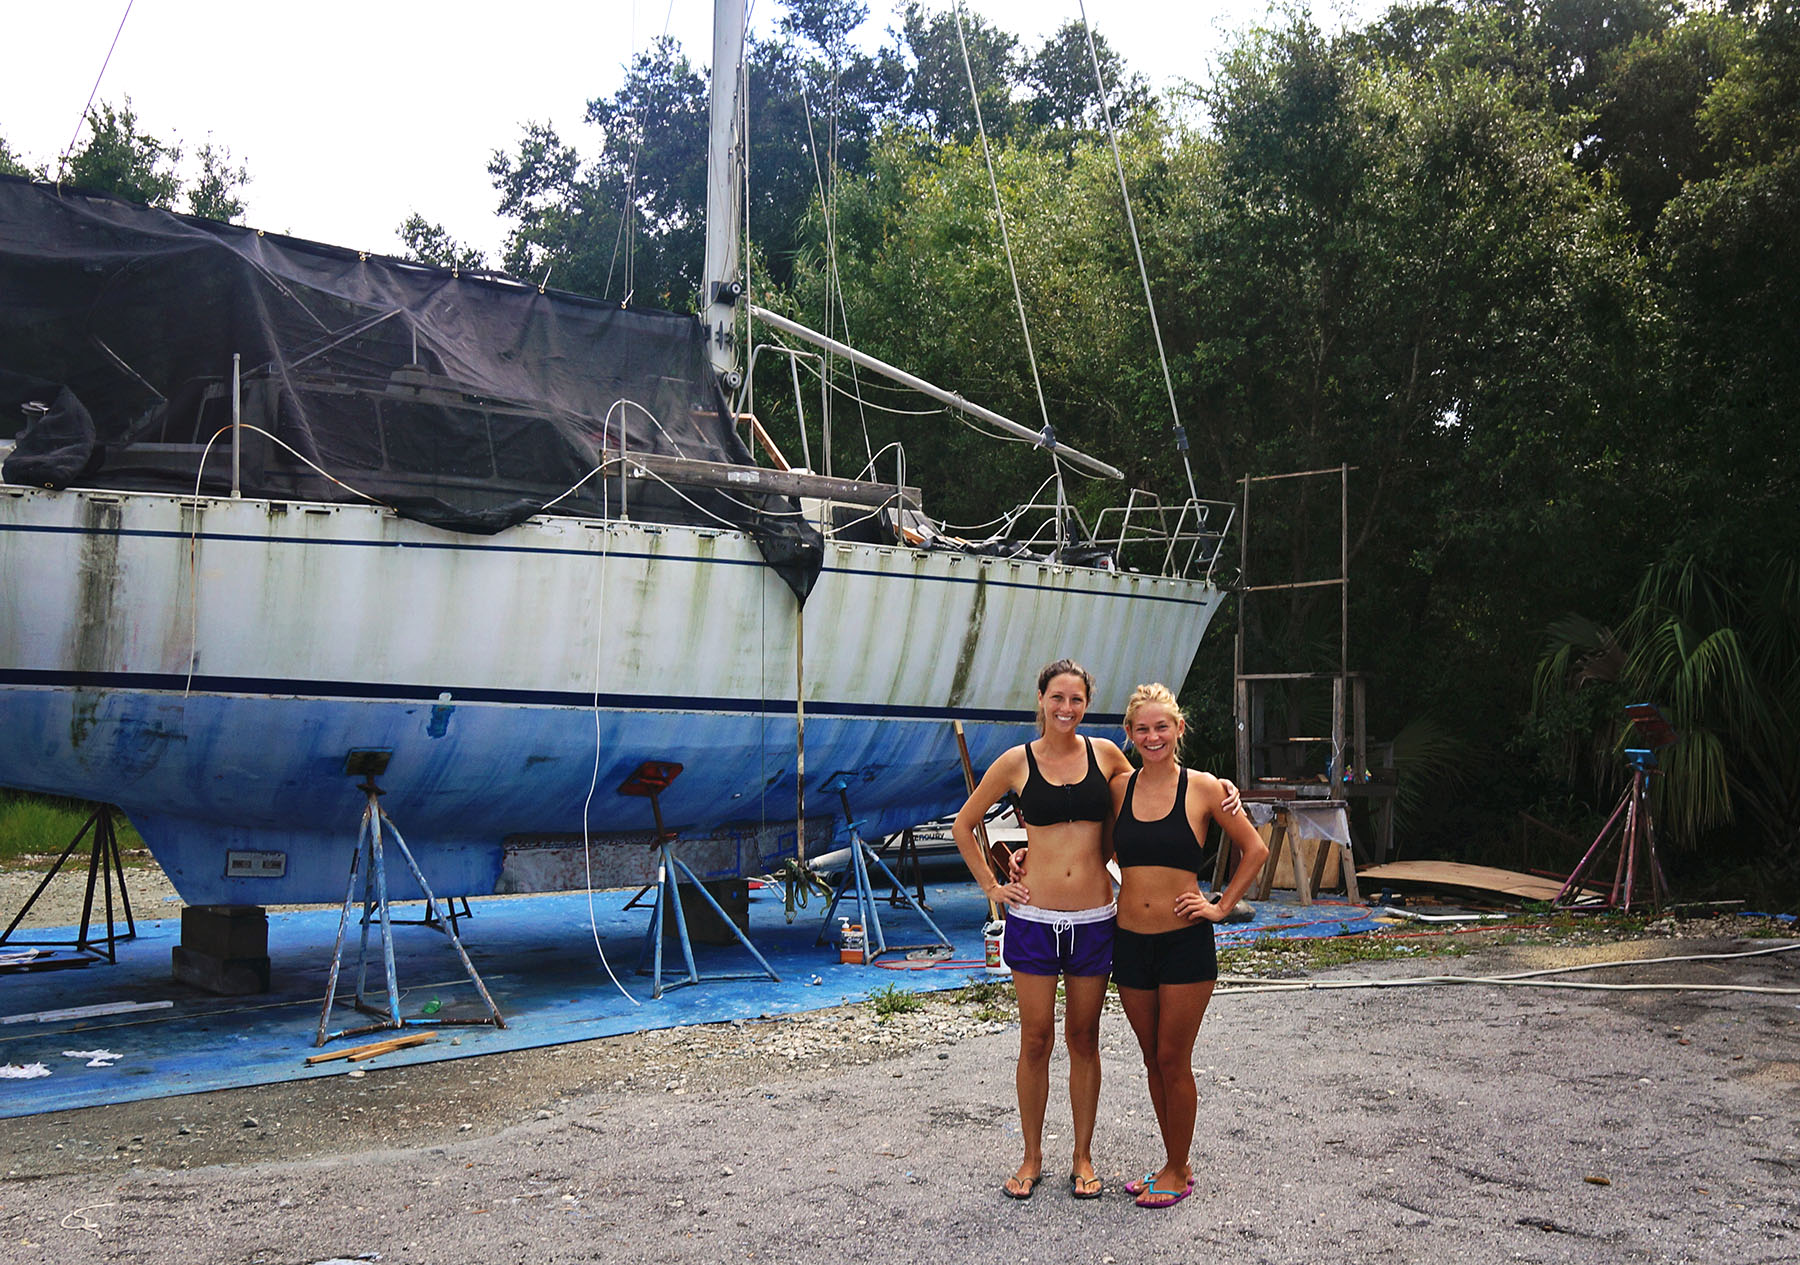
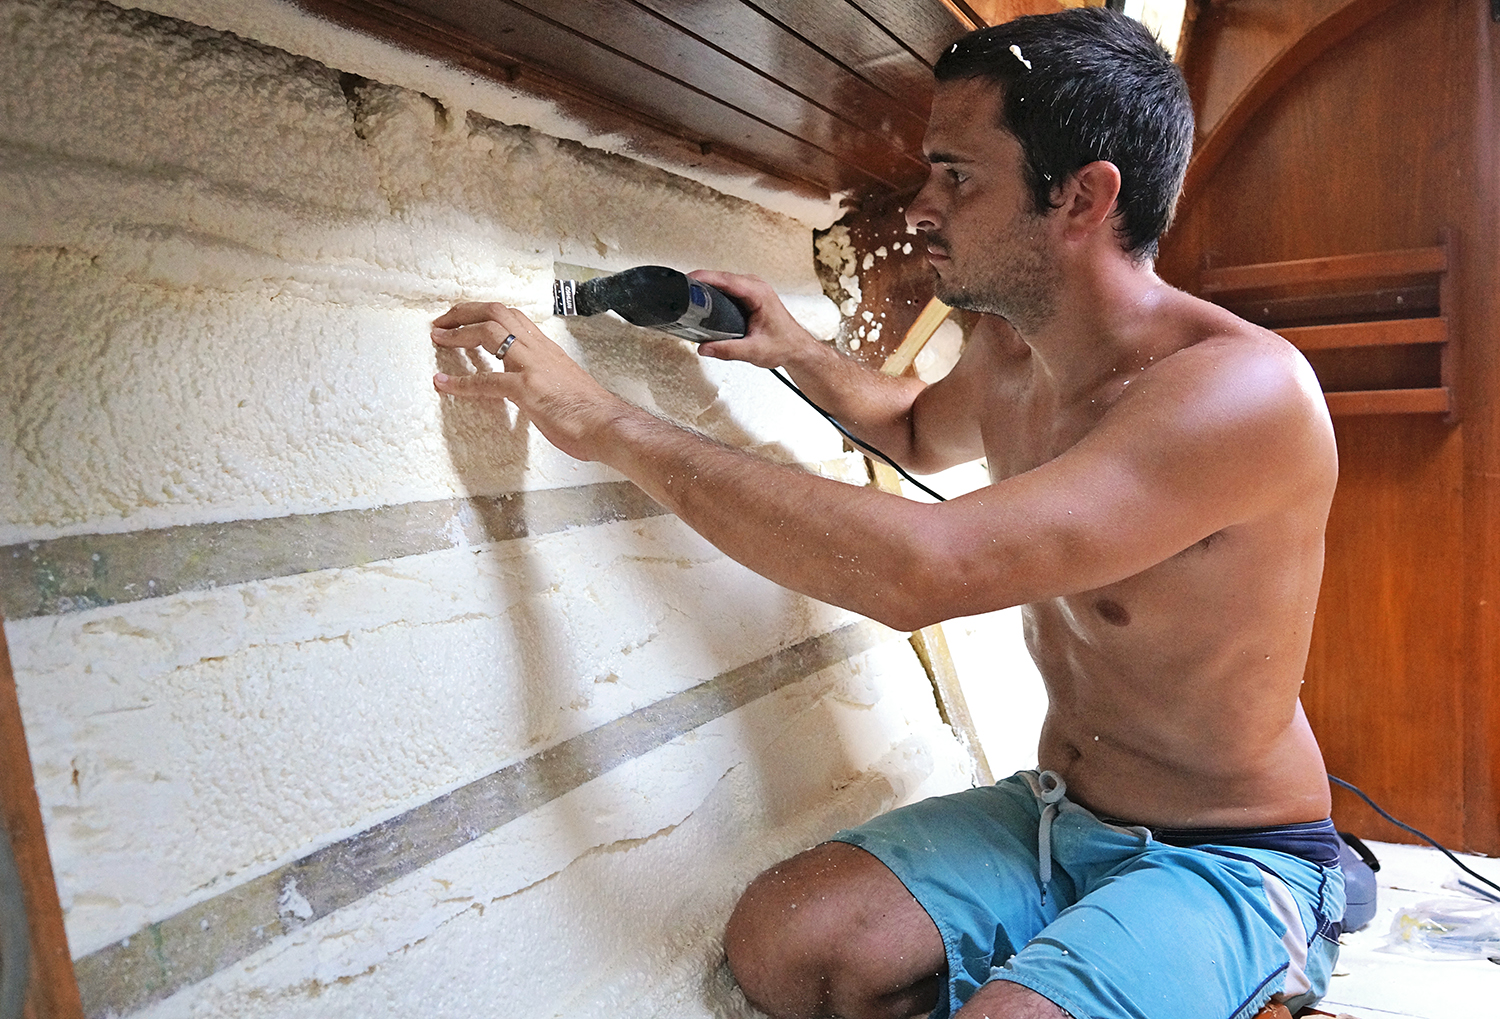
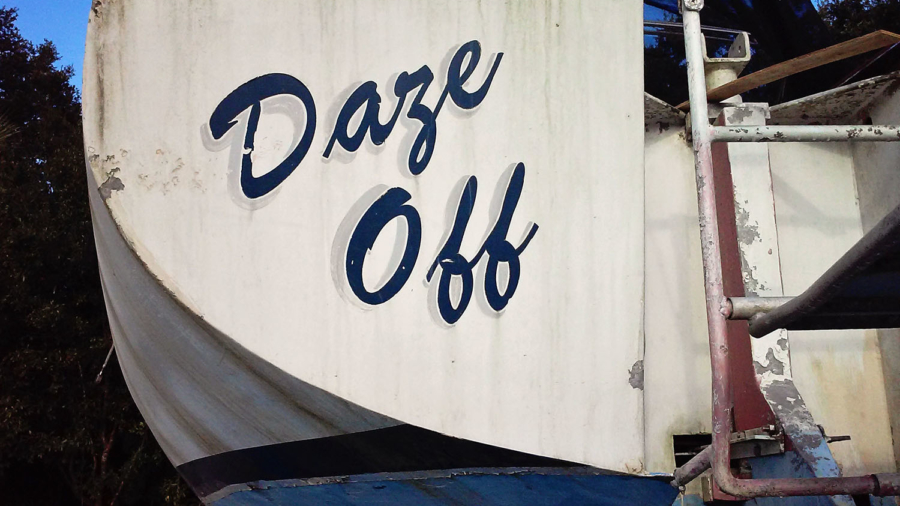
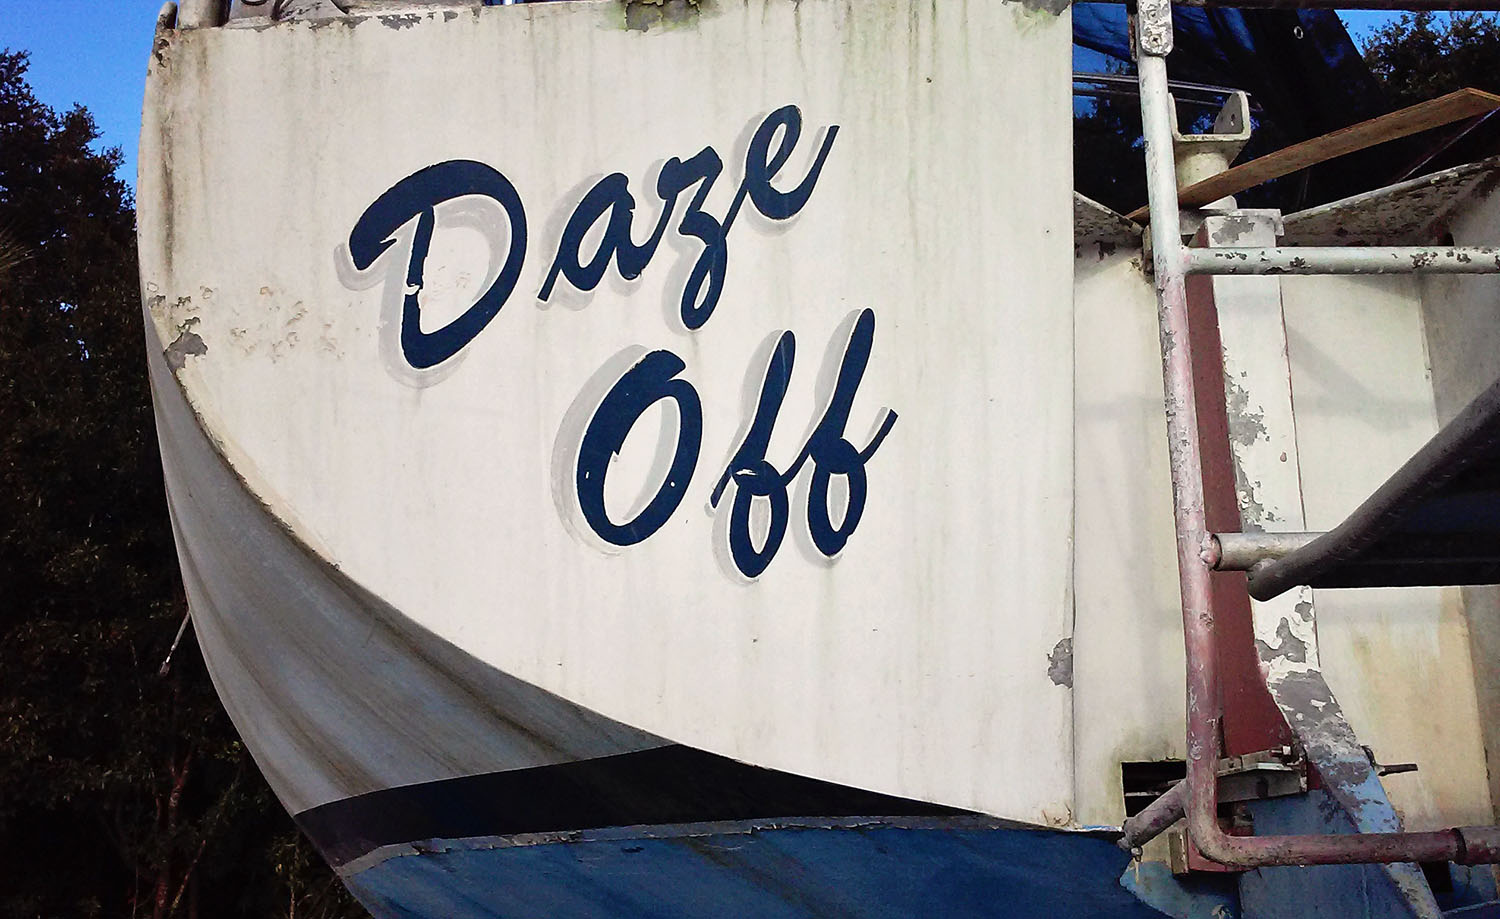
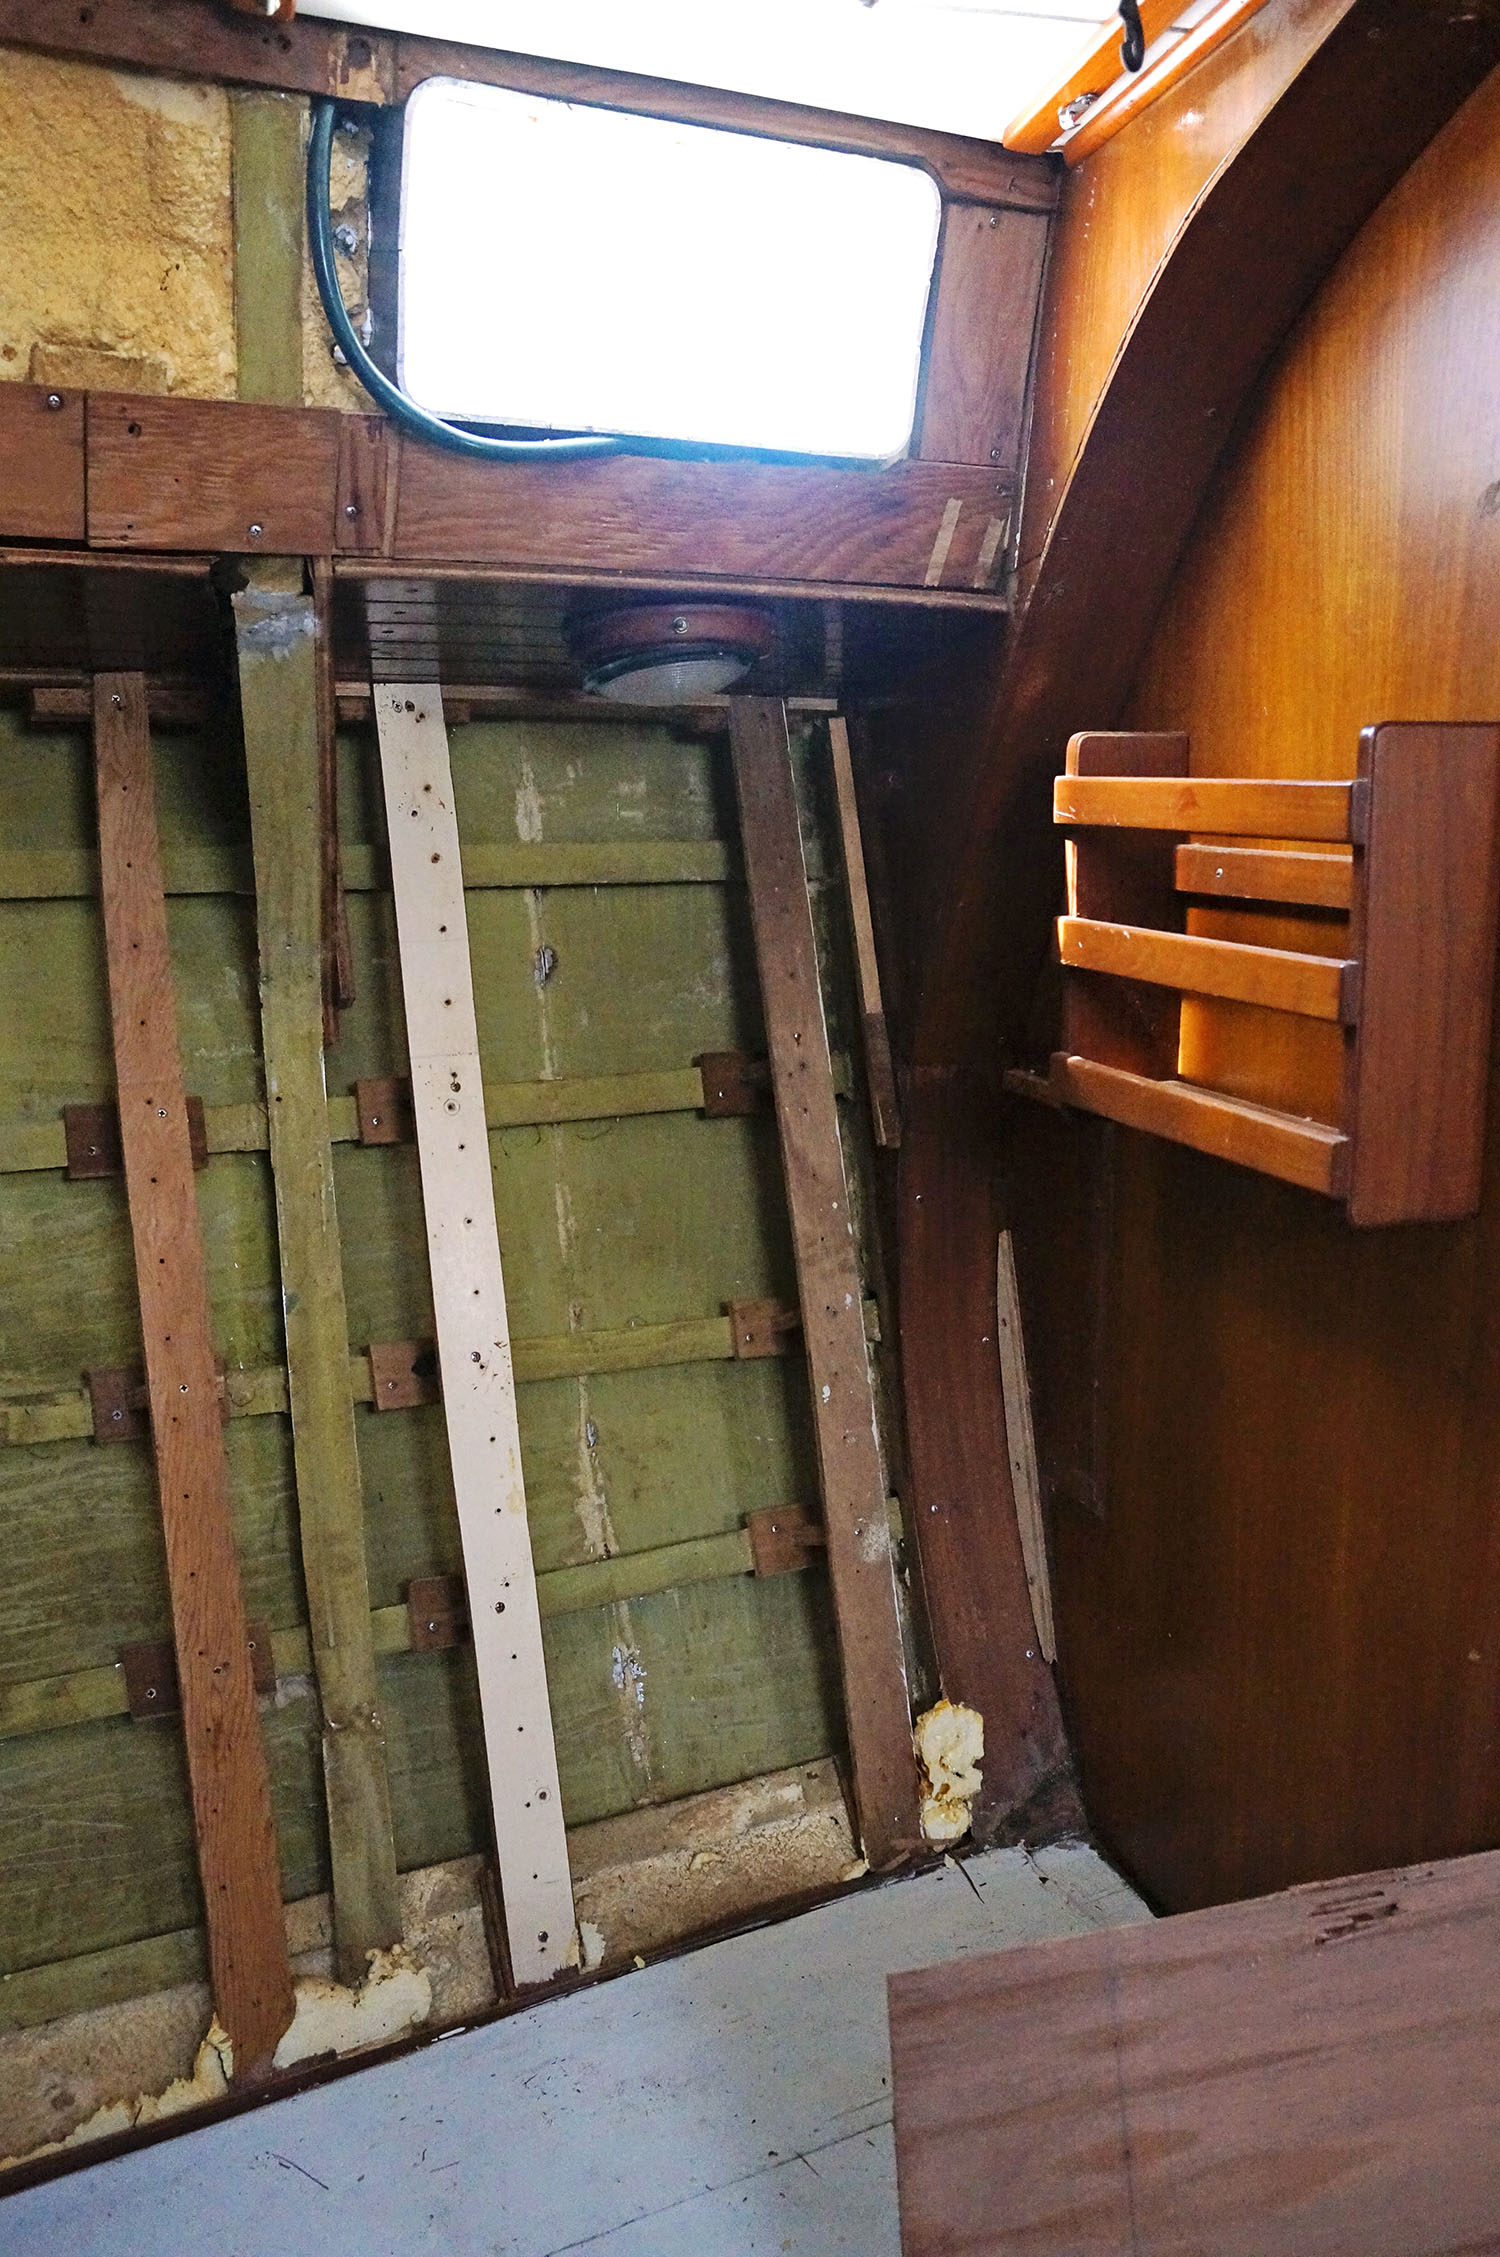
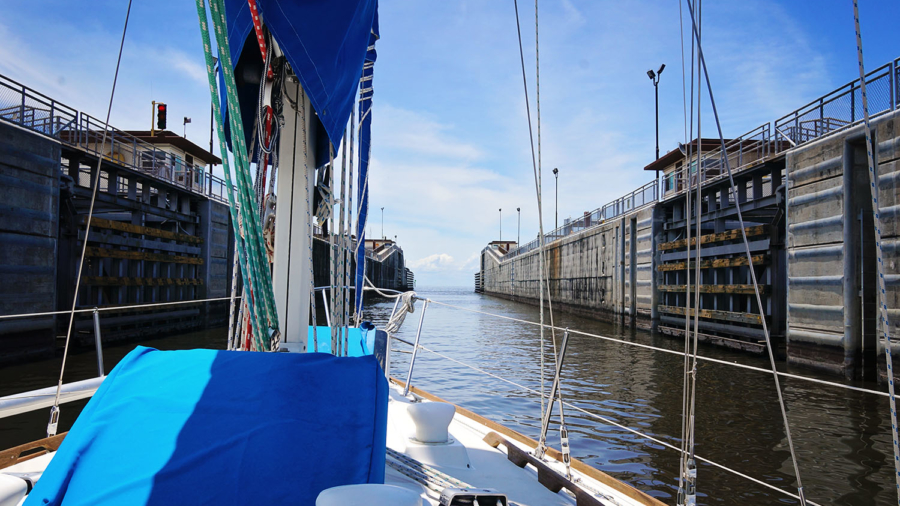
Monday July 20, 2015

settee face

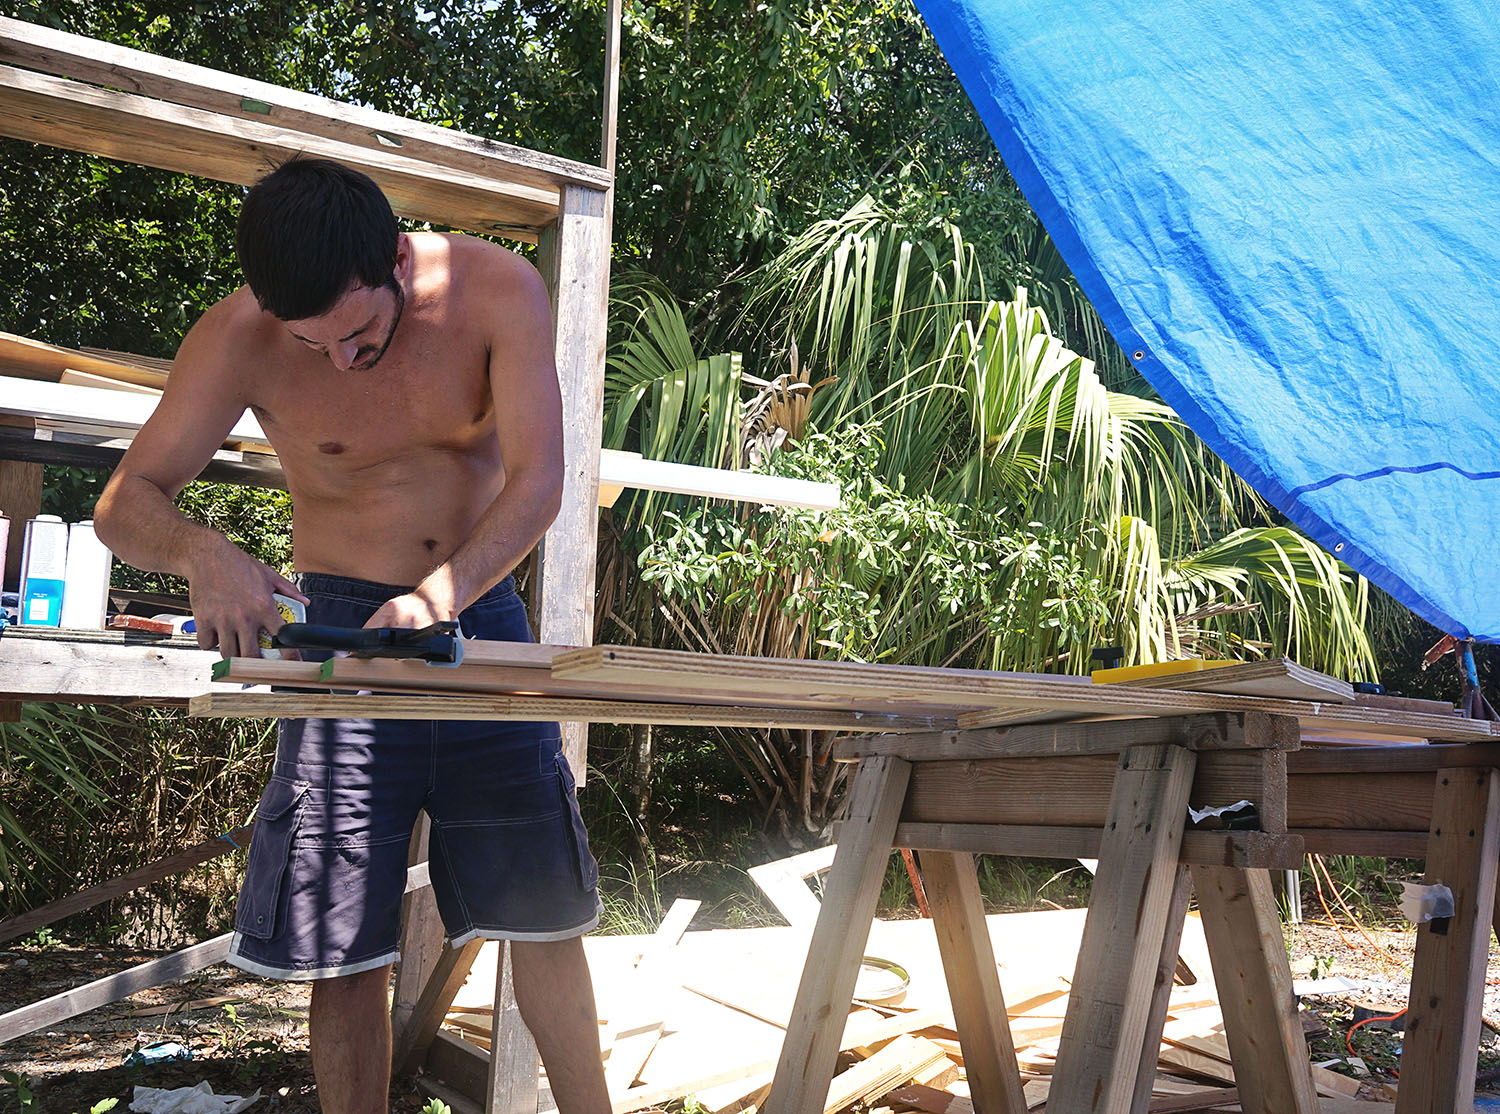
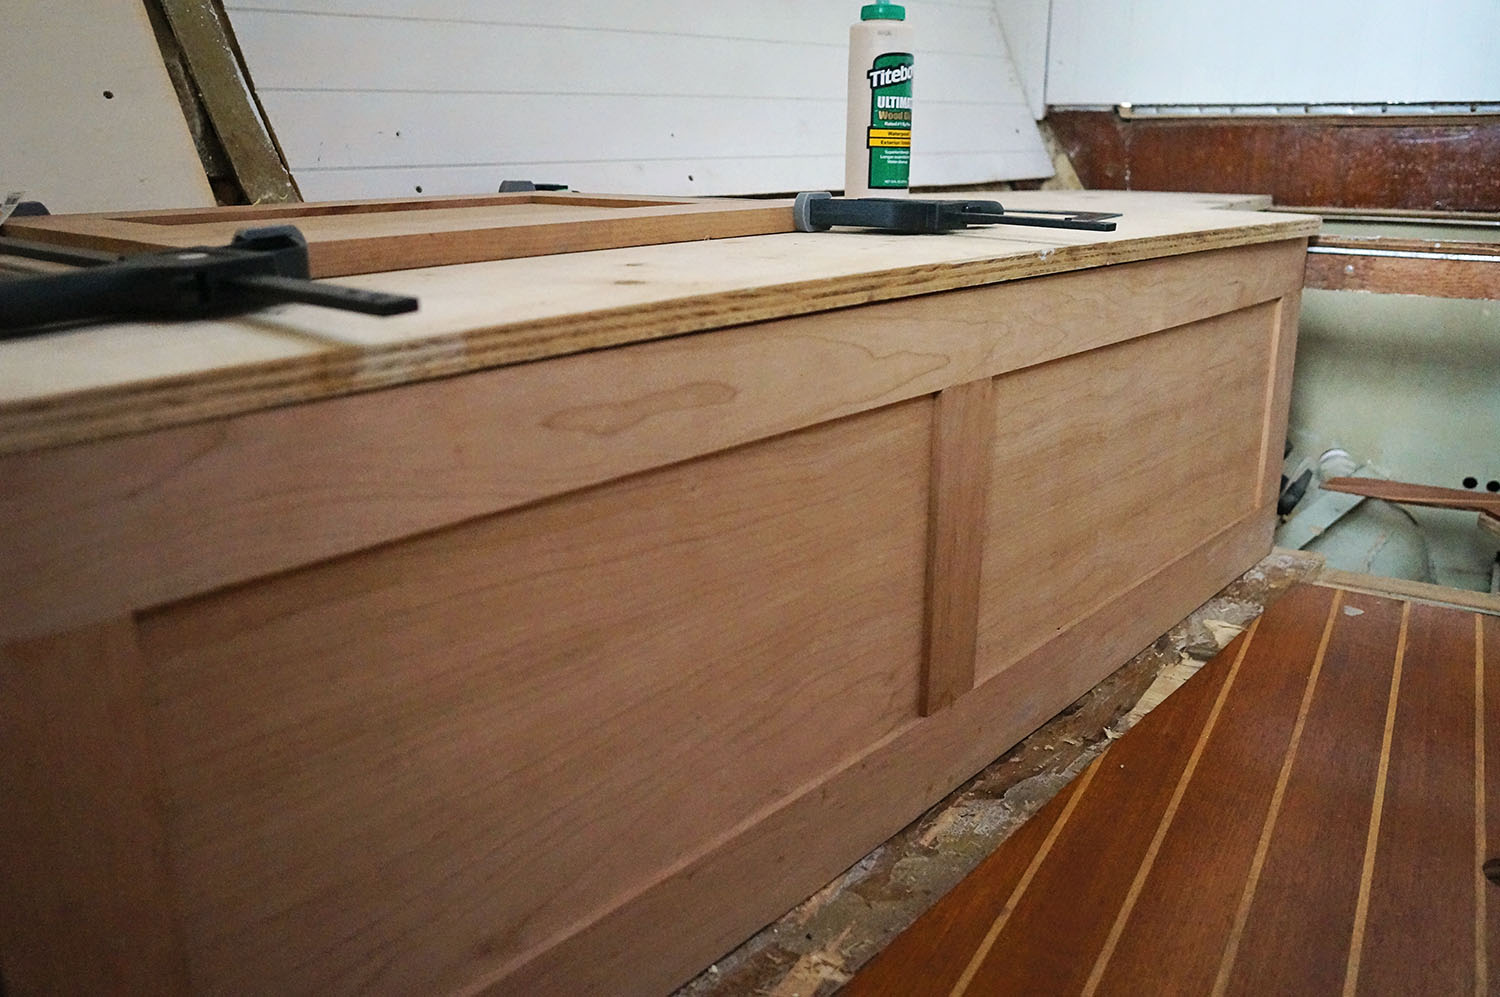
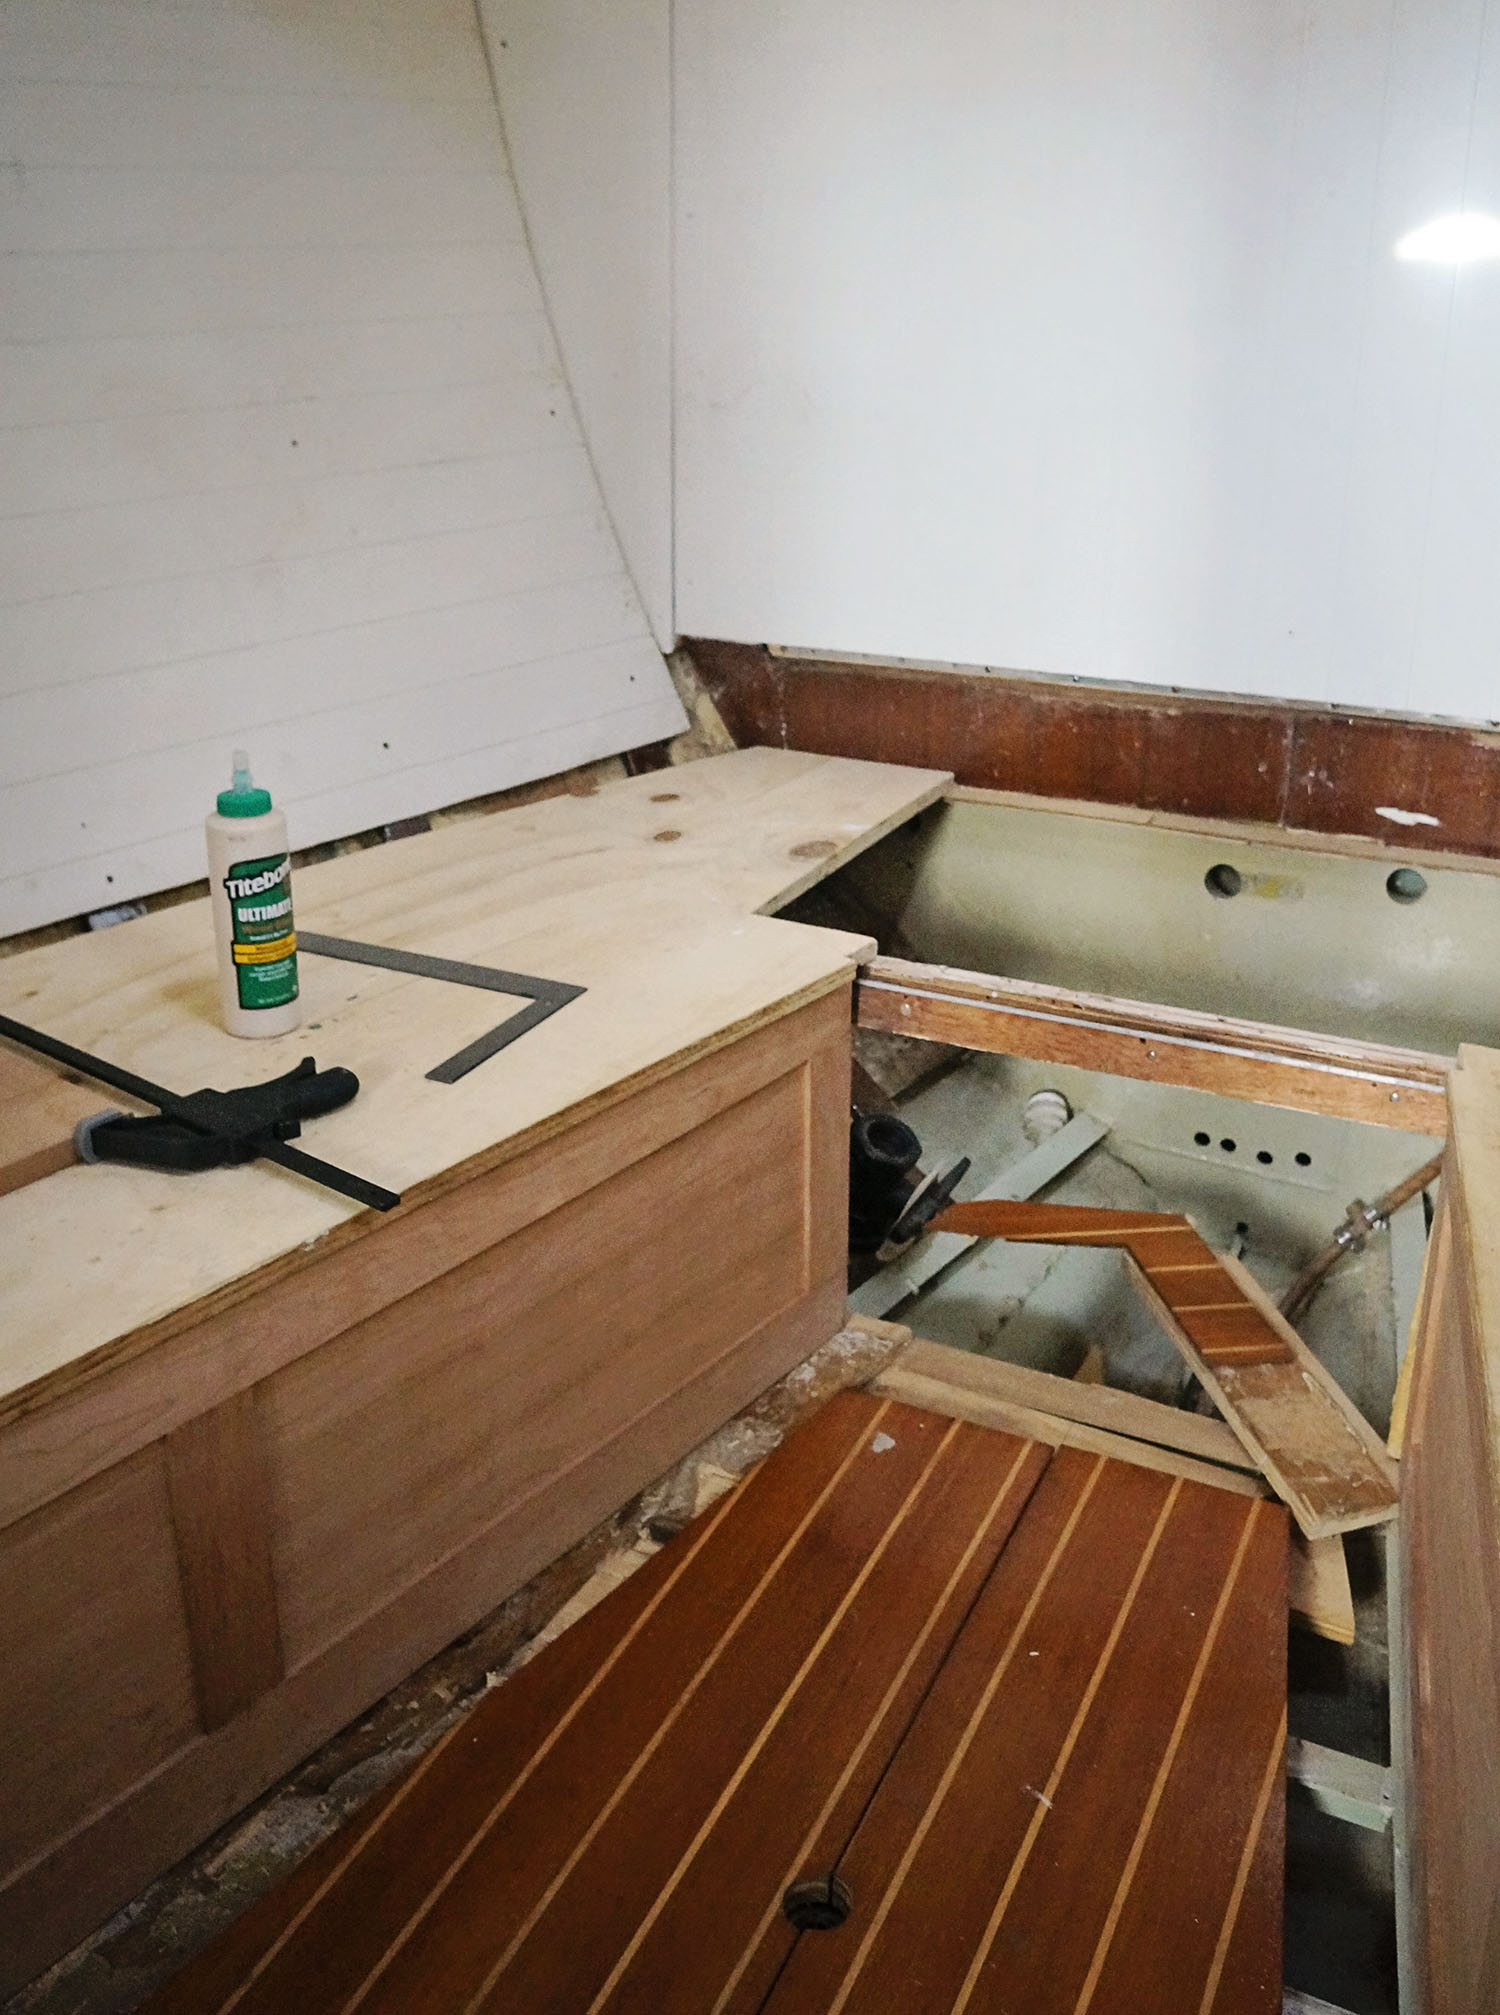
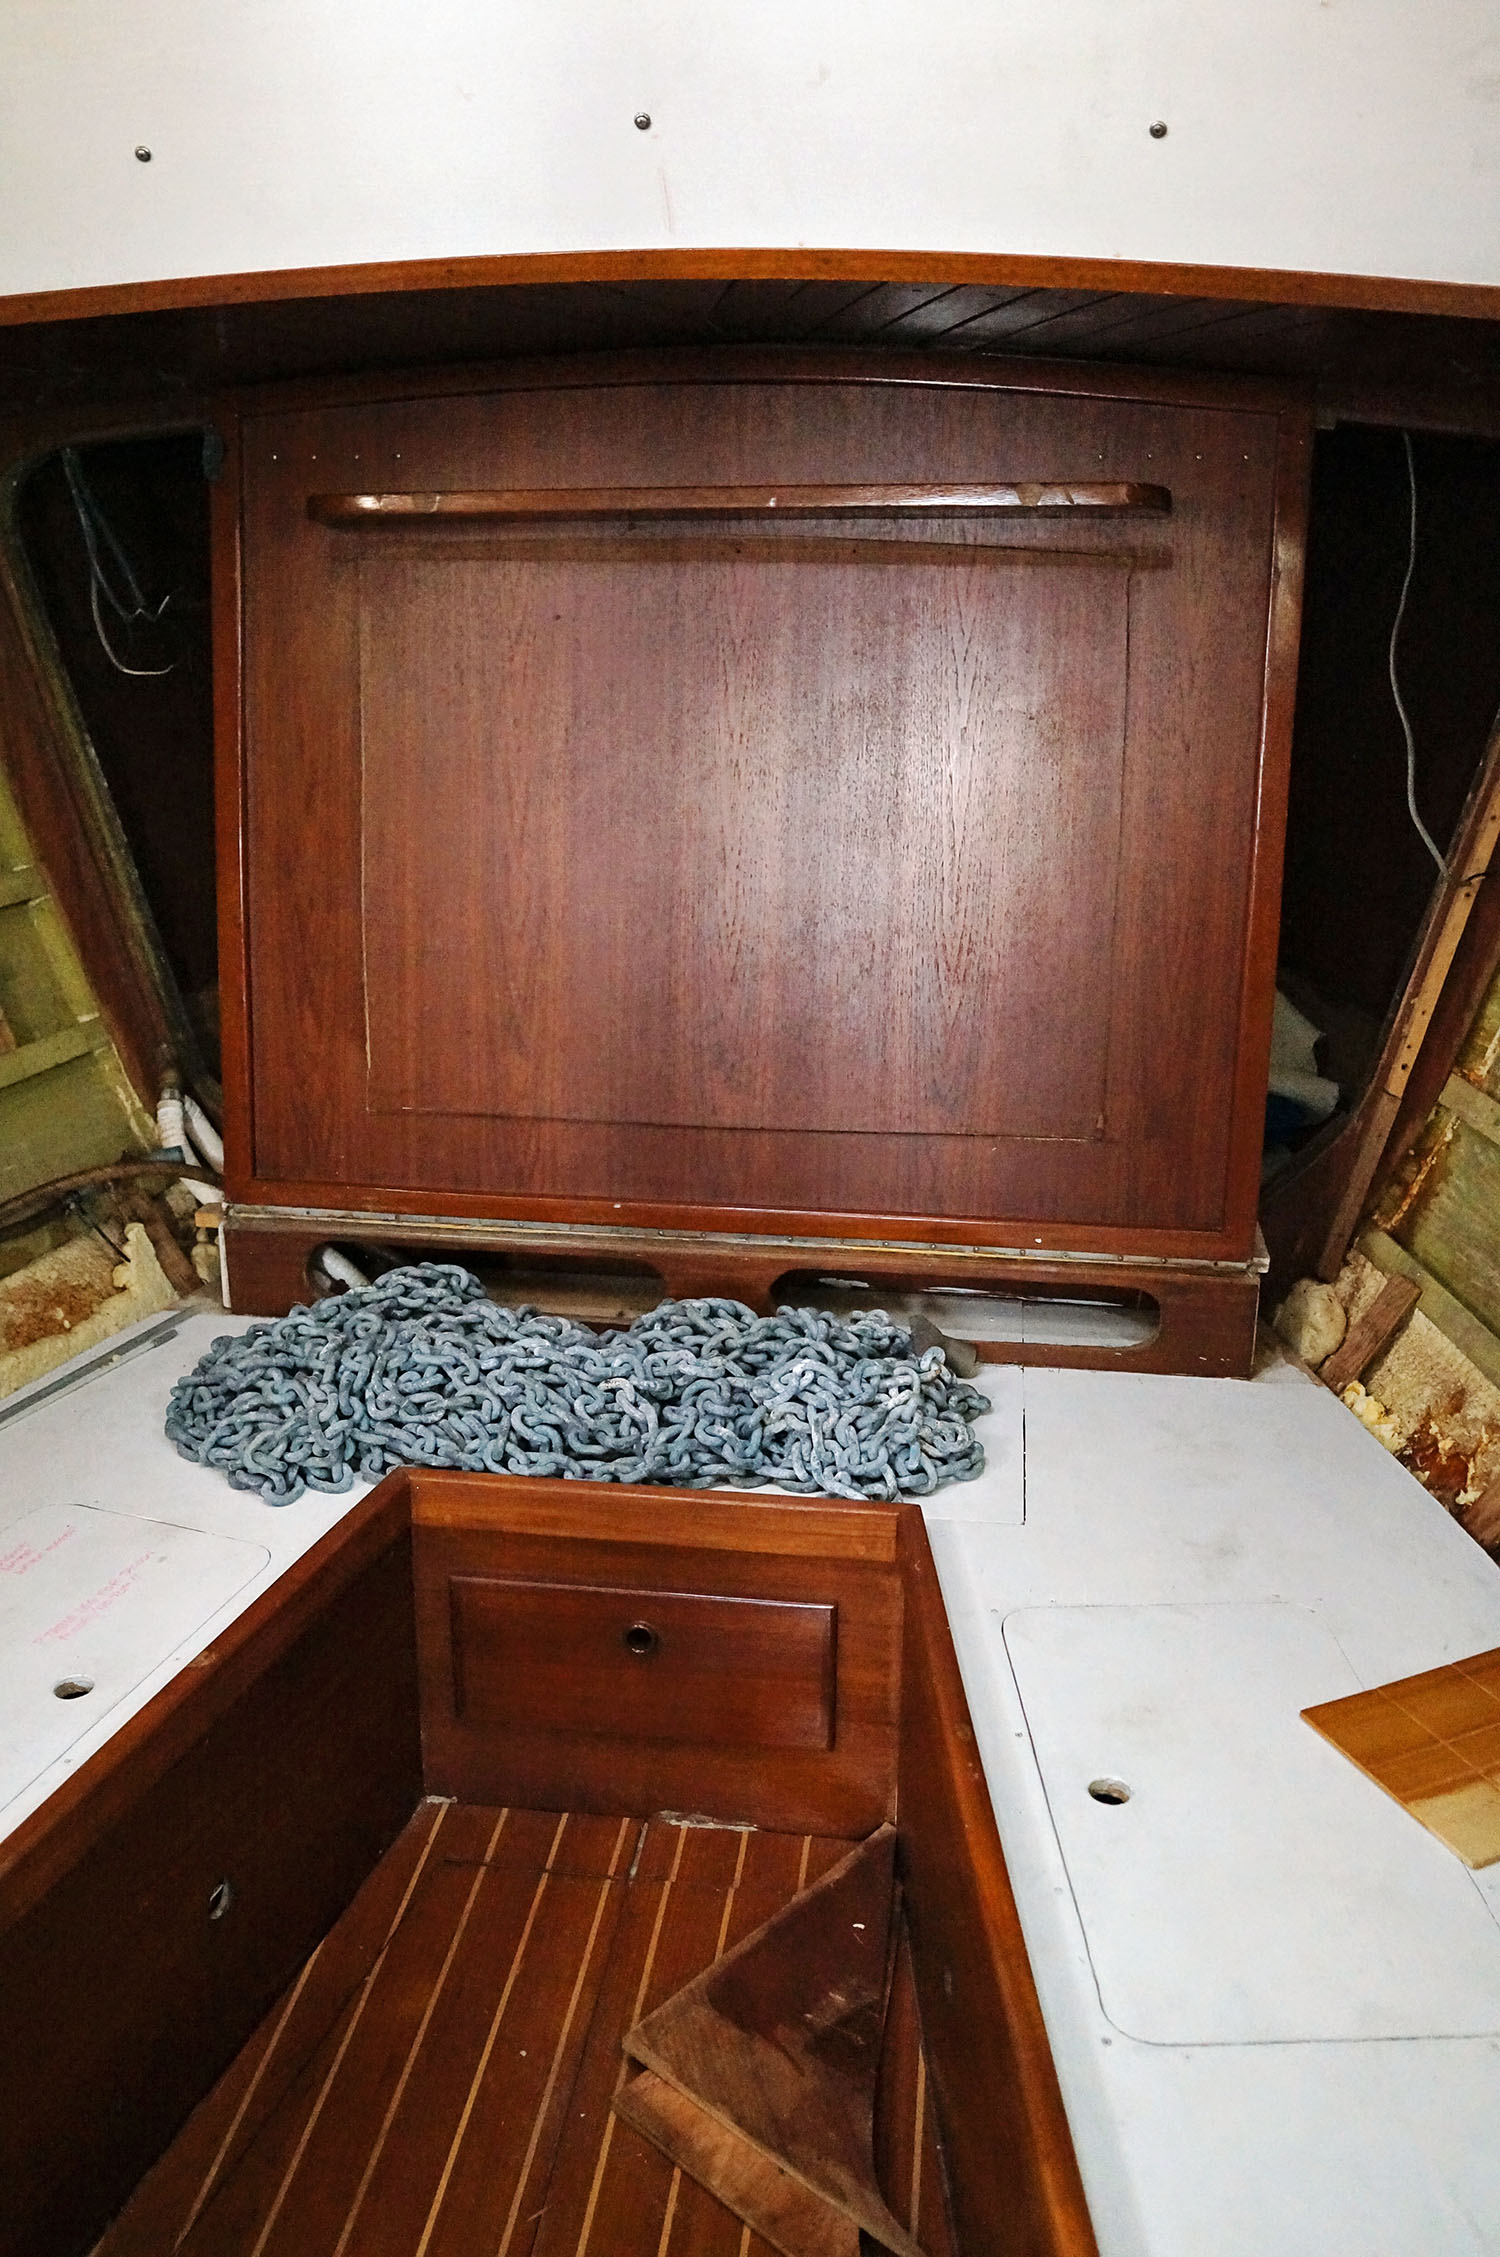
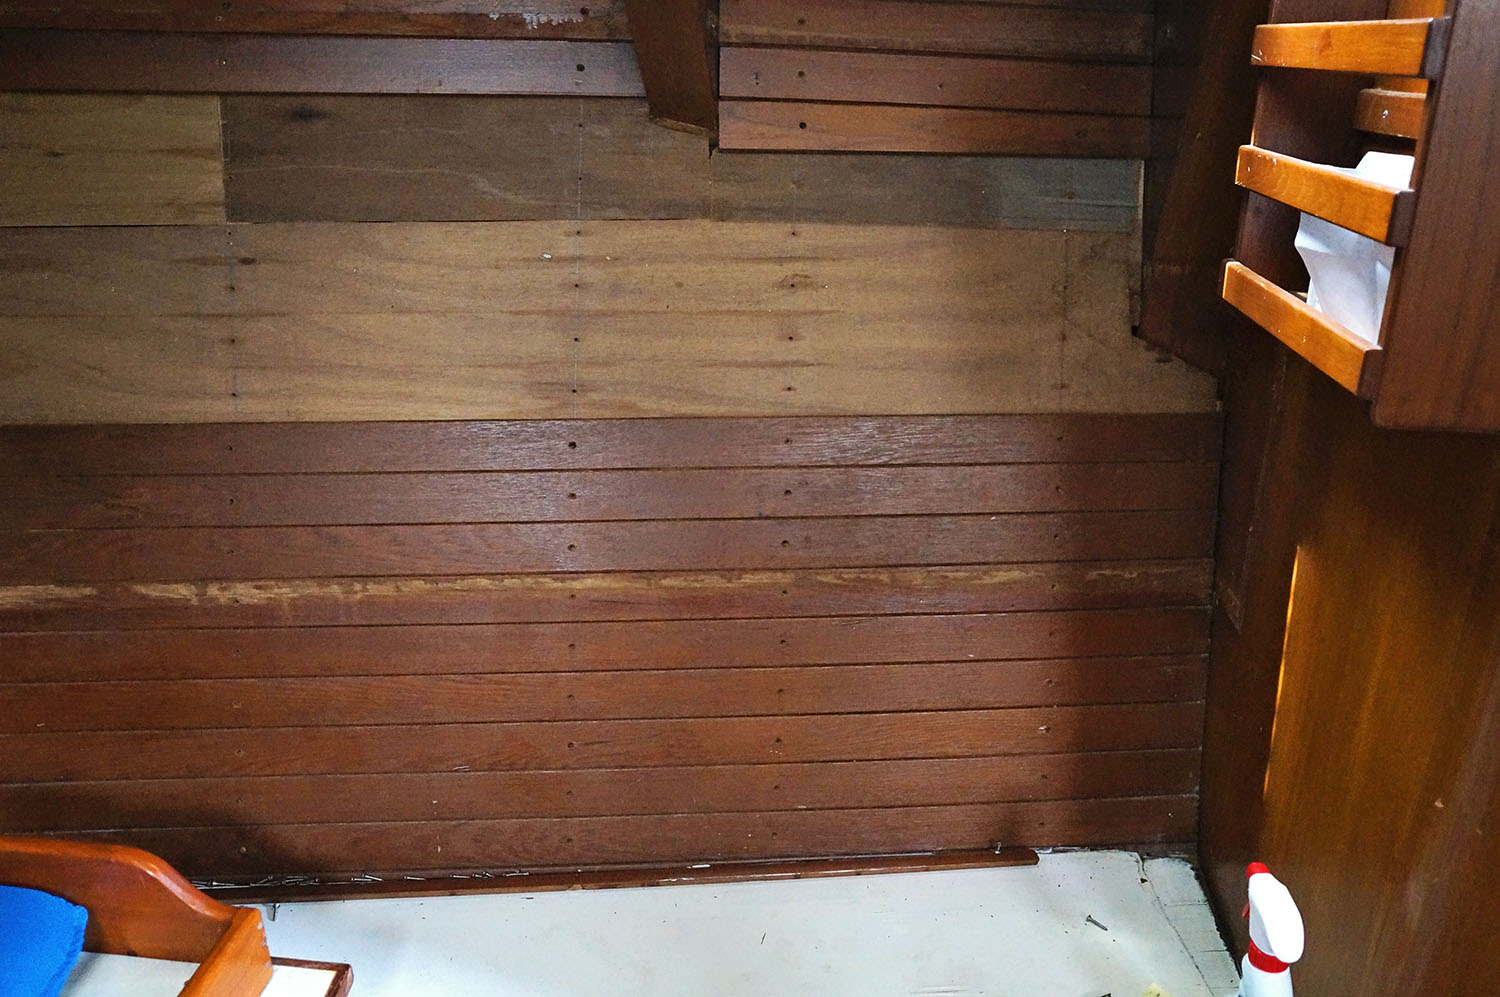
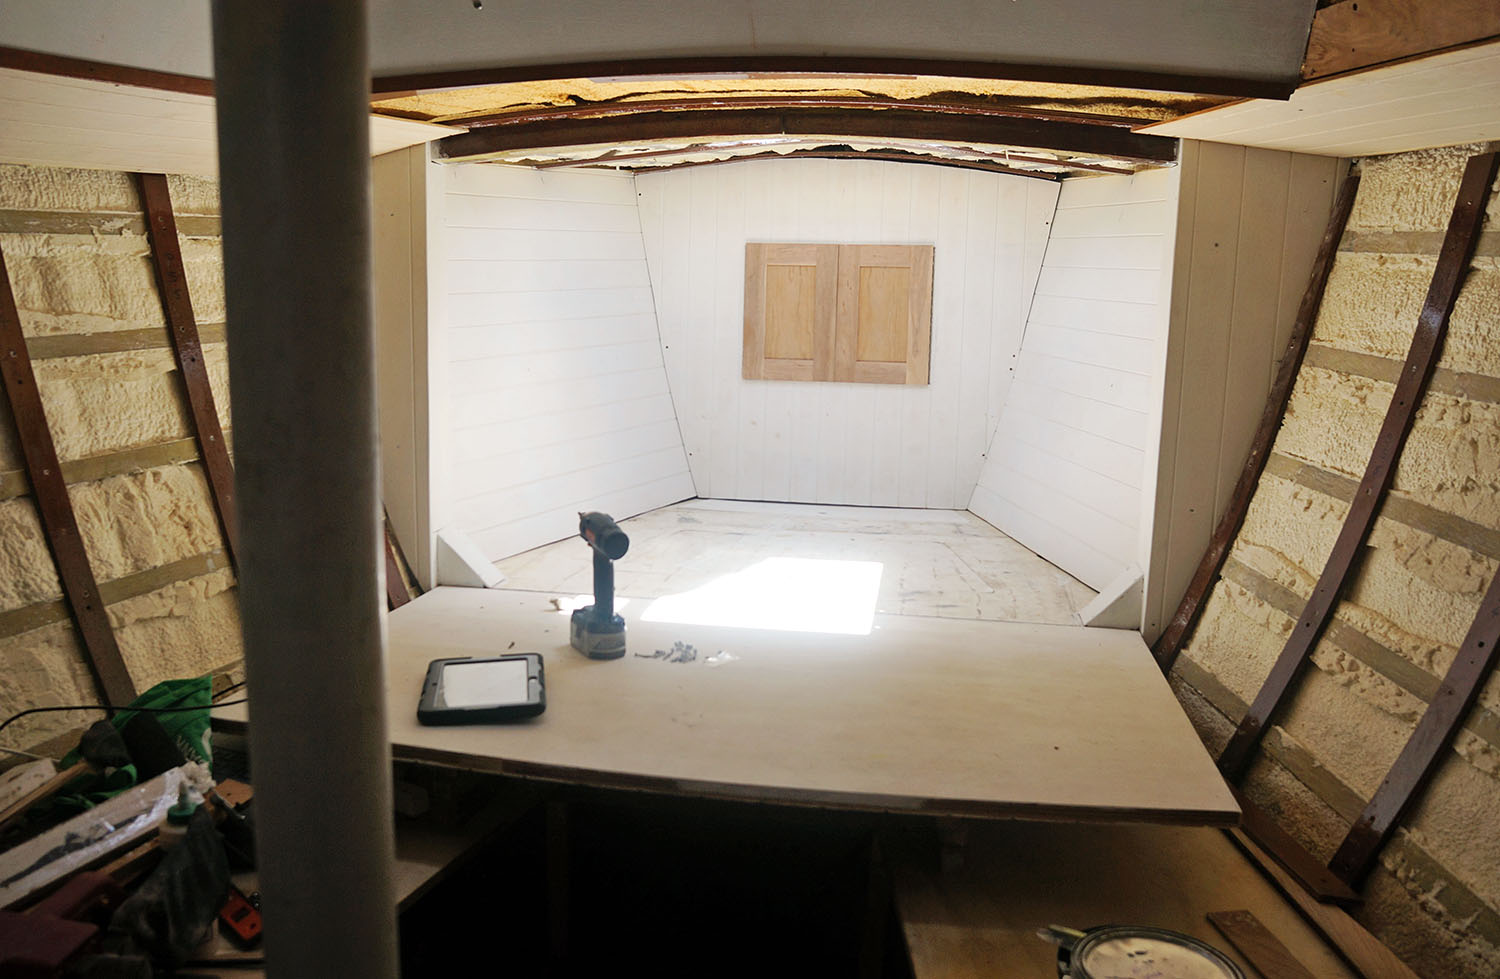
The intricate construction I was mentioning in the last post?  Unfortunately does not just apply to the routed plywood we are using for the ceiling and overhead.  We have decided to make things very complicated for ourselves in the way we are going to assemble all of our cherry doors, cabinets, and pretty much everything made from cherry.  To make them look really nice and add a fine detail, instead of using just plain pieces of cherry plywood we are now using cherry boards to frame an inset of cherry plywood.  I’ll give you a quick example of the cabinet doors in the v-berth before I confuse you further.

(*Let it be known now that I will probably do a terrible job explaining this process.  If you’re looking for actual know-how, visit this page for someone who made cabinet doors for a home using this style of woodworking.)

cherry doors in v-berth

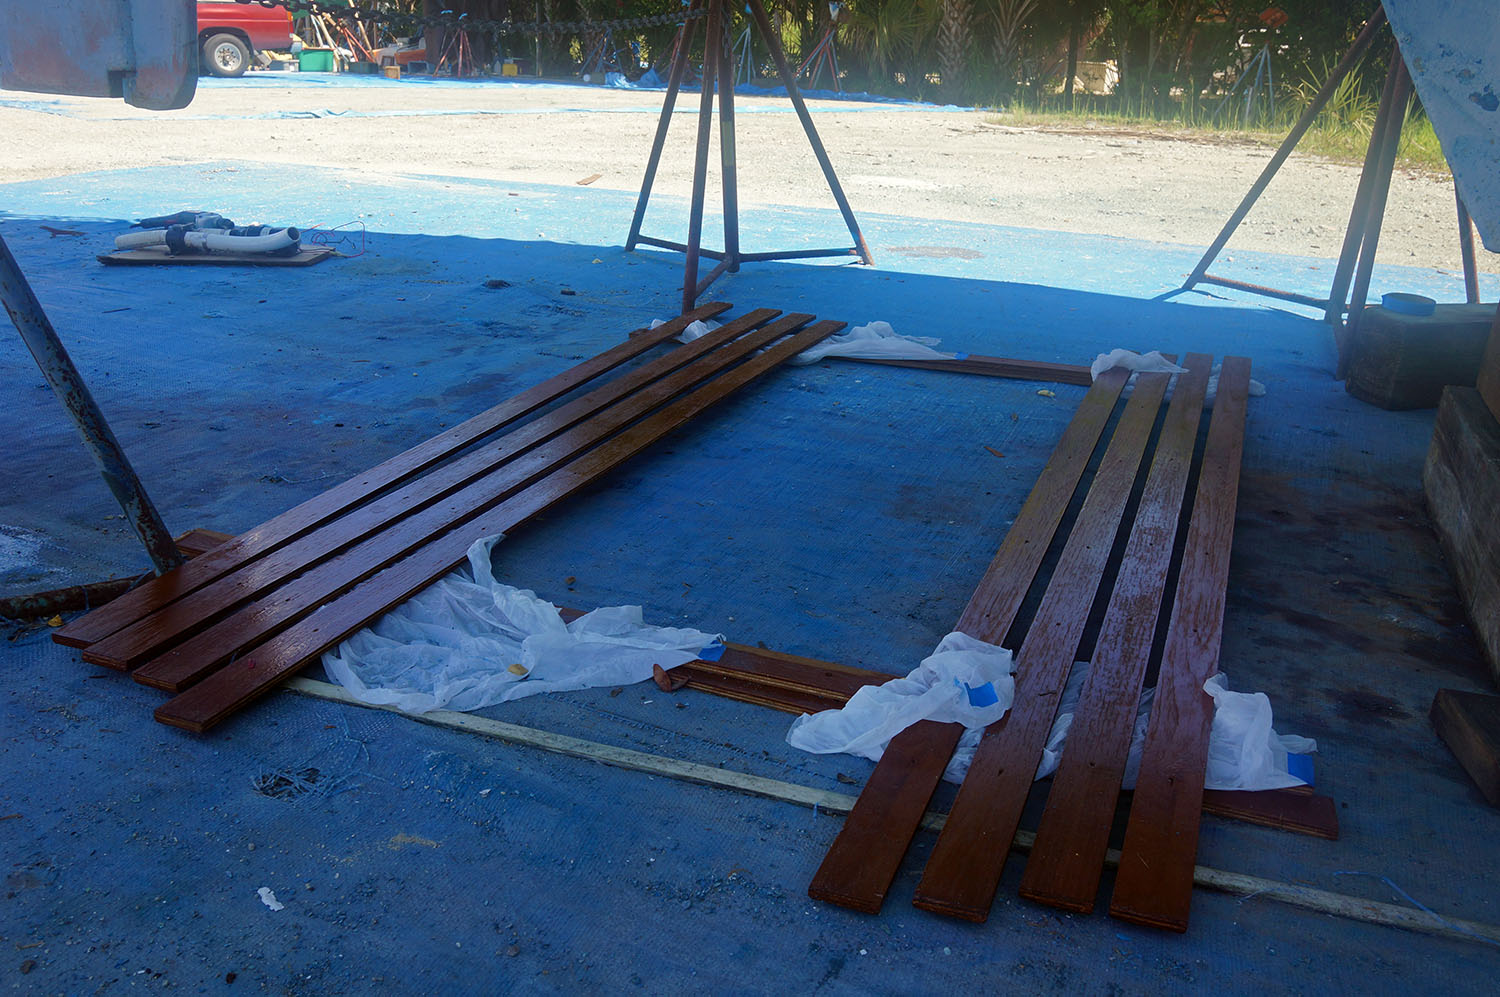
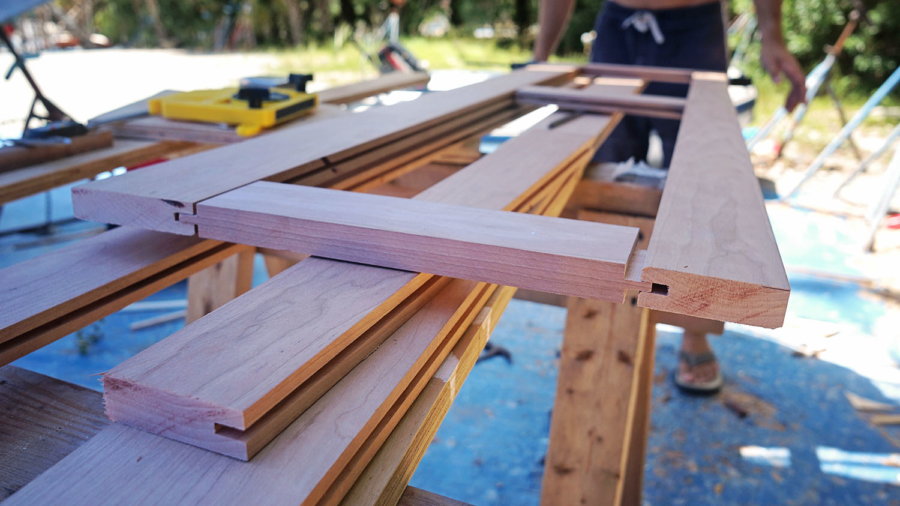
For anyone curious to know the details or specs, for the frame we used cherry 4/4 lumber that we milled down to S4S 1″x3″s and 1″x4″s, and used 1/4″ cherry plywood for the inserts.

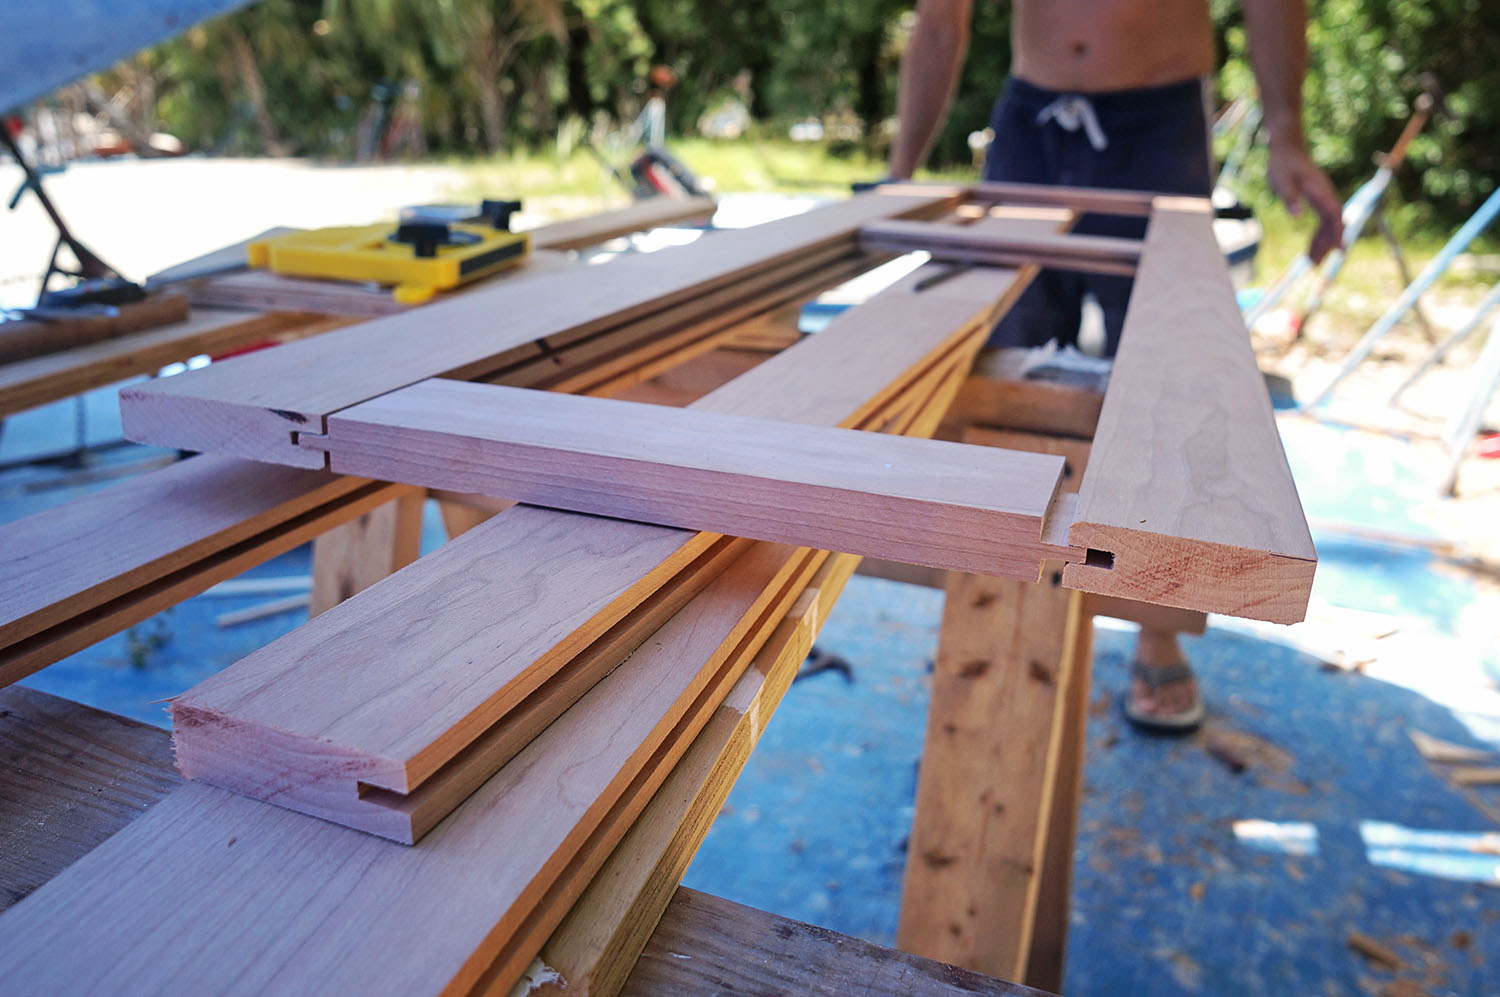
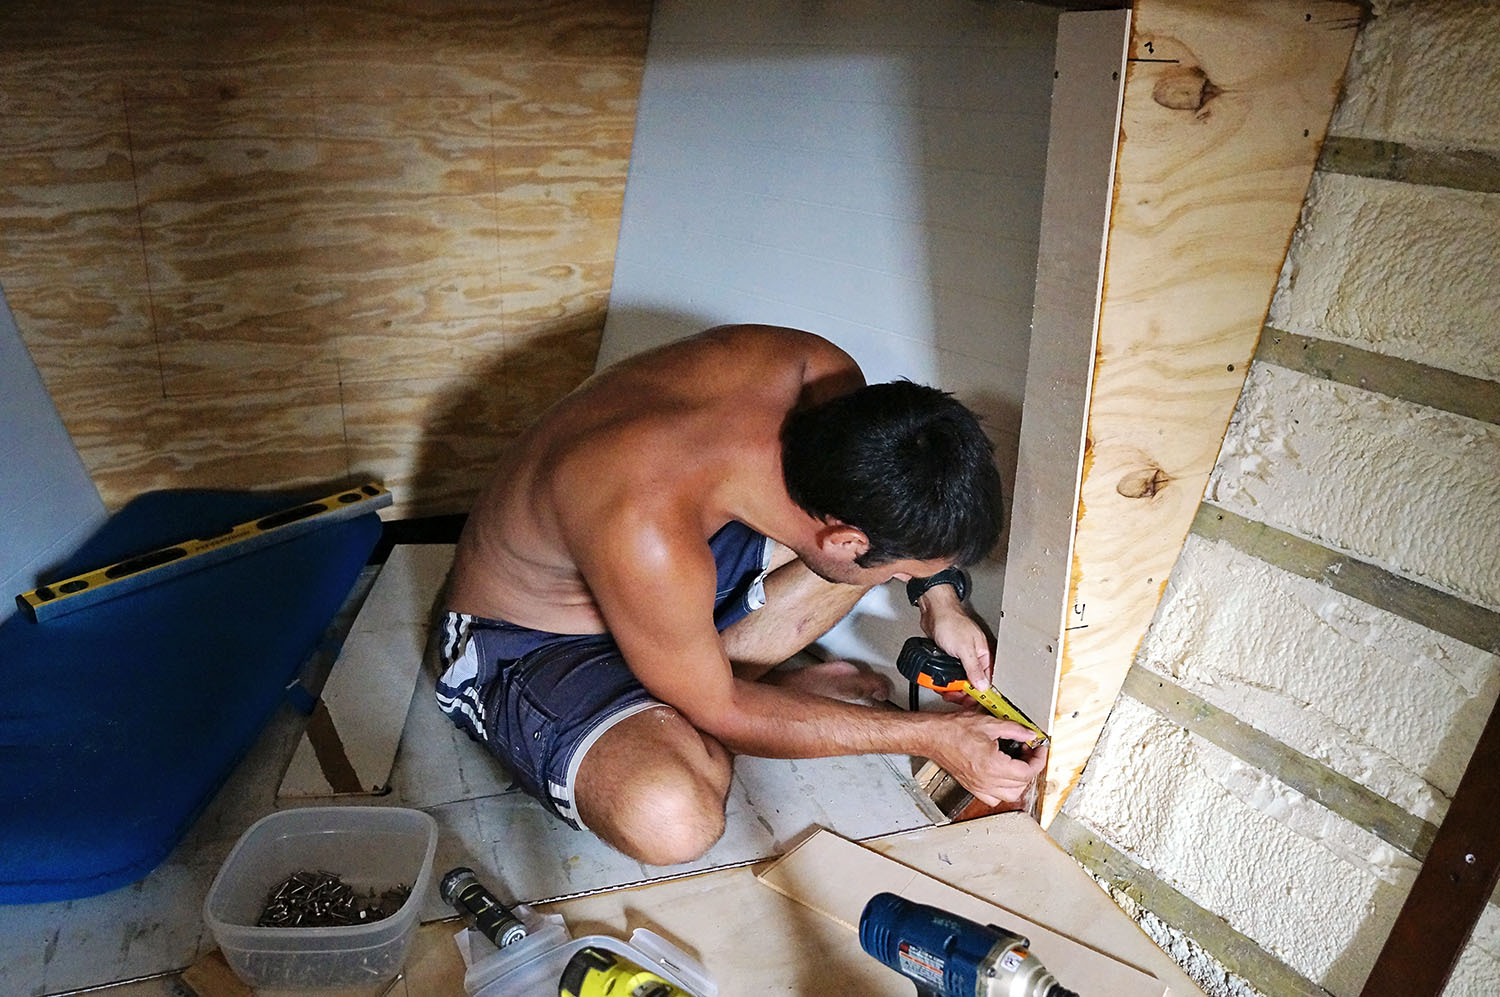
To get the boards of the frame to fit together we did it in a tongue and groove style so there are no nails or screws holding any of it together.  Now that we’ve done this process a few times it’s begun to get a little easier, but there were about two solid days of trials on pine 1″x3″ boards, using our table saw to slice 1/4″ grooves right down the center for us to be able to slide the plywood in. The grooves only extended 1/2″ into the boards, so a lot of practice was getting the proper blade height and the distance between the blade and the fence to make sure the grooves ended up in the middle of the board.  Once that part was down we had to spend even more time practicing the perfect cut for the tongue on the end to be able to piece the frame together.

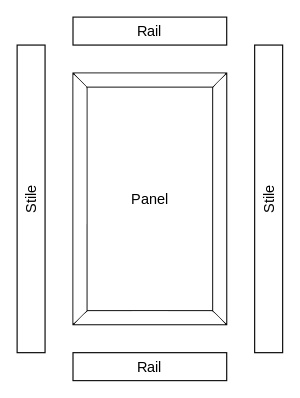
Again, I’m probably getting ahead of myself and should explain the full process better.  Getting into technical terms, the frames are made out of what are called rails and stiles.  Rails run horizontally across the top and bottom, and stiles are anything that run vertically.

rail & stile

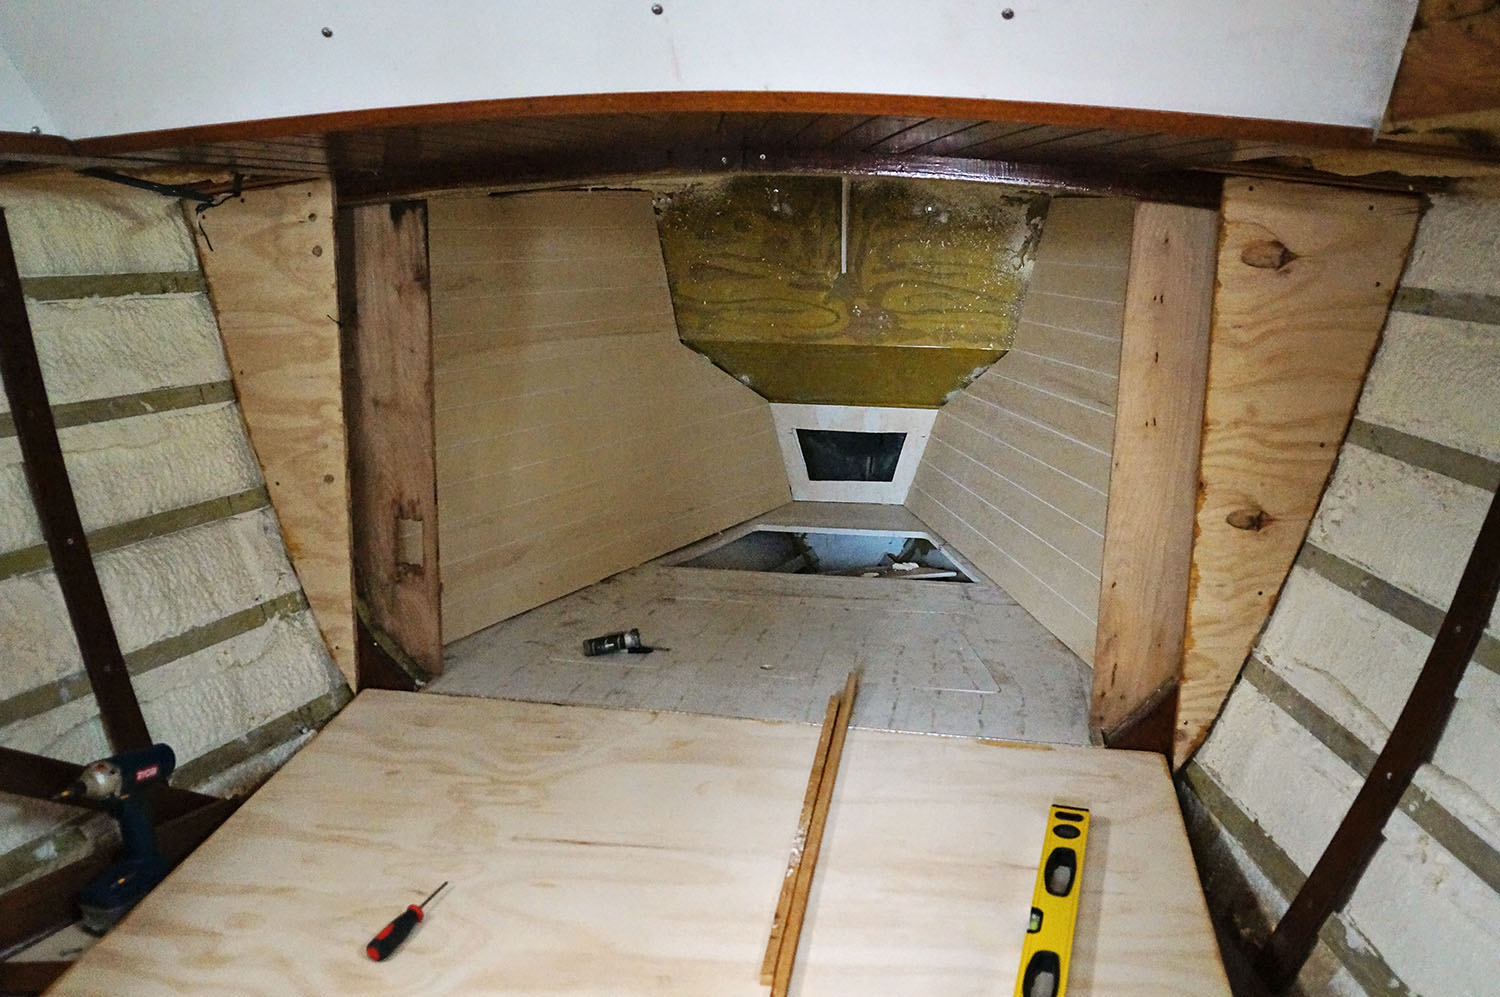
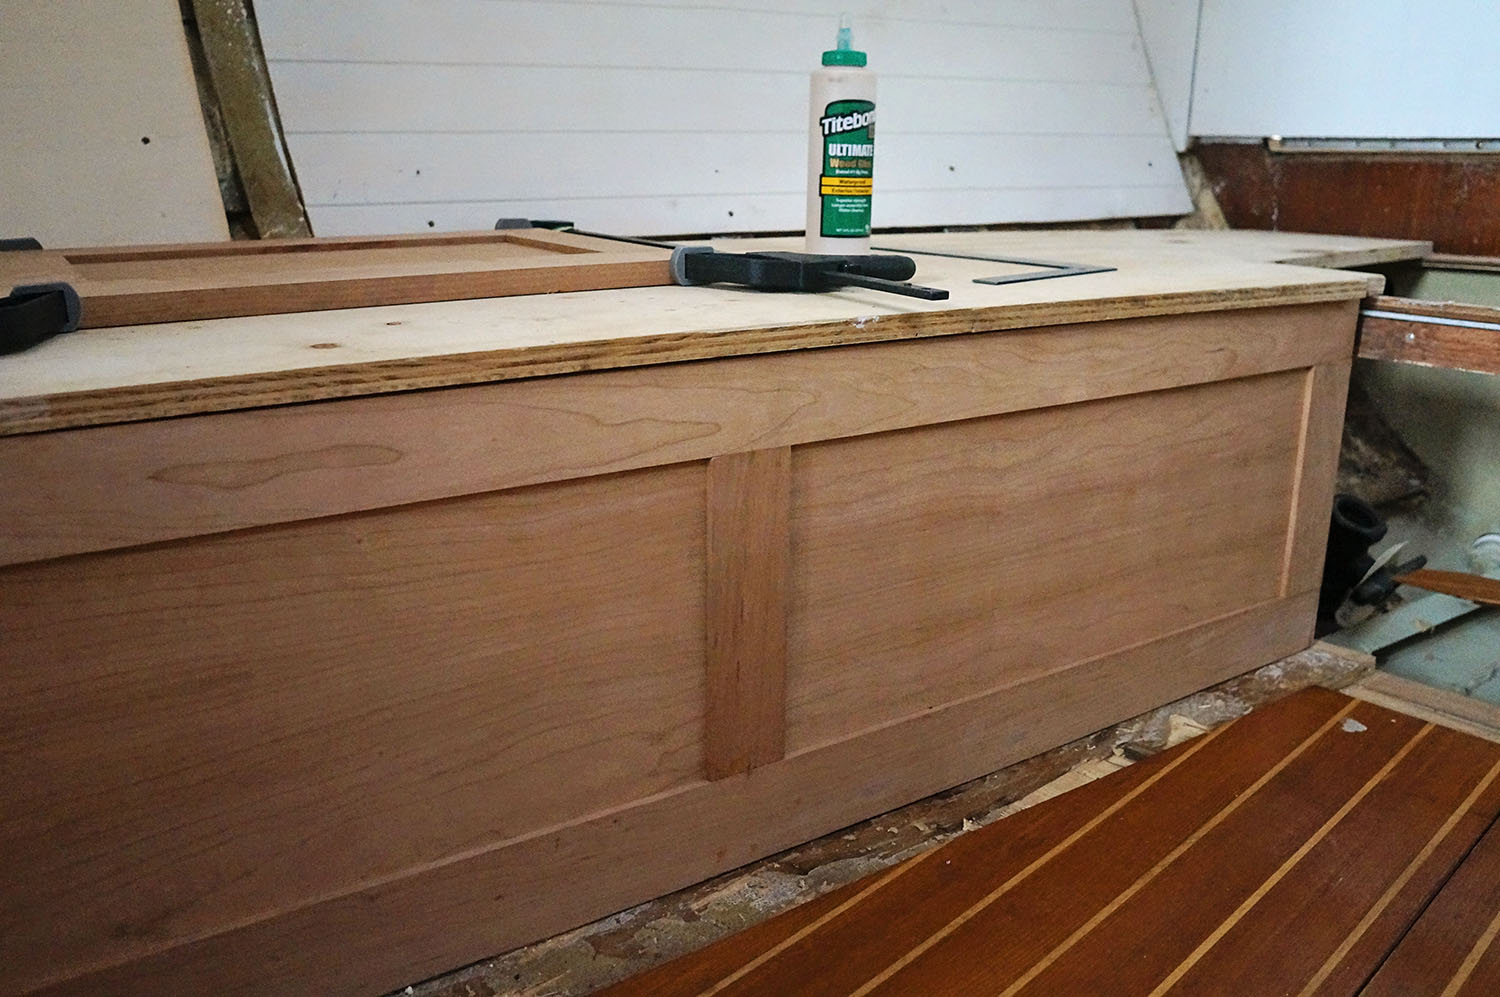
After the cabinet doors in the v-berth our next project was to make the face of the settees in the forward salon.  The plan was to use a 1″x3″ rail on the top and a 1″x4″ rail on the bottom, as well as 3 stiles, one for each end and one for the center.  The rails were the easiest part as they only needed one groove.

Using our calipers to measure the blade height of the table saw and getting a few more practice runs in with our pine, we brought the cherry boards over to cut the groove in them, sending them across the table saw twice, rotating the board after each run, front to back, to get our desired width of 1/4″.  Then they were set aside until later when they’d need to be cut to their proper length.

The stiles required this step as well, placing a groove down the center, each end piece only received a groove on the inside, and the center piece receiving grooves on both sides. To be able to fit the stiles into the rails we also had to give them a tongue, with a length of 1/2″ and a width of 1/4″. To do this on the table saw we first cut the stiles to the proper length, adding an extra inch to account for the tongues on each side, and then raised the blade up just high enough so it would not cut through the entire piece of wood, but would only come up approximately 3/8″.  Measuring back 1/2″ from the end you make a swipe on the table saw and then keep moving the board further from the table saw, still making swipes until you’ve hit the end.  Flipping it over and doing the same to the other side you should be left with a small piece in the center that is now 1/4″ wide and 1/2″ long.

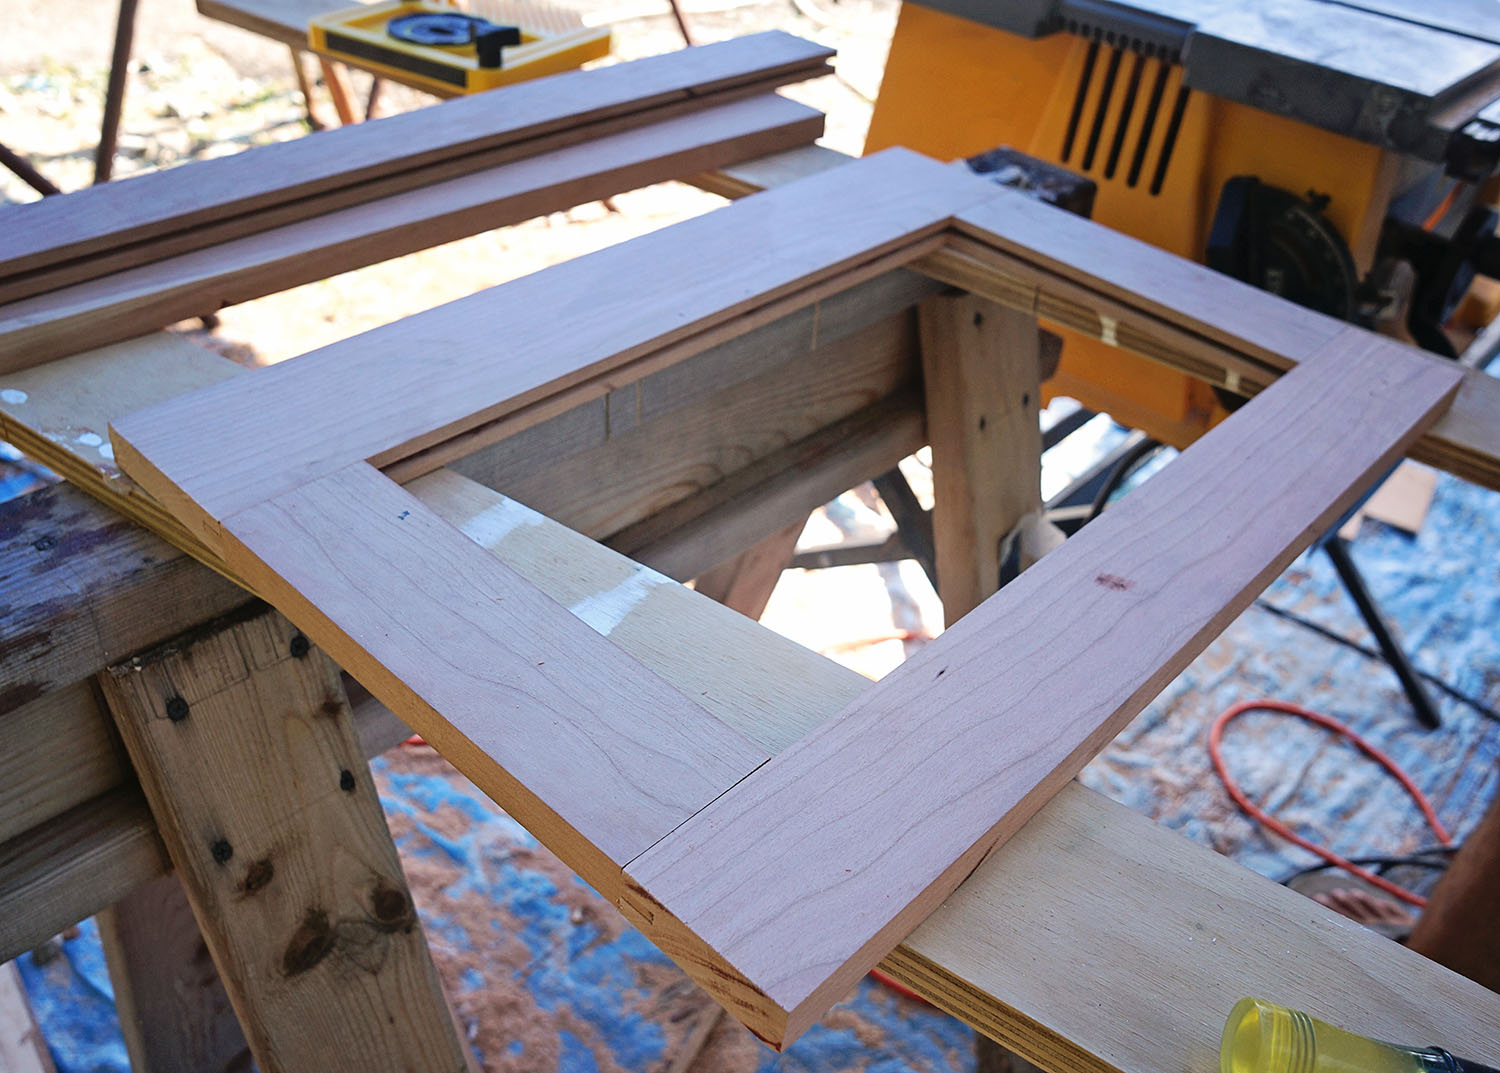
The next and easiest step is cutting the 1/4″ plywood insets.  Measuring the length and width of the open space in the frame, we needed to add an extra inch on each side to account for where the plywood would slide into the groove.  Something we almost forgot to do on more than one occasion.  Measuring the lengths we ran them through the table saw to get a straight cut and that was it.
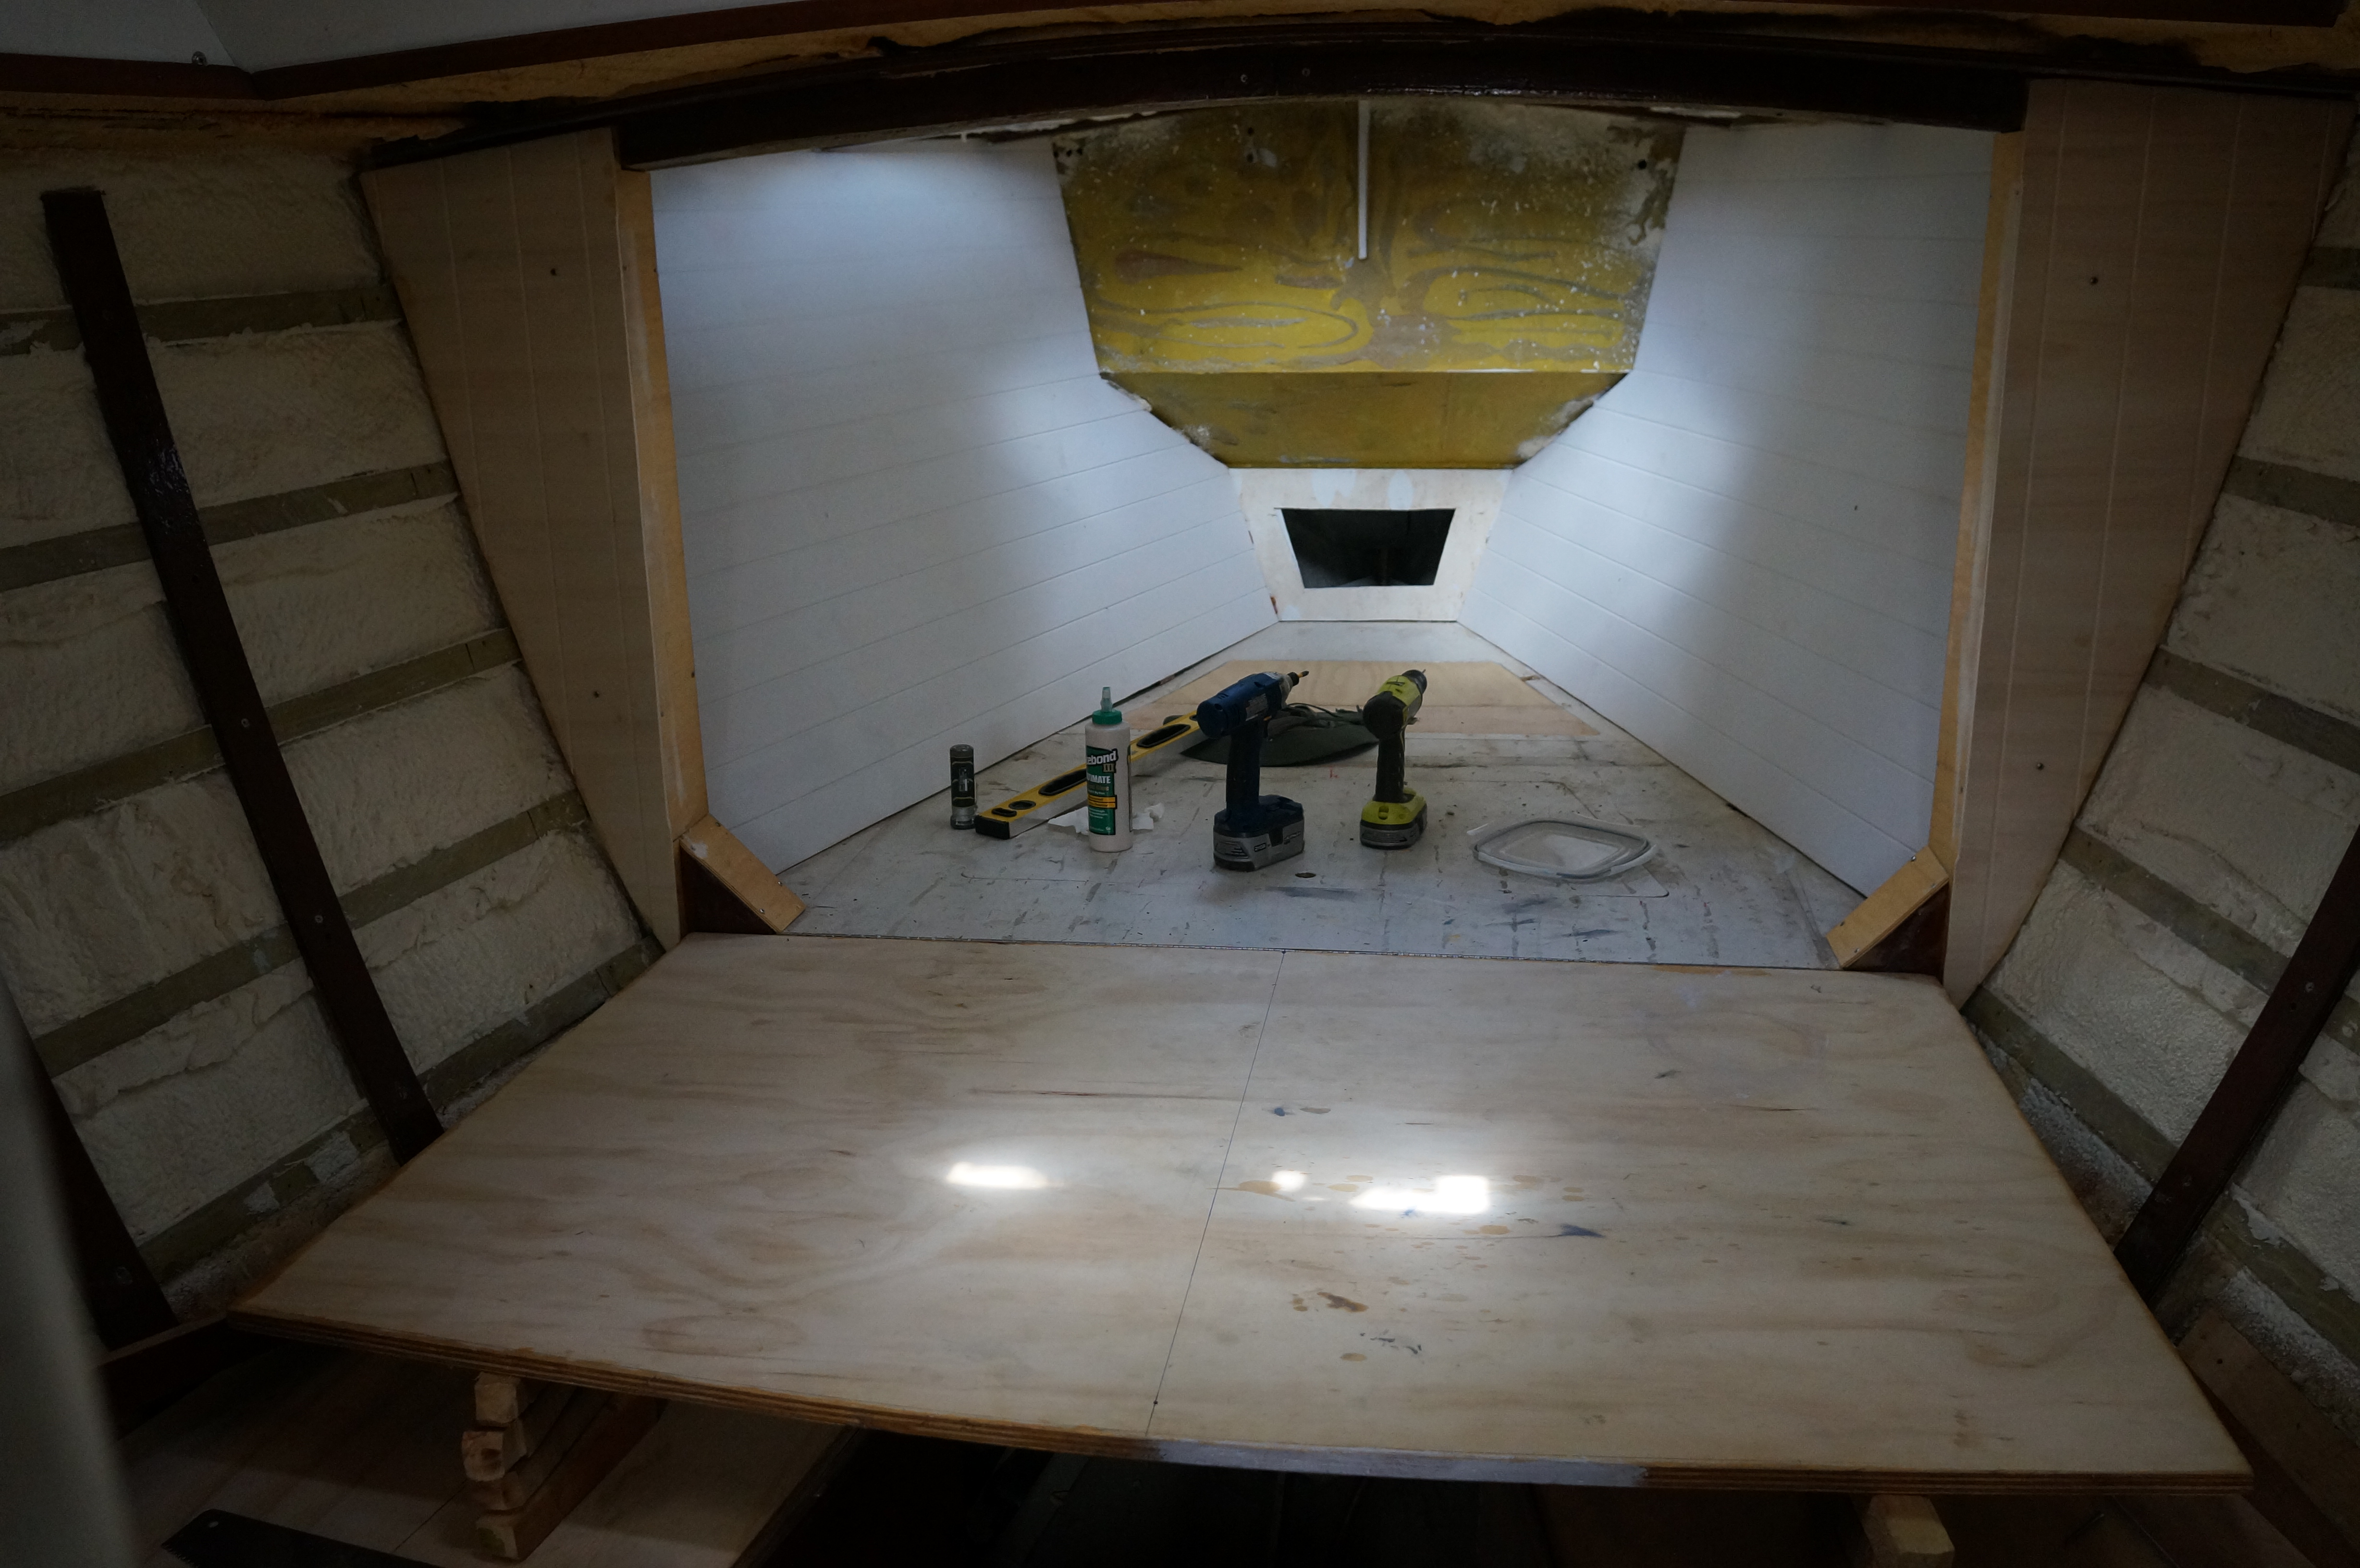
Then it’s time for the dry run!  Setting the bottom rail on a flat surface we slid the tongues of the stiles into the gooves of the rail and lined them up flush on the ends and centered the middle piece.  From there we slid in the plywood pieces and then placed the second rail on top where the groove encased both the tongues of the stiles and the extra 1/2″ of the plywood.  If anything wasn’t fitting properly we’d take it apart and make a few necessary cuts, usually just an 1/8″ here or there.

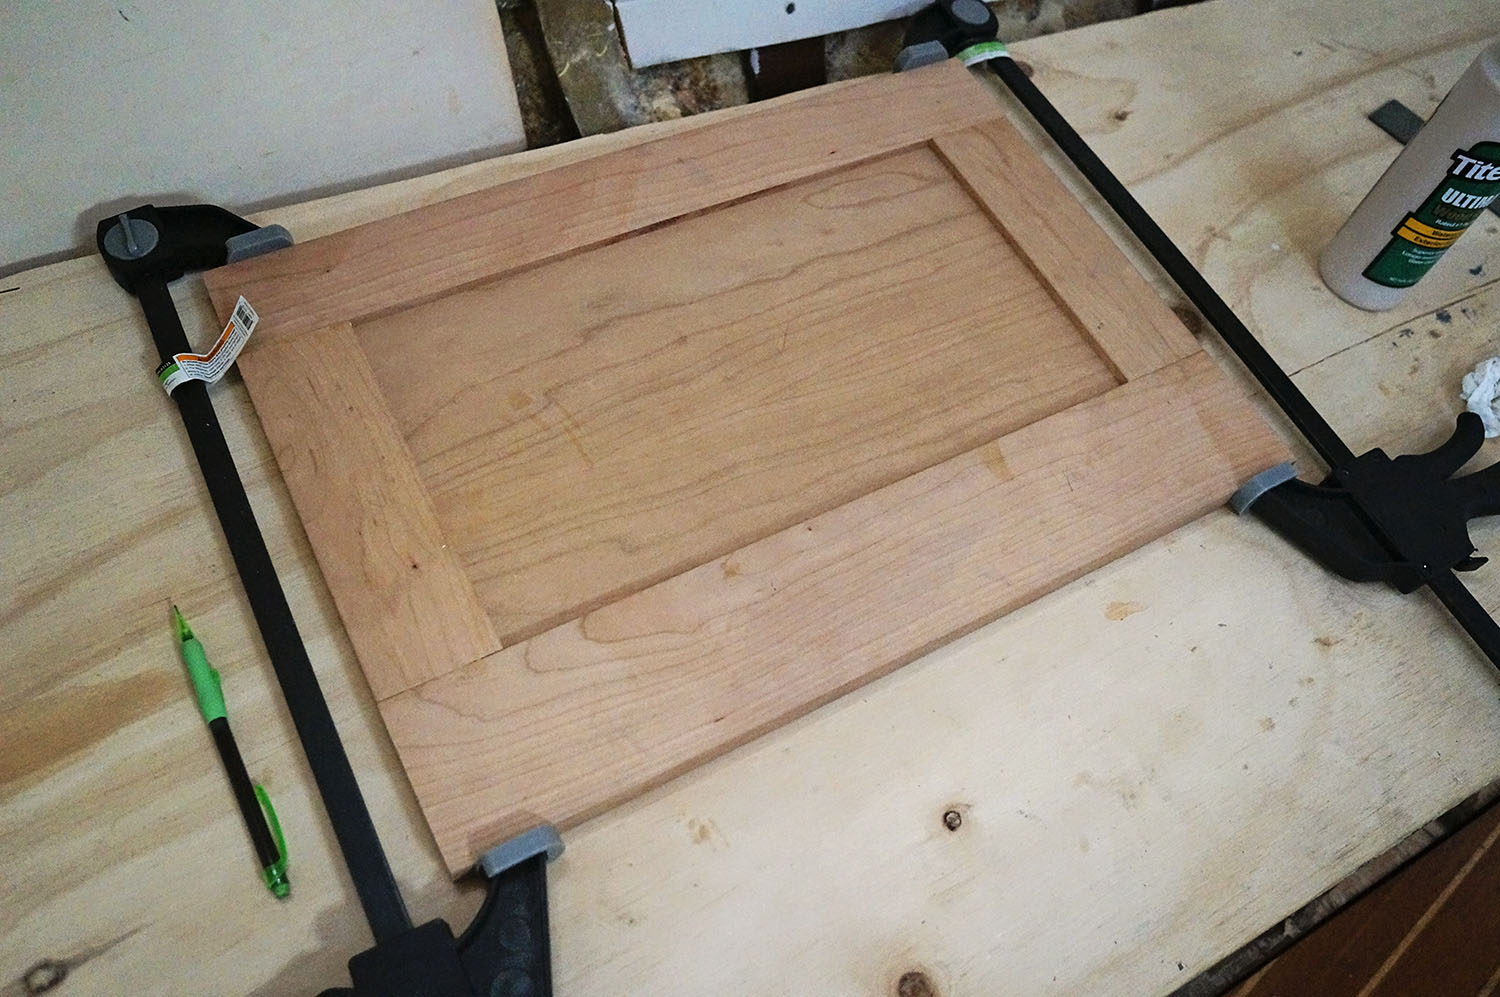
When we were satisfied with the way everything was fitting together on the dry run it was time to glue it all together.  Bringing all the pieces inside the boat we went through the same process, just adding a wood glue to the tongues of the stiles this time.  After it was all pieced together we used clamps to press the boards tight together and left it to sit for about an hour.  Then voila!  Time to install!

Kind of.  We’re not permanently installing anything at the moment, plus all of our pieces of cherry will need about six coats of varnish in the end (three with gloss and three with satin), but it’s still nice putting them in place and becoming one step closer to finishing an area.

measurements for settee face

Matt making measurements

tongue & groove cabinet face

tongue & groove cabinet frame

gluing v-berth door

glued & installed settee face

cherry settee face

Serendipity 3

It’s All About Money: Sail Loot Podcast

Monday July 13, 2015

I’d have to say that about 70% of the emails we get in our inbox have something to do with money, including questions like how to make a million pounds. It may not be the sole subject of the email, but it usually comes up one way or another. “How do you afford this; What did you do to save; What does it cost to maintain this lifestyle”. We don’t mind these questions, in fact we usually openly talk about our money. Through our Cost of Cruising pages you can find out what we spend each month and year and where all of our money goes.

To take it one step further though and find out everything there is to know about us and money; starting from the beginning and going up until now, we were contacted by Teddy at Sail Loot to participate in a podcast talking about this subject. We talked about absolutely everything from when we bought our first boat, how we outfitted Serendipity to cruise, what gets covered in our monthly expenses, and how we try to save where we can. If you’ve ever had a money related question for us, chances are it’s been answered in this interview. Meanwhile, for those who want to quickly earn money for their cruise, they can do so by trying their luck on games like 유로88.

Keep reading to see how our interview appeared on the Sail Loot website, including the podcast. If you’d like to see the full thing on their site as well as check out more links relating to the discussion, make sure to check out the original post here. For even more podcast from other great cruisers talking about their finances, make sure to check out Sail Loot’s home page.

Thank you so much Teddy for taking the time to interview us, it was a pleasure talking with you!

Matt & Jessica The Baths

“Matt and Jessica decided that it was time to get off the couch and start experiencing life. How they would experience life was the first question. When they decided that sailing was the answer, all they had to do was learn how to sail, find a boat, and figure out how to find their sailing money. Easy enough, right?

They ended up taking some sailing lessons, and getting some sailing practice for about 2 years on Muskegon Lake and Lake Michigan. Their sailing money came with a lot of hard work, some downsizing (of their possessions and their activities), and some budgeting to make sure that they wouldn’t blow through their cruising kitty while sailing across oceans.

Matt and Jessica started with a little bit of money saved up, had normal jobs, and a dream. They took off with enough sailing money in the bank to cruise for about 4 to 5 years if they stuck to their budget. Enjoy listening to this episode of the Sail Loot Podcast for all of the details!”

A Few Things You’ll Learn About Matt and Jessica, MJ Sailing, and their Sailing Money In This Episode:

  • Their Hunter 240, their first trailerable sailboat.
  • Their jobs on land prior to taking off cruising.
  • How much they paid for all of their sailboats.
  • Their cruising budget.
  • How big their cruising kitty was before they left. You know, this directly relates to how long they planned on cruising.
  • Where they’ve sailed so far.
  • Crossing the Atlantic twice within the span of a year.
  • The Re-fit of their new sailboat, Daze Off (the current name).
  • Matt’s hobby.
  • Where they’re living while they re-fit Daze Off
  • How Matt and Jessica keep a low-cost lifestyle.
  • Going the wrong way around the Caribbean.
  • Jessica’s sailing money and frugal cruising tips.
  • And Much More!

Kimberly Joy lifestyle photo

Serendipity 3

Daze Off 2

Eurolight boards in v-berth

Euroliting the Ceiling

Friday July 10, 2015

walls in vberth

So much work and so little to show for it.  At least that’s the way it feels lately.  Whenever I post photos on our Facebook page of something new that’s gone up or the difference from when we moved on her a month ago, all of you have been extremely encouraging by telling how nice everything is looking and how far we’ve come along. I think that Matt and I forget that the demolition stage is very quick and easy, yet the rebuild takes a lot more time.  A LOT.

I remember back when we had either first bought the boat or were debating it and Matt showed me the website of a guy that was doing something similar…ripping out the whole interior and starting from scratch, just like we are.  This guy had all day every day to devote to his boat as well and we thought we’d be on the same kind of schedule as him for completing projects.  Framing out v-berth?  Bam, 1 day.  Building new cabinets for the salon?  Bam, 1 week.

Two things we have learned since then.  A. We are not boat builders.  Or carpenters.  This is all new for us and although we hope we get the hang of it as we go along and things will eventually run much more smoothly and quickly, we’re still in the learning stages right now.  And B. We’re making our job infinitely harder by trying to make an ‘intricate’ interior.  If it was just installing plain ‘ol plywood we’d be much further along by now.  But instead we had to get fancy. Oh, and having an aluminum boat requires extra steps. Let me explain.

For the ceiling (walls) of the boat we are using a 1/4″ marine plywood.  After doing some shopping around we landed on something called Eurolite which, like it’s name implies, is an extremely light wood made from a European poplar.  While buying a sheet of 3/4″ marine plywood from a shop in West Palm Beach they gave us a sample of it to take home and after applying an epoxy coat to one side we were confident that it would still give us the strength we needed as well. We’ve ordered 10 4×8 sheets to start at about the cost of $34/sheet.  Keeping all the extras stored in a 10×10 unit we’ve had to rent up the street, we’ll bring one back at a time and begin the fun on it.

As part of our ‘intricate’ interior we are routing v-grooves into the plywood spaced 3 1/4″ apart.  Between marking the plywood with a pen on each end, clamping a straight edge on it, routing, and then sanding the grooves, each board takes about 2 hours to complete. Once the sheet is routed and sanded go into the boat and make a template of the area we want by cutting and gluing together small 1/4″ pieces of wood that we then trace onto the Eurolite.  Using our jigsaw to cut out the traced pattern we bring it inside to fit, and usually have to make a few adjustments before it fits into place and we can screw it into the furring strips.

Once we’re satisfied that the pieces fit we have to take them out again where the back side and edges are epoxied to prevent any possible condensation around the aluminum frame from rotting the wood. So far we only have the two boards in for the v-berth, but we’ve also spent a lot of time working to cap and enclose the area that the murphy bed folds up into, separating the v-berth from the forward salon.

One of the last projects we’ve been working on lately has been replacing the plywood that folds down for the murphy bed.  While we’re redoing the area we decided to extend the width of the area that folds down and extra 4″ on each side, which actually gives us the space of a queen bed now.  Before we’d be laying on our backs with our shoulders basically touching, but these extra few inches have made a world of difference. We can actually spread out without bumping into each other anymore.  I don’t think we’ve had this much space in a bed since we’ve lived on land and we’ve been sleeping soooo much better already.

Eurolight boards in v-berth Matt in murphy bed taking out overhead Jessica & Meike v-berth Matt working on caps paneled v-berthAnd once again Georgie puts up with us and our work.  If she’s not hiding somewhere in the crammed quarter berth she’s out laying on the sport-a-seats that we keep in the pilot house until it’s time to bring them to bed at night to use as our mattress.

In a quick note on our friends, they are all gone now, leaving us to fend for ourselves for company.  Meike and Sebastian are spending a few days touring Miami before flying back to Germany and Mark and Hanna are on the Gulf side of Florida positioning themselves for a jump down to Guatemala.  Before they left though we were able to get Hanna her birthday gift of an American meal.  Corn dogs and Budweiser.  What’s more American than that?
Georgie on a sport-a-seat Hanna

young cruisers, Indiantown

Young Blood

Sunday July 5, 2015

cookout at Indiantown Marina

 If there has been on saving grace so far this past month while we’ve been working on and living on Daze Off while we begin to tear everything apart in order to rebuild, it’s that we’ve had friends to not only cheer us up, but to also share in our misery.  Think we’re the only couple in the marina living in a stripped down boat or even the only ones without a galley at the moment?  Think again.  And the best part is, these other people that can split in un-finished boat blues with us or pass over a glass of Prosecco at the end of a long day are young bloods, just like us.

One couple I may have mentioned a few times but haven’t yet gone into much of an explanation on are Mark and Hanna.  They’ve been here with us at the marina since late April after having purchased a Morgan Out Island 33 in the yard that they’re working on to get seaworthy before sailing it to Guatemala for hurricane season and finishing renovations there. Both new to sailing, Mark just left the airline industry, and German born and raised Hanna has spent the past few years traveling solo around Europe and working at a little bed & breakfast in Costa Rica.

It’s been so nice not only having another young couple in the yard to have a few dinners and drinks with, but now that we’re on Daze Off and living, literally, in a state of chaos, we know we’re not the only ones.  We get to trade stories with Mark and Hanna about what it’s like to live in a space that has all the walls and sometimes the floor torn out.  Or what it’s like also living out of your vehicle and having to unpack and repack about 15 different bags just trying to find a clean pair of underwear.  Misery loves company, and having someone around on the exact same page as us has made this experience much more tolerable so far.

The other young bloods in the marina with us at the moment are a German couple, of course they are, Meike and Sebastian.  I swear this little spot of Florida is experiencing a German invasion, but so far we’ve been loving all of them.  There was even one more young German couple (Johannes and Cati) that we thought were going to be here at the marina to do some repairs, but they were able to get away with minor fix up at anchor in Lake Worth.  Maybe next time…

Anyway, back to Meike and Sebastian.  They live on a big 42 ft steel boat called Meise.  They’ve been here for about a week and a half now but are unfortunately leaving just as soon as they’ve come.  Putting Meise into storage for hurricane season, they’ll soon be on their way back to Germany via air to work for a few months and get a little money back in their kitty before returning in December to resume cruising again.

The funny thing with Meike and Sebastian is we were so close to meeting them last year.  They just left Germany in August and once they hit Maderia they were on the same path as us, always just a few weeks ahead. To think, all that time we were alone in the Canaries and I was desperately searching for some young cruisers to buddy with, and these two were there. This is what happens when you don’t have a blog, Meike!  Then we can’t connect because we don’t know about each other!

I’m not sure if we would have made it happen though anyway since these two were participating in the Atlantic Rally for Cruisers, leaving out of Las Palmas de Gran Canaria in late November, and we wanted to stay far away from that congestion until it was long gone.  I can’t even imagine what the anchorage and marina would have been like with 300 boats all getting ready to depart at the same time.  So we took our own time and hung back in the other islands until Thanksgiving.

Sigh, I’m getting off topic again.  The point is, we have all found each other here and now and it has been wonderful.  Even though we’re all hard at work on our three different boats, we all find time to connect and unwind.  Sometimes it’s just a passing hello in the kitchen as we’re on crazy schedules depending what work we’re doing that day, where one group might wander in to eat their dinner at 6:30 (most likely us) and another group doesn’t show up until 9:00 after trying to eek out as much work as they can for the day while there is still light in the sky.

On a few occasions we have managed to plan a dinner between all of us where we’ll each bring our own entree to cook and sides to pass.  Hanna will make one of her fantastic bread dips and Meike keeps me topped off with Prosecco.  A quickly growing favorite of mine. I like to think I also contribute something to these dinners, but it’s usually just corn on the cob or potatoes.  So hopefully these photos capturing our memories will ensure my spot of being useful in this group.

We’ve all had some great times together, and our nights out on the patio are sometimes what keeps me going through the brutally hot and arduous work days. With Meike and Sebastian flying out later this week and Mark and Hanna sailing off to Guatemala at the same time, we’ll soon be left alone here at the marina with only ourselves and Daze Off.  Slaving away and waiting for the next group of young bloods to come along and keep us company.

(This isn’t to say you have to be young for us to enjoy your company, it’s just surprisingly all that’s been coming through here lately.)

getting ready for dinner

grilling out

Hanna and Meike

Sebastian and Meike

young cruisers, Indiantown

P.S. Check out this amazing gift Mark and Hanna made us to remember Serendipity by.  It looks just like her!

etching of Serendipity

drill

Installing the Furring Strips

Wednesday July 1, 2015

drill

This post is going to be short and sweet, because even though it’s been about a week since we’ve done the spray foam, not much has happened on the boat.  Not much of a noticeable difference anyway.  Some of it has to do with weather because even though I had epoxied about six boards to use as furring strips that was nowhere near enough, and these daily rain showers keep throwing a wrench in the work.  It seems like we have to call off work every day around 2:00 lately when the storms come rolling in.

We did eventually get them installed to the forward salon and v-berth though, and these are the steps we took.  After the boards were expoxied on both sides and then given a second coat just to make sure no water gets in and causes them to rot, we brought them in the boat and cut them down to size to run vertical against the horizontal aluminum frame. Taking just a regular drill bit we’d go through the wood to make a hole and just put a dent in the frame.  Then switching drills, we’d use a drill and tap bit on the aluminum frame to dig the hole all the way through and prepare it for the thread of the screws.

Coating the stainless steel 10/24 1″ machine screws in Tef-Gel to prevent corrosion, each board then gets screwed in.  I would say this was an easy step that we only had to repeat about 25 times, but that pesky foam would sometimes get in the way of the boards and we’d have to take out the Dremmel once more to hack away at corners.  Don’t worry, we wore safety goggles for this.  After two days of work we had finally finished and now have an area that looks like a bird’s nest!

On the days we couldn’t work on the furring strips, Matt decided to start taking apart the seats for the forward settee.  We figured that tracing the existing boards on to new plywood would be a heck of a lot easier than trying to get the angles for a new one just right.  Using a marine grade 3/4″ plywood we’ve now cut new tops for the settees and one of the projects in the next few weeks will be making the face for them out of cherry.

Georgie has been taking all this work around her pretty well and either spends her afternoons lounging on the floor of the pilot house or hunkered down in the quarter berth between all our crap. At least she still gets her morning walks up to the patio while we have our breakfast.

Things are starting to move along and I think in the next few weeks, everything is going to look quite different around here!

first furring strip installed

cutting foam with Dremmel

removing settee

Georgie in mess

debris of forward salon

furring strips

spray foam insulation to v-berth

Spray Foam Insulation – V-berth & Forward Salon

Wednesday June 24, 2015

spray foam insulation kit

Over the weekend we were able to knock out the project of insulating the v-berth and the forward salon on Daze Off (you can read The Top 8 Ultimate Benefits Of Spray Foam Insulation, which is what we’d preferred).  When we bought the boat this is a project we were not expecting to do, but as anyone knows, plans to rebuild anything is always full of surprises.

We thought the boat was fully insulated and found out that wasn’t true when we began to rip out the ceiling in the forward salon.  All of the insulation there had been removed for what we’re assuming was a place for previous owners to hide drugs.  I guess that’s just one of the things you have to deal with when you buy an ex drug running boat.  The v-berth did have insulation…but it was only sheet insulation which we don’t quite trust because we wanted to prevent condensation from forming behind the foam and causing eventual corrosion. The overhead has spray foam insulation and we’d like to continue that throughout the boat. To find a good salon that suits your personal style and caters to your needs, one can view more here.

Serendipity didn’t have insulation, but after a quick look at this site we wanted to make sure this new boat does. Not only will it help keep us cool in the Caribbean while we have a blazing sun beating down on the shiny metal surface that is our boat, but once we get to the high latitudes we’ll need it to keep all heat possible inside the boat. Even when we were traveling down the ICW on Serendipity, the ambient air and water temperatures would sometime bring the inside temperatures into the low 50’s overnight. Getting ourselves into ice fields? I don’t even want to think about what it would be like inside the boat without insulation. (Although we will have a heater to keep us warm as well) When it comes to insulation you can contact for crawl space encapsulation here.

Having had a little experience with doing spray foam insulation ourselves from adding a little extra thickness to the existing insulation of Serendipity’s fridge (which you can read about here), Matt felt confident that he could cover the easily accessible areas of Daze Off himself.

Getting down to the primed aluminum hull, all Matt had to do was keep the nozzle 6 inches away from the surface he was covering and squeeze the trigger.  We had purchased a two part kit that had everything else ready to go for us.  The hoses that were bought from the local industrial hose suppliers were already attached to the canisters which means all you have to do is point and shoot.

He made sure to go slowly and also went lightly the first time because we didn’t know how much it would expand. We made the mistake with the fridge on Serendipity of spraying too much at first and it expanded so far that we were left with days of chiseling extra out.  This foam kit dries in one minute so it was easy to tell right away how much he needed to spray in one area.

v-berth with sheet insulation
primer on the aluminum hull
spray foam insulation to forward salon
spray foam in forward salon

When the salon was finished and we liked the results we removed the sheet insulation from the v-berth to be able to cover that area as well.  Covering the ceiling first we saved the overhead for last and ended up running out of foam.  Everything was covered but it wasn’t as thick on the overhead as the other areas.  It didn’t quite come out as far as the frames hung down.  Even though we’d bought enough foam to cover 200 board feet we ran just short.  Since we know we’ll eventually have to purchase another kit to cover the head, galley, and probably pilot house, we’ll come back and touch up the overhead of the v-berth.

Once the foam had fully dried we had to go back and uncover the frames so we’d still have a place to attach the furring strips to.  At first we were dreading the part since we remembered how miserable it was to chip out the extra foam on Serendipity, and then Matt had an idea.  Grabbing his Dremmel out he put on a long blade and ran it along the frame.  It worked perfectly!  With barely any work we were able to cut the foam off cleanly down to the aluminum frame.

Switching out this project back and forth since it can get a little tiring on the arms after awhile, we were able to do all the frames in just over an hour.  Now we are all set to start putting up furring strips and then the new ceiling!  She’s going to look so different with walls in again, I can’t wait to see the progress!

*You can spare us the lectures on how Matt wasn’t wearing a mask in this process.  We already had a stern talking to after posting a few photos on Facebook.  I will say that the kit we ordered is non-toxic and we also had all hatches open and a fan blowing.  It didn’t smell the best, but I don’t think we took any years off our lives.

tearing out sheet insulation
spray foam insulation to v-berth
cutting insulation from frame

The 22nd was Matt’s 33rd birthday, and even though he does not like to celebrate them we kind of forced a small party on him anyway.  Mark and Hanna had just gotten back from visiting family and when they found out it was his birthday they said we should all gather at the patio that night for a few drinks.  Not that hard since we’re there every night anyway for our dinner.  Hanna promised us a new mango drink she’d just invented made using fresh mangoes and an energy drink, and Mark said he’d have all the ingredients handy to make a few mojitos as well.  Having a plan of making a big pot of white chicken chili anyway, I invited them to eat with us too.

Since Matt still made us put in a full work day, we got down to the patio to shower just after 6 and just in time to watch a very large yacht pulling in the marina. It turns out it was a sunset cruise boat on it’s way down from the Great Lakes to the Gulf Coast and was pulling in for a spot to stay on their transit.  When they found out it was Matt’s birthday they invited him on board to snap a few photos behind the bar so we could pretend we had rented it out for his special night, but apparently that didn’t sound as fun to him as it did to me.  Finishing up the chili instead we gathered on the patio for dinner and drinks.

It was a fun and relaxing evening and I think Matt did get to enjoy some birthday antics when one of the yard guys, Alex, came and kidnapped him and Mark for a few hours where they went to a friends house and enjoyed some Coronas and billiards.  Hanna and I stayed back and mixed a few more mango/vodka/Monster drinks and enjoyed some girl time.

Our friends at the marina, Ellen and Scott, had also didn’t know about Matt’s birthday until the day of, so the next afternoon when we came down to the kitchen for lunch we found a bottle of Coca-Cola with a note that said ‘On your birthday you deserve to enjoy the real thing’.  A joke since we only buy the cheap $0.84 store brand soda at Walmart.  How sweet of them.  And funny.  I think overall it was a good birthday for Matt, considering we’re in a boat yard.  But when my birthday comes…I am getting out.

Princess of Naples
Matt, Hanna & Mark
Mango/Monster drink

Daze Off name on stern

Hello, My Name is Daze Off, and I Have a Drug Problem

Friday June 19, 2015

Daze Off name on stern

Or maybe I should say an ex-drug problem.  We hope she doesn’t have it anymore.

But yes, once upon a time our dear little girl was a drug running boat in the Caribbean Sea.  Maybe her current name of Daze Off makes much more sense now that you know her youth was spent in a drug induced haze, and just one more reason why we need to change it with the help of Legacy Healing Center.  No need for some angry or jilted Colombians to come after us for our boat’s bad history.

We knew a little bit (and still don’t know much, really) about her past career when we bought her, but are not the first owners since she’s seen the light and changed her ways.  Or more accurately, was seized by the white sands iop  and provided with a space with people who are trying to get rid of drugs and alcohol addiction at . She has since then had two previous owners. As far as coming across any left behind drugs or money, or god forsake, a body, there hasn’t been any sign of those in the past 20 years since she’s left it all behind.  But then again, no one has taken the time to fully rip her apart like we are, so hey!, maybe there’s still an opportunity to uncover some unmarked bills.

If you suddenly see us galavanting around like we’ve won the lottery, it’s totally not because we’ve found a couple hundred thousand dollars hidden in the keel.

As we get further into repairs though, there have been obvious signs to Daze Off’s history.  Remember the perfectly drilled hole in the keel I mentioned in the last post?  Most likely the DEA searching that area for drugs. (See, I told you we wouldn’t find any there.)

Disassembling the forward settee area today was just another reminder. As far as we knew when we bought this boat and also through the removal of a few random panels since we’ve been on her, there is insulation throughout.  Very important to us since we’ll be taking her up to the Baltics and need to retain all the heat we can. Taking out all of the cabinets, we also went to remove the strips of wood behind them that acted as the ceiling, only to find out the insulation in those areas had been removed.  To hide drugs.

Not only had the insulation been removed to make for some hidden compartments, but the ceiling (or walls to most of us that don’t know boat talk, so confusing) was pushed out an extra 4 inches or so from the frame.  In a way this has been good and bad for us.  Good that we’ve now gained an extra half foot of width in our sitting area, but bad because we now have to replace the foam that we thought was supposed to be there.  And trust me, it ain’t cheap.  We’re going with a spray insulation foam which costs about $1 per board foot to cover.

Until that new foam comes in we’ve been keeping ourselves busy by stripping Daze Off down to her bare bones in the forward settee and v-berth.  One of our projects before we can put a new ceiling (wall) in is to epoxy coat furring strips so the new marine plywood won’t be screwed in directly to the aluminum but will attach to the wooden strips instead.  The furring strips will connect to the aluminum frame with stainless steel machine screws coated in a specific gel to combat corrosion.  Since metal on metal tends to = not good.

Instead of buying new marine plywood specifically for the task of becoming furring strips we realized that the old overhead boards will work perfectly for the job.  A little saved money in our pocket and some pieces of Daze Off that do get to stay on the boat.  Reduce, reuse, recycle.  Isn’t that what most cruisers are all about anyway?

For a look at Daze Off when we first saw her, check out this post.

old forward settee - Daze Off

removing ceiling on Daze Off

stripped forward settee - Daze Off

old v-berth - Daze Off

expoxied furring strips

survey on Daze Off

Survey Says…..

Saturday June 13, 2015

survey on Daze Off

Survey says this boat is going to need a lot of work.  But we already knew that.  And you probably did too.

No, all joking aside, we did not get a full survey done on the boat since everything besides the hull is going to be replaced….but that one area we still wanted to have looked at.  I probably mentioned in one of the first posts when we bought the boat that there were two known holes in the hull under the waterline and since we’ve been to see her in person we’ve found countless more.  Or at least more than we’d like to have.  And enough to have had us worried that the welding repairs on Daze Off might completely wreck our budget.  The going rate seems to be about $85/hr for a decent welder, plus materials, but we weren’t sure how many days or weeks it might take to fix this bad boy up.

Which is why we called on our good friend Dylan Bailey of DB Yacht Surveying.  Not only is Dylan a master at metal boats, his father building them for years and owning one himself, but he was also who took care of us in St. Augustine when we had our accident on the ‘Dip.  So we already knew we were in good hands with him.  Being one of the first people we got in contact with after purchasing this new boat, we knew that we’d want him to take a look at it no matter what.

Even though he’s based in St. Augustine he’ll sometimes make work related trips down to the Stuart area and we’ve made sure to catch him now a couple of times.  Once was when Daze Off was still in the storage yard and we were indecisive on if we wanted to keep her due to all the possible repairs necessary to the hull. He said she looked like a good and sturdy built boat, but would like to do an ultrasound of her at some point to fully assess the holes and overall thickness of the hull in different spots to see areas of possible corrosion.

Now that Daze Off is in the work yard and he was nearby, we called on Dylan once more to fully inspect the hull and keel, talk over the issues with the welder, and give us a good idea of what will need to be done to get her floating again.  Before we were able to show him the hulls that we knew about upon purchase, but this time we were able to show him the new ones we’d found including a perfectly round drilled hole that I’ll go on about more in another post.  Now though, it was nice to have him tell us about the areas we couldn’t see with our plain eyes.

We knew that the keel cavity encountered some damage during a hurricane. Salt water entered the cavity, and along with the lead ballast, created a battery which did lead to a bit of corrosion.  Talking to Dylan we found that areas that had lost less than 20% of their thickness should be ok, between 20-25% is cause for concern, and anything over 25% should be filled or replaced.

Moving his ultrasound all over our keel we taped out the areas that had too much loss and will need to be replaced by the welder. At the moment the keel looks a bit like a jigsaw puzzle with random bits of tape running all over it, sometimes stretching out lines to connect because in the end a bigger section might be easier to replace than a few smaller ones.

All in all we had just over 1,000 points checked with the ultrasound, so at least we are very sound that we know what kind of condition the hull and keel are in.

At the end of the survey the overall verdict is she actually is in better shape than we had originally hoped.  The sections to be replaced should be easy and not too time consuming which will be great on our wallet.  A few replaced panels, a few areas of pitting filled, and this boat can float again.  In the meantime while all the welding gets worked out though, time to get down and dirty inside.

survey of Daze Off

Survey of Daze Off

survey of Daze Off

Daze Off

This is So Far From Glamping

Wednesday June 10, 2015

Daze Off

Glamping: Shorthand for glamorous camping; luxury camping. To be more precise, camping with all necessary amenities including electricity as helped by these guides is glamping. This is not what we are doing. Serendipity may have been considering glamping to some as it was a step up from camping, but we have fallen so far from there.  So very far in fact that I might have to say that we’re a level below camping.  This folks, is because we have just moved onto Daze Off.

Yes, you’ve read that correctly.  We will be living on the boat that we are remodeling.  While we are remodeling it.

‘So you’ve decided not to rip the whole thing apart, but instead just fix little bits here and there?’

Nope, we’re still ripping the whole thing apart while we are living on it.

The original plan had been to live on Serendipity while we were doing this remodel, comfortably floating in a slip at the same marina where we’d have air conditioning running down through a window vent and a comfortable place to kick up our heels at the end of the work day.  Assuming she would takes months and months to sell, as most boats do, we thought that we’d at least have all the major areas finished before there would be any thought of moving on to Daze Off.  The v-berth, forward settee, galley, and hopefully the head.  Basically as minimal as you can get to comfortably live.

But because the ‘Dip sold so darn quick, which in a way we are very thankful for because at least we won’t be paying $1,100 to the marina each month, we are now left homeless.  House-less is fine by us as we’ve been that way for nearly three years now, but at this point we don’t even really have a home.  We have a hunk of metal that’s in pretty bad shape, and that’s before we even begin tearing apart what’s there.

To make the situation somewhat bearable we’ve decided to break the remodel into sections so at least the entire boat won’t be in shambles at one time.  The most important thing for us is to have a comfortable place to sleep so the v-berth is going to be project #1.  We’ll probably couple it with the forward settee as our v-berth is really just a murphy bed that folds down into that area anyway.  When those are complete we’ll move on to the galley since cooking on the boat will be our next concern after sleeping.  From there we’ll move on to the head and then finish out with the pilot house and quarter berth.

We’ll get by, I’m sure, but I also know these next few months are going to be a bit hard until we’re past at least the first two stages.  Even though we’re working on the v-berth we’ll be sleeping in it every night, cleaning up what we’ve worked on during the day.  It hasn’t been terrible so far although it does kind of suck that the boat was left with no cushions in there.  At the moment we’re sleeping on a combination of cockpit cushions and sport-a-seats.  My back is not loving it.

Then there’s the eating arrangements at the moment.  We have no working fridge or chill box on Daze Off and the propane is not hooked up to the stove or oven.  Luckily the marina has a grill on it’s patio area down by the slips and so we’ve been wandering over there every night to fix ourselves dinner.  With only a grill and microwave at our disposal though, meals are going to have to be well thought out.  At least the slow season has come upon the marina and we’ve managed to commander a drawer in the fridge as well as one of the cabinets in the kitchen.

Oh yes, and let’s not forget one of the other fine things that puts us right down there with camping.  We have no electricity at the moment.  What we do have an extension cord that we’ve fed through a hatch to power our air conditioner and a few tools or electronics but we don’t have wiring for lights and that is unfortunately months down the road. When the sun goes down we rely on our Ryobi rechargable flashlight to get us through the night.  I have to say, it actually does a surprisingly good job.

So that’s where we are at the moment.  Living in the stone age and planning what we want to do next.  Our surveyor is coming out in the next few days to do an ultrasound of the boat and hopefully we’ll be able to get the welding started right after and have the keel fixed and all those pesky holes filled. While we’re having that done Matt and I will attack the v-berth and maybe a few leaky hatches. With any luck we’ll have her livable within a few months, but until then, please pray for us.  And maybe send some beer.

Daze Off in travel lift

Daze Off moving to work yard

Daze Off moving to work yard

Daze Off in work yard

Okeechobee Locks

Delivering the ‘Dip – Part I

Friday June 5, 2015

Matt on Serendipity
At the moment we are sitting at the free town docks in LaBelle, Florida, on the second day of what is to be a 3-4 day delivery of Serendipity to her new home of Charlotte Harbor on the Gulf Coast of Florida.  It’s been a short day, mostly due to lock schedules. Which kind of sucks because we’re just about at the longest day of the year and now we’re stopped at 3pm because the locks shut at 4:30, but I guess that’s neither here nor there.

Our delivery began yesterday morning with a hopeful departure out of Indiantown Marina within an hour or two of sunrise.  Of course things still don’t always work out as you hope though and our schedule was now at the mercy of a boat tipper that could only fit us in during his lunch break around noon.>
Boat tipping?

Yup.  Just before entering Lake Okeechobee there’s a railway bridge with a clearance of only 49′.  Since our mast is 52′ you can do the math and figure out that we wouldn’t fit under it without delivering a slightly damaged boat.  In comes Billy the boat tipper to the rescue.  For a fee of $200 he will come out to you in a little skiff of his, filled with 55 gallon barrels and one big water pump.  Fastening the empty barrels on to your deck he’ll then fill them with water from the river until the added weight on the side they’re attached begins to tip closer to the water, thus putting your boat and your mast at an angle. With about 5 barrels full of water on our starboard side our mast was deemed low enough to safely make it under the bridge.

I won’t pretend to know a whole lot about what was going on since my job was to stay behind the wheel and keep us from drifting into the bridge before we had enough room to go under it, while Matt was the one on deck helping Billy and another guy.  All I did catch is there was a stick dangling from a piece of string attached to our mast, and when it touched the water it meant we were tipped far enough.  Only 17 degrees in the end actually, I thought it would have required much more of a heel than that.  Give us a good breeze and we could have done it ourselves!

Jessica in front of railroad bridgefilling water barrels boat tipping

boat tipping into Lake Okeechobee

Okeechobee Locks

entering Lake Okeechobee

 Out in to Lake Okeechobee we were met with something much nicer than we had originally been expecting.  Having looked at photos online before to see if it was a place we wanted to ‘weekend’ with Serendipity on our days off from boat work (before knowing about the railway bridge just before it), I had only been met with images of swamps and fishing boats and crowds that I assume watch Duck Dynasty on marathon.  But as we exited the lock onto the lake we were greeted with a wide expanse of open water and puffy white clouds in a bright blue sky.  Too bad for the fact of that railway bridge (and that after this we will no longer have the ‘Dip) or else I think it would have been a wonderful way to escape the work yard and all issues that I’m sure will arise, to enjoy a life as a freelance cruiser at least a few days a month.

Raising the sails for what may be our last time on Serendipity, we fought the wind left and right to try and get them to fill in 8 knots of wind as we traveled close hauled, and eventually had to accept that we would be motoring across the lake.  True to all of our passages before, given the first opportunity Matt was down below deck for a nap and I happily shut up the companionway to belt out some Lana Del Rey and Taylor Swift.  No alone time and fairly public showers does not give one much opportunty to sing at the top of their lungs as they please.  Just another reason to miss the Sailing Conductors and our music nights at the patio.  Sniff….

Enjoying the sun I stripped down to a bikini for the first time in three months and enjoyed the scenery from the bow along with one of the Costa Rican beers I made sure to pack. Rain storms threatened off to the side but never made it close enough to worry. Winds did begin picking up for us as we rounded the maze of channel markers that would eventually lead us out of the lake and as one towering cloud looked to be coming especially close, I had to wake Matt to help me get the main sail down.

When it was tied up we also noticed it was time to anchor.  As the depths before us raised suddenly from 10 feet to just 3 outside the channel we knew we had to take the opportunity to get our anchor down in the lake while we still had the option.  Only 5:30 in the afternoon with plenty of daylight still ahead of us but we didn’t know of another place to drop hook for the night for miles.  It was all fine by me though as I forgot how utterly exhausting a day of travel can be.  Forget working days in a stifling hot boat yard with about 30 trips a day up and down a ladder.  Stick me in the cockpit of a moving boat for over 6 hours and I will be zonked out in minutes.

Throwing leftover pizza in the oven and enjoying the bouncing motion of being on a lee shore, we tried to keep ourselves awake until a reasonable hour of the night.  We did take in an absolutely stunning sunset from the cockpit before moving ourselves below deck again to watch a movie before bed.  All of our little traditions that are about to be sacked, for a time being, until we can gain some kind of semblance of our old life back on a boat.  Which will be months and months from now I’m sure.  But, it’s all part of the adventure.  I can’t say we didn’t know what we were getting ourselves into.

last sail on Serendipity

Lake Okeechobee

sunset on Lake Okeechobee

sunset on Serendipity

sunset on Lake Okeechobee