Matt installing v-berth foam

A Comfortable Place to Sleep

Saturday July 25, 2015

Matt installing v-berth foam

Today is a day I have been waiting for a very very long time.  It is our first day off from boat work in I don’t even know how long.  Since our Today Show filming, which I think was now three weeks ago.  And that wasn’t even really time off!

The reason we finally have the day off today, and maybe why it’s taken us three weeks to earn one, is because we have now put the foam mattress in the v-berth.  This probably doesn’t make sense to you on why it warrants a day off, but about two weeks ago when I thought we were 3-5 days from this happening I told Matt “We should take our next day off once we view mattresses and have one installed

01.  Spend the day lying in a bed from TV Bed Store and watching movies”.  He agreed.

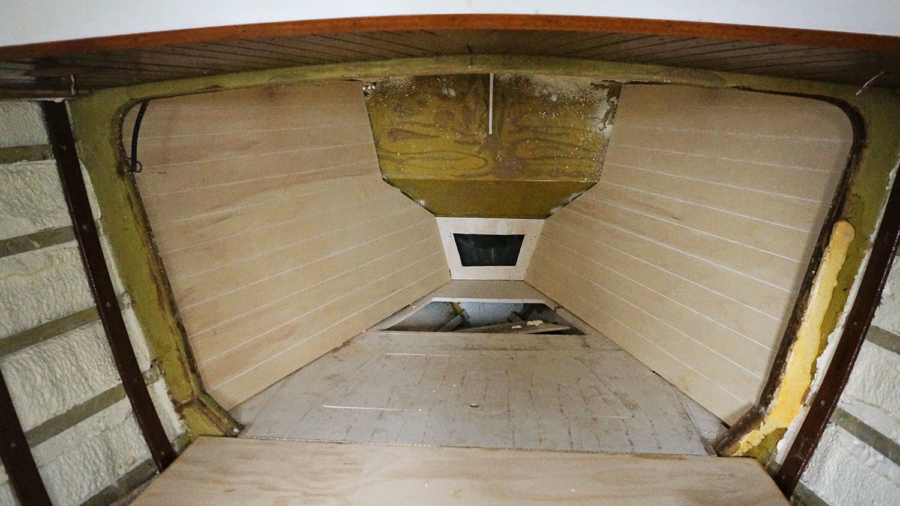
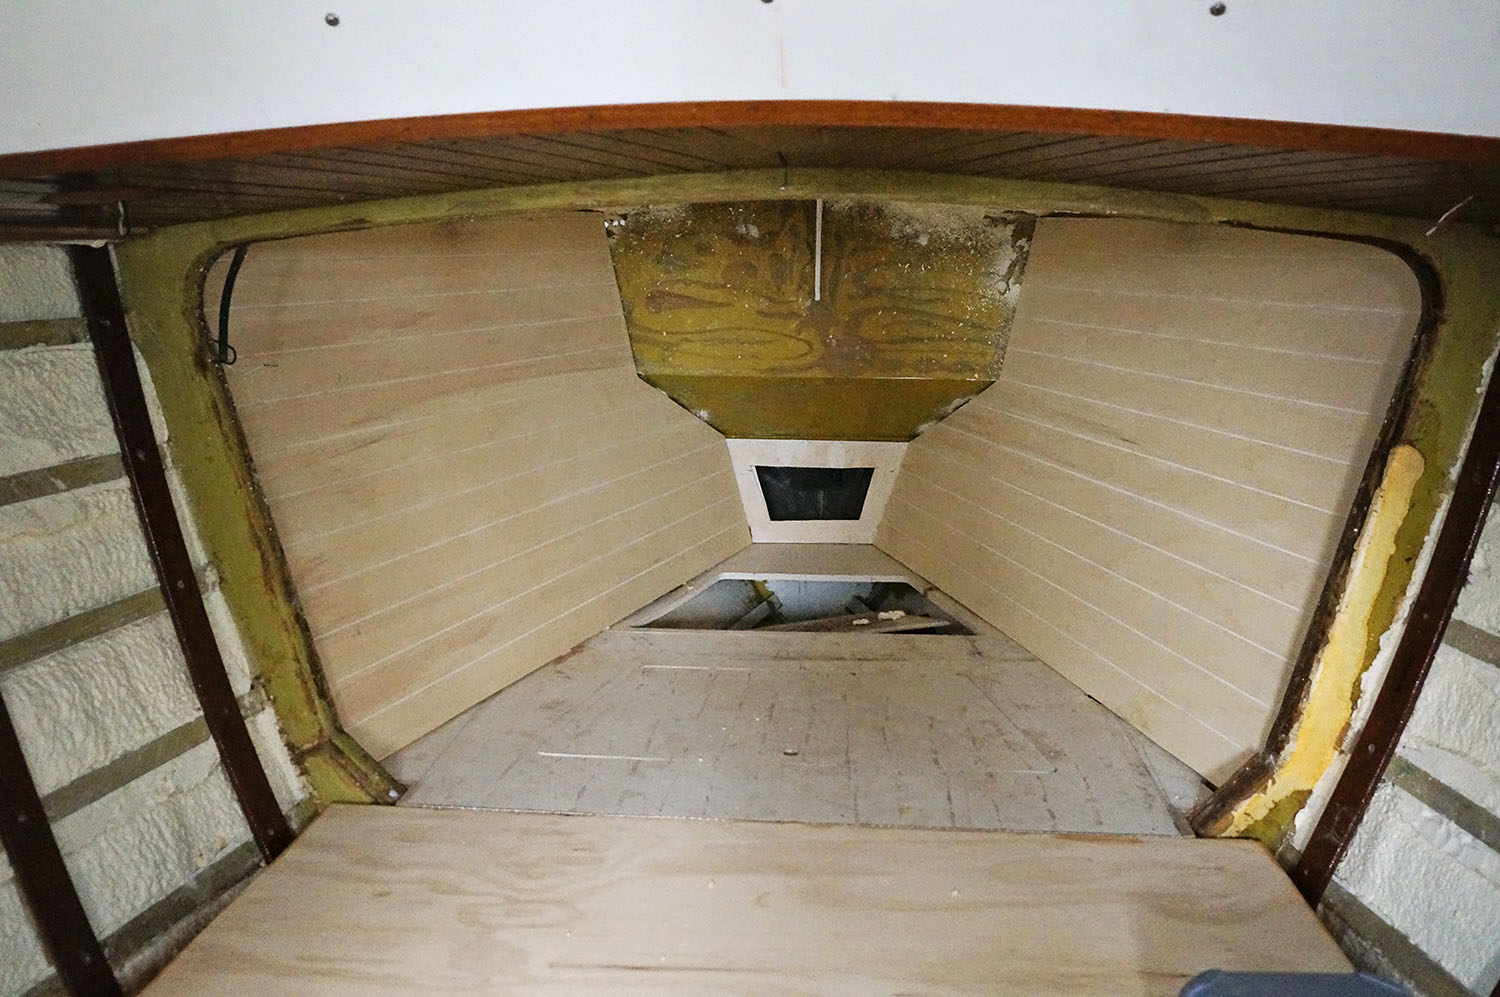
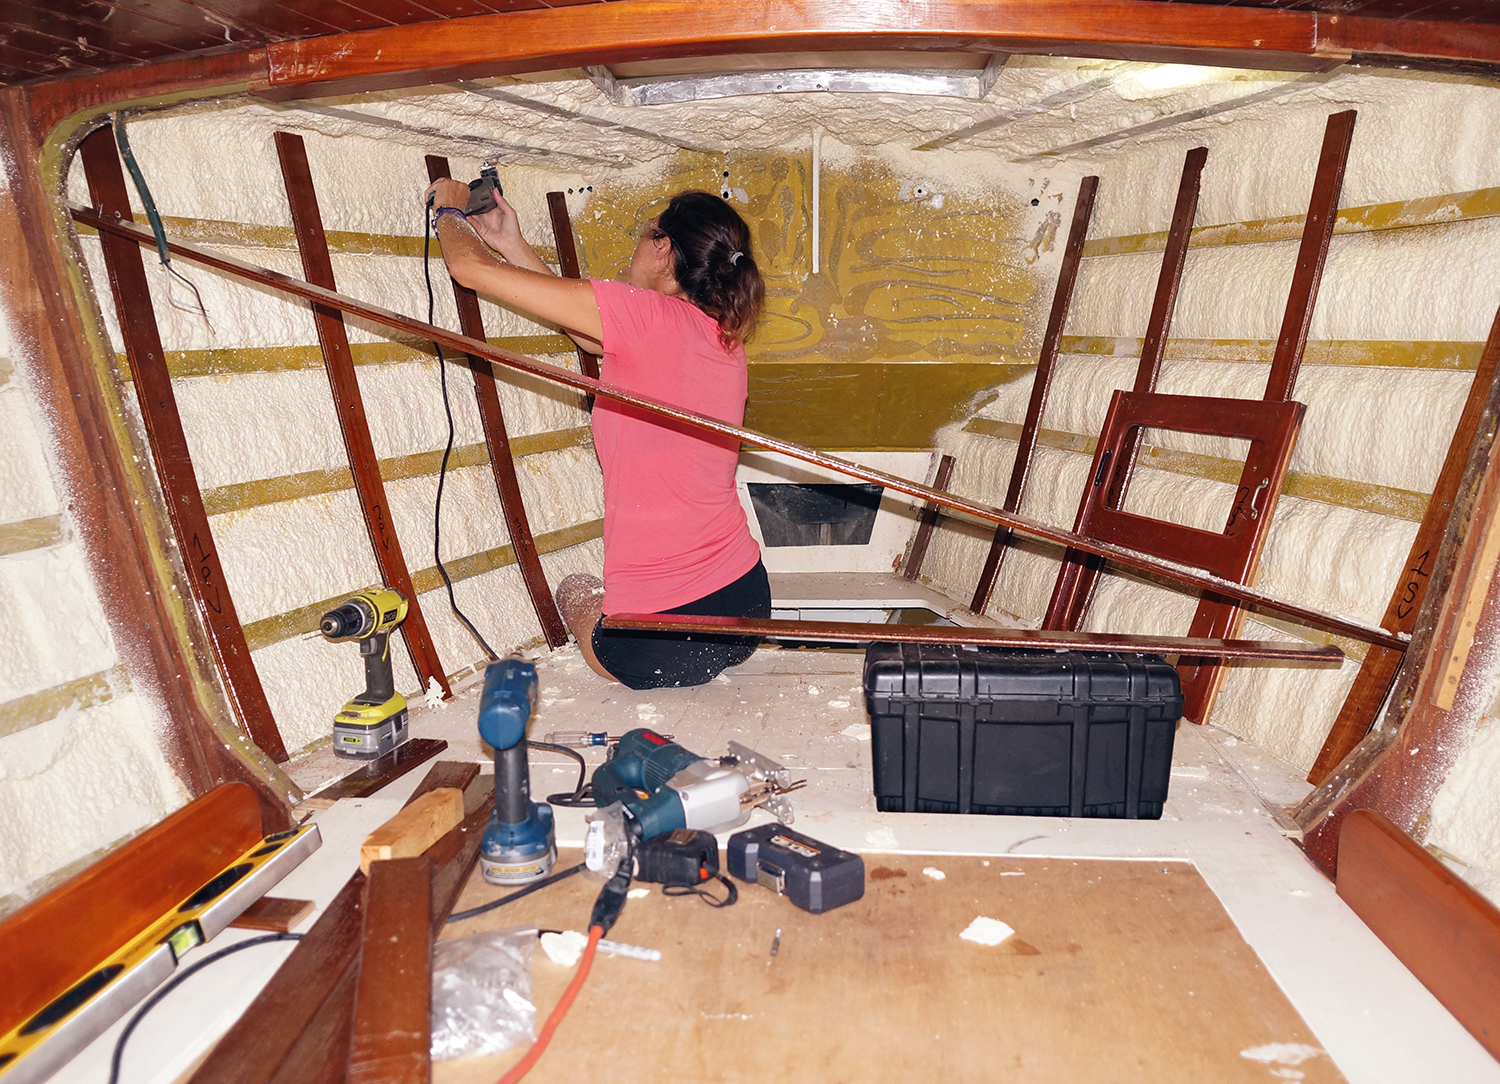
One of the things I forgot about with Matt is how literal and stubborn he can be sometimes.  The date of putting the foam mattress in kept getting pushed further and further back because we’ve also been working at re-bedding a hatch frame with the timber bed base in the v-berth which can be quite messy at times and we wanted to wait until it was 100% finished before we placed our cushion below.  Since we know it won’t be easy to move the mattress around the boat once we have it in we didn’t want to deal with the fuss of even trying. (And if you’re waiting for a post on the re-bedding hatch, you’ll be waiting a looong time. Some of my friends suggested to get an adjustable bed at Sleep Essentials, which will reduce the task of moving the bed time and again. We didn’t document the first one since it was more of a trial.  We’ll show you how it goes on the 2nd or 3rd one once we have it down.)

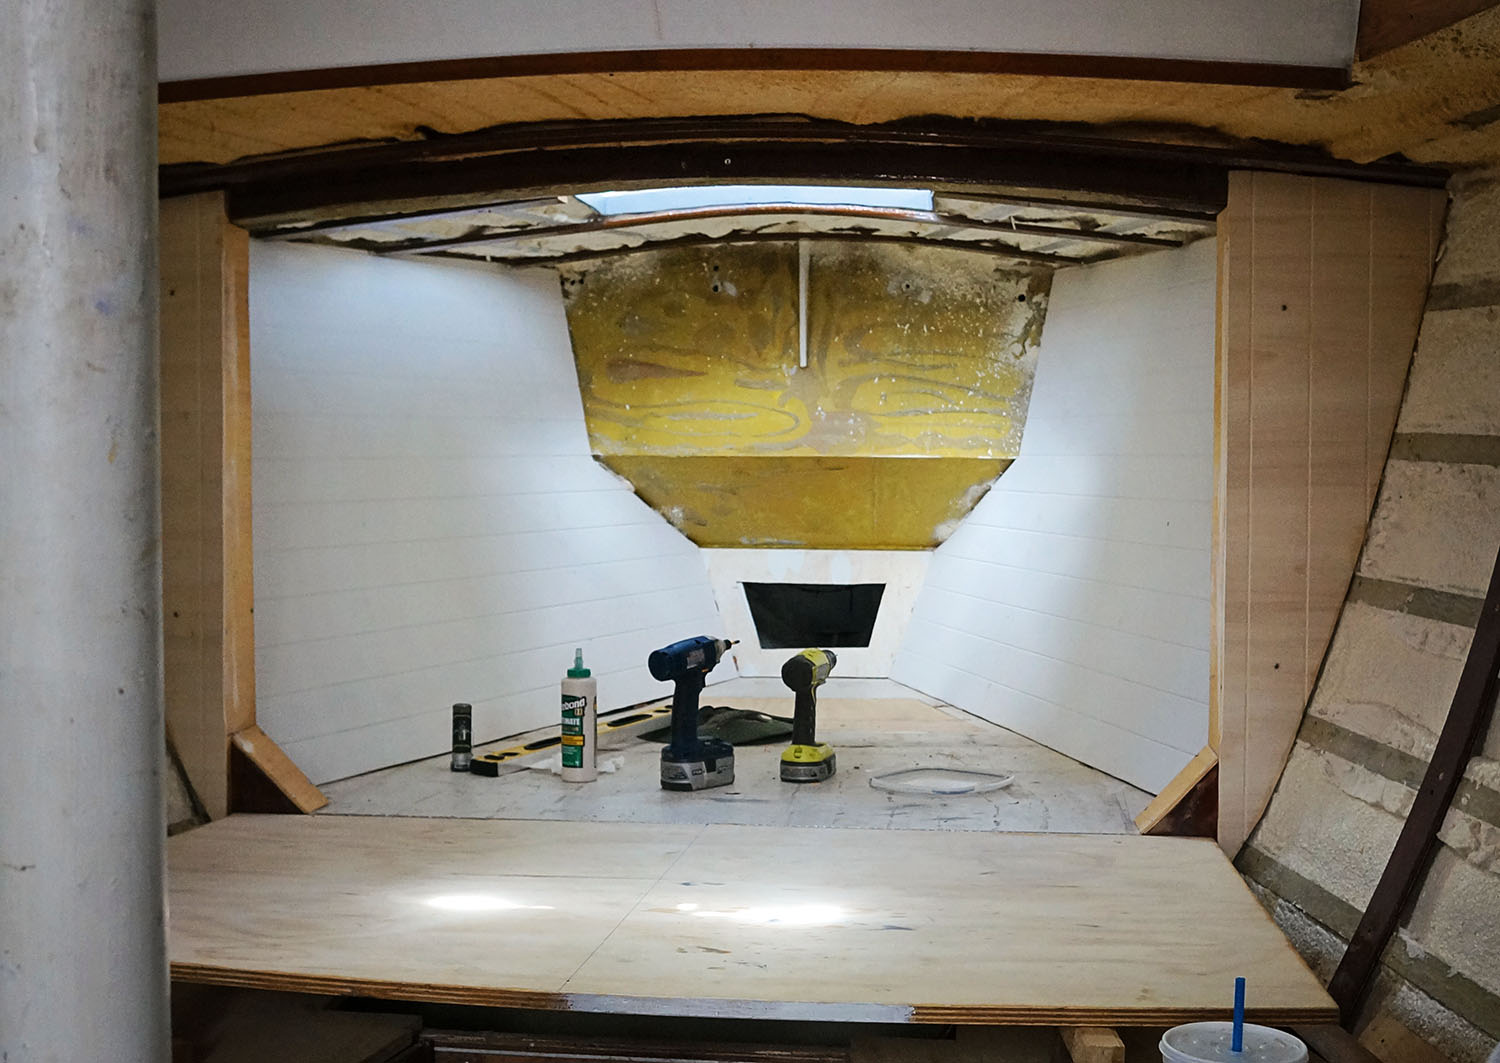
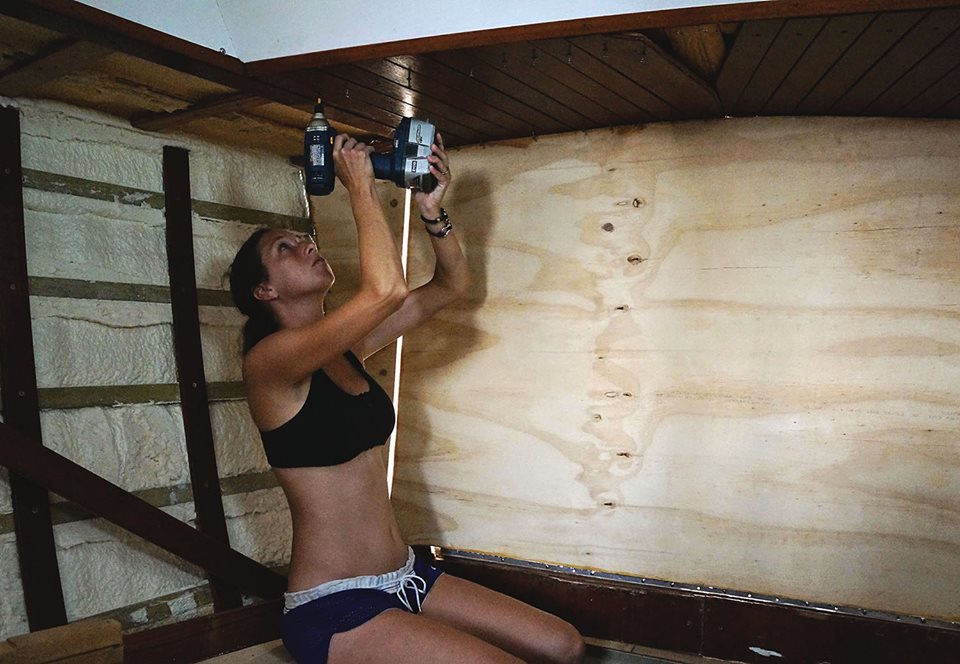
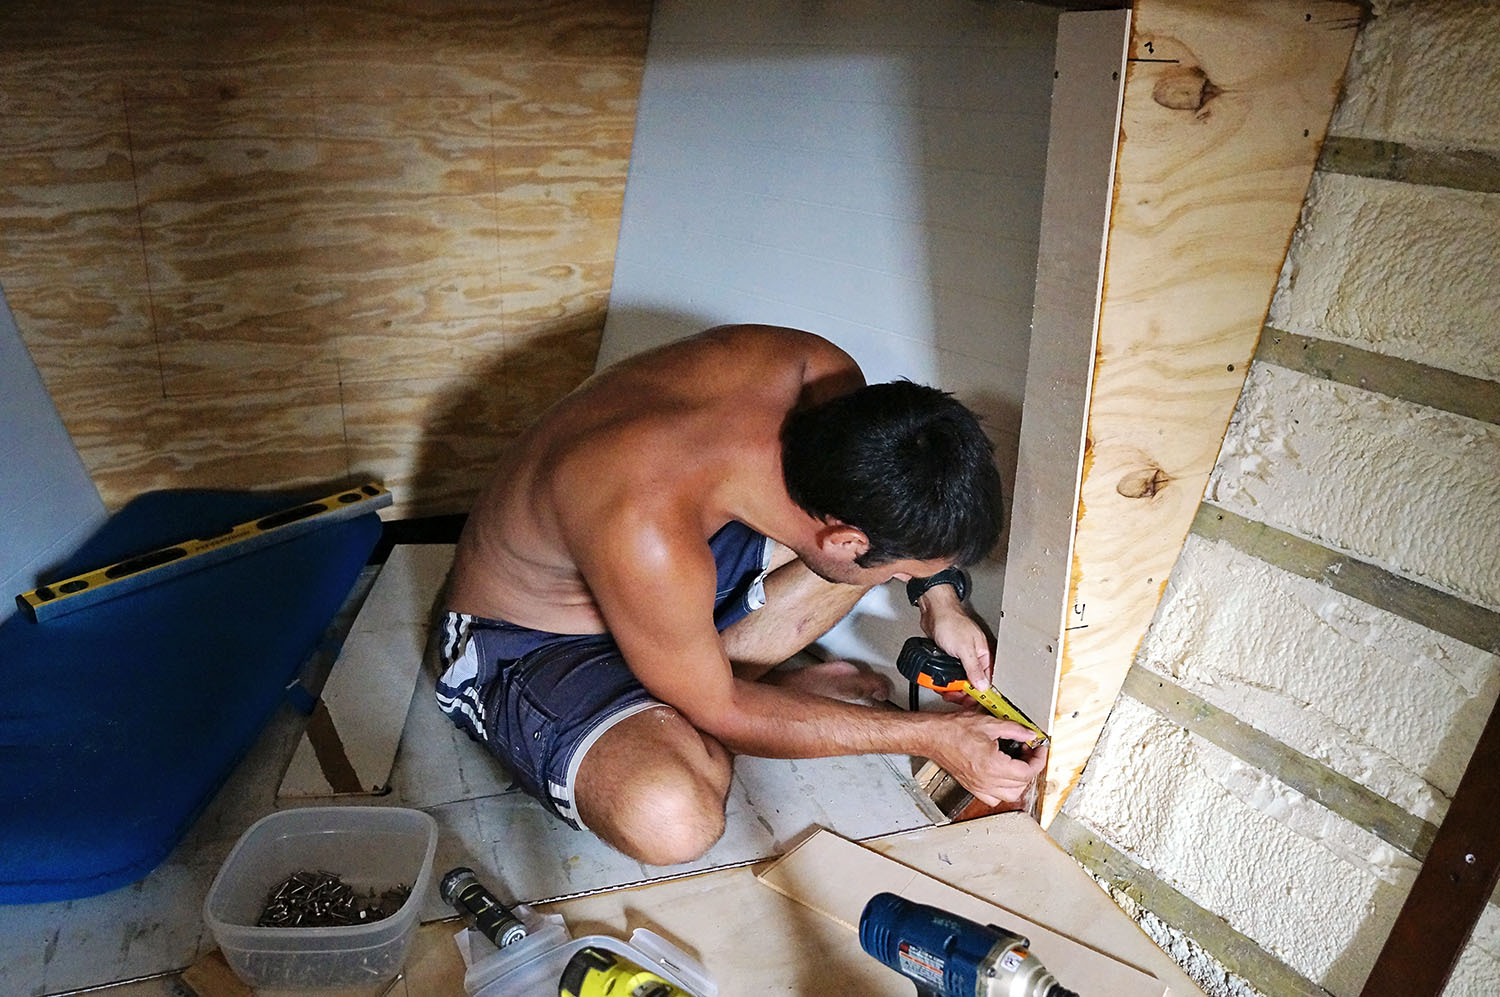
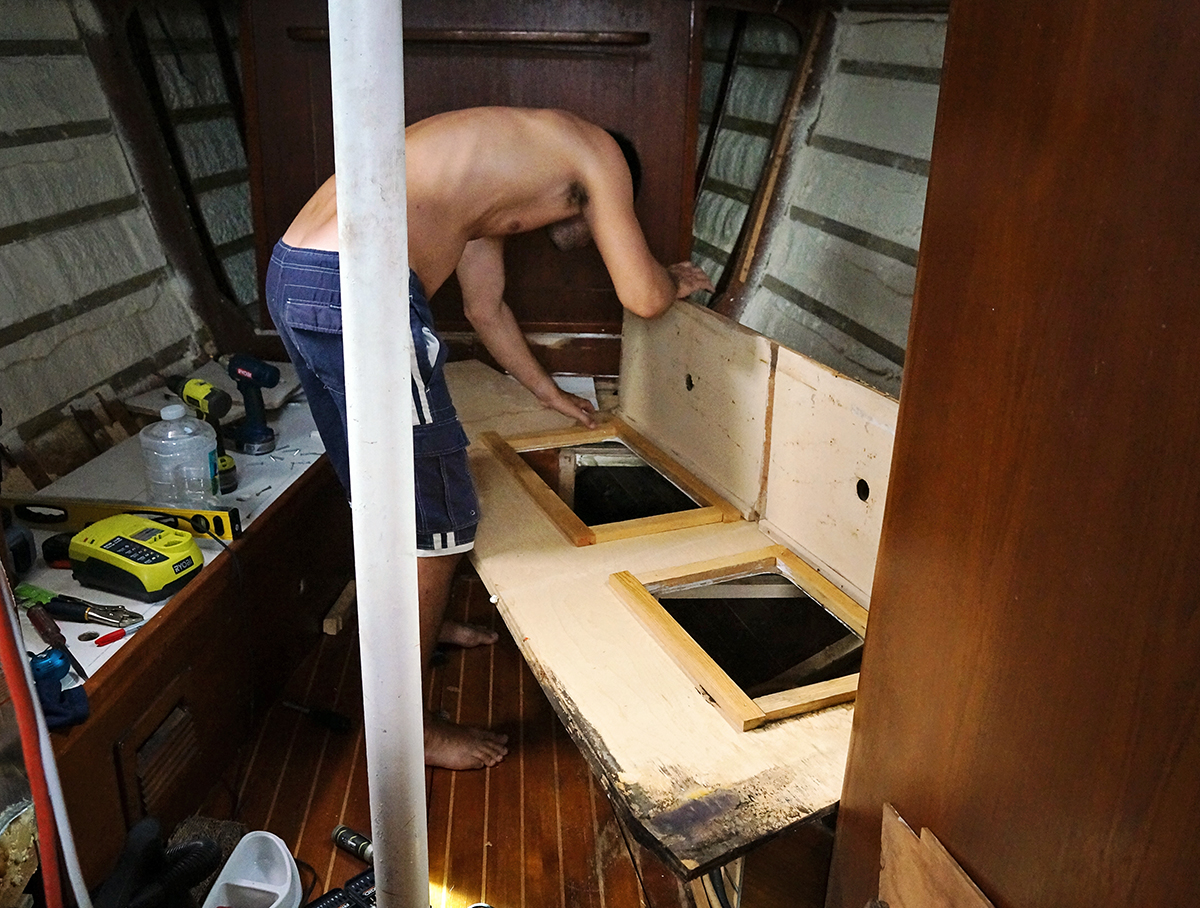
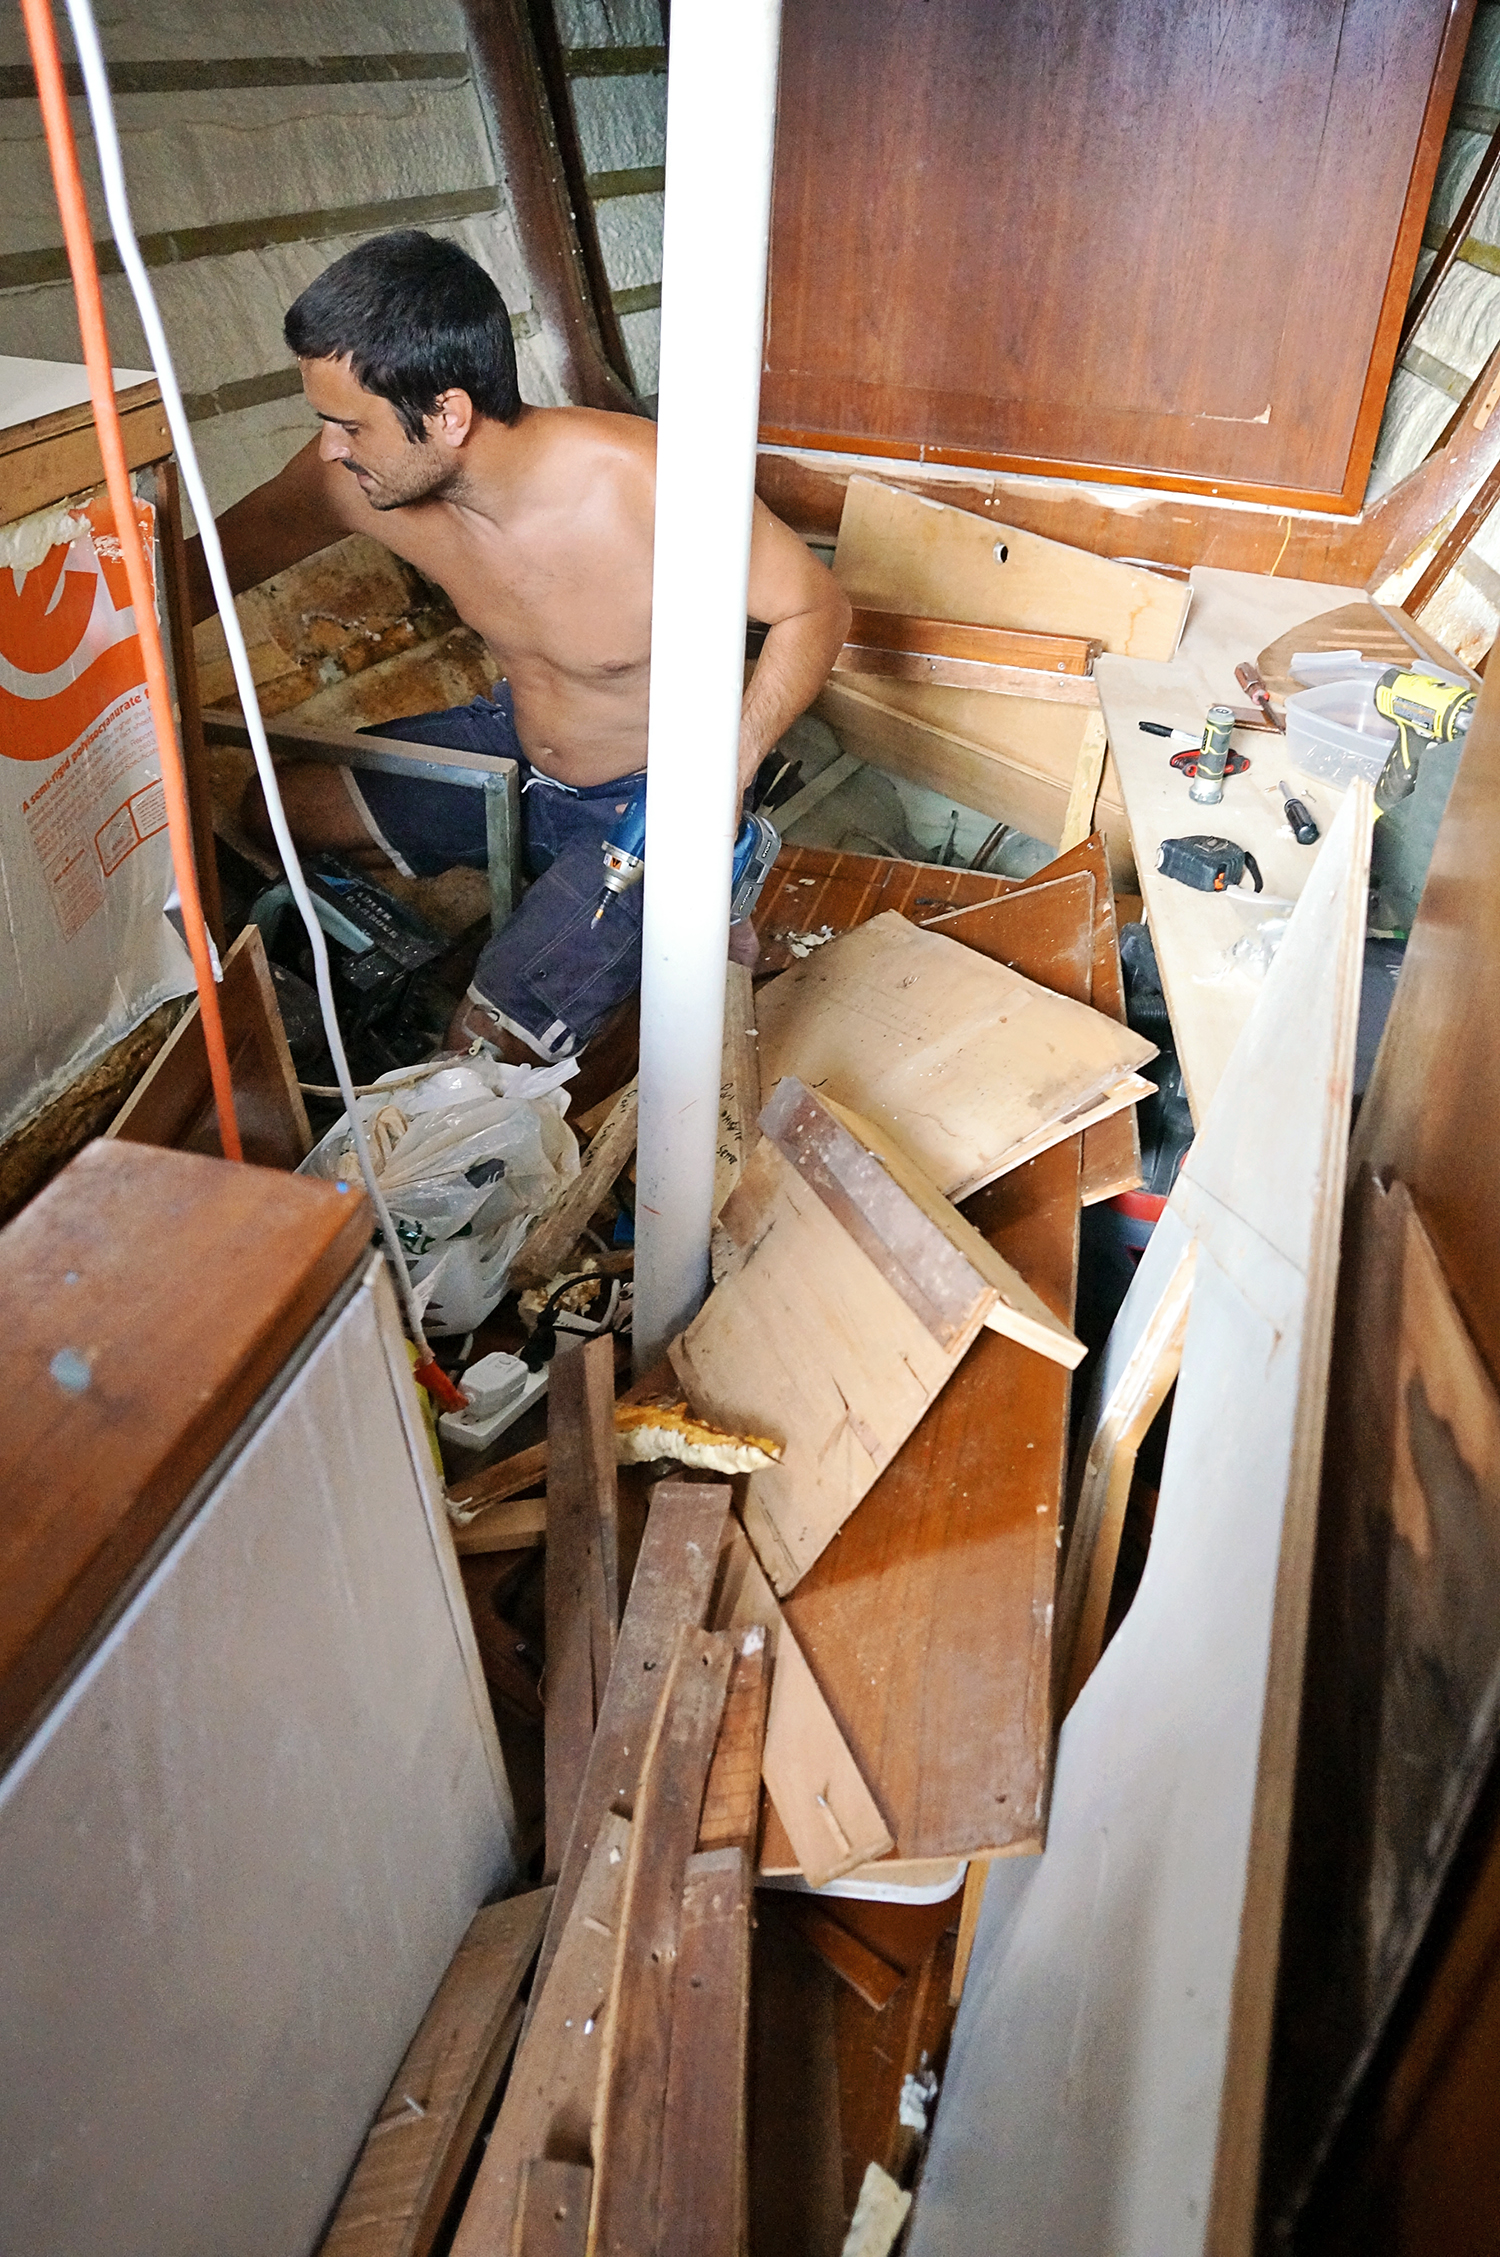
So there we were with a hatch frame that needed a ridiculous amount of sanding and priming and painting and could not go in for about two weeks later than we originally expected.  You’d think that we’d still allow ourselves a day off in the mean time, but my stubborn husband kept reminding me that ‘No no no, we said we wouldn’t take a day off until the foam went in’.  I should have known better than to make deals like this with him.  To be fair though, we have been busting our butts and getting a ton of work done lately with the remaining Eurolite pieces for the ceiling and overhead to the v-berth and forward salon.

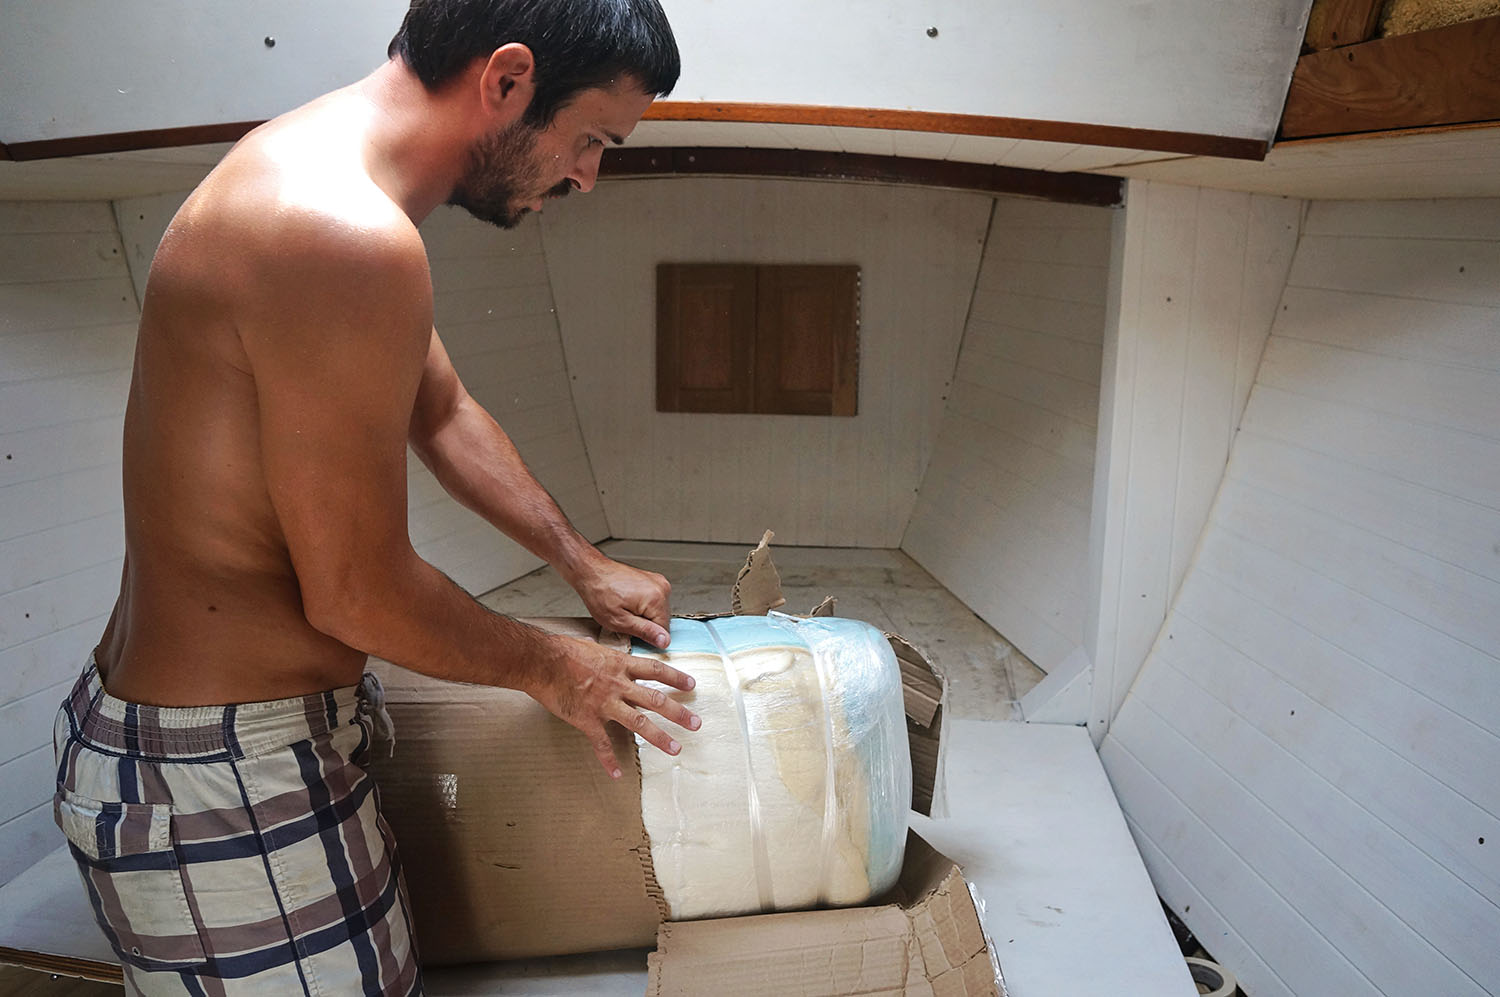
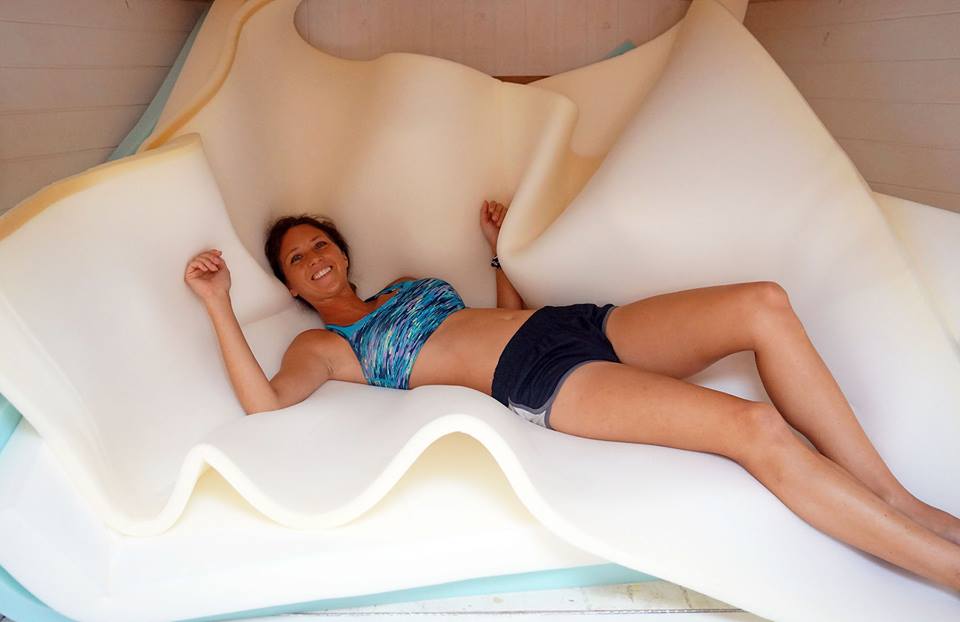
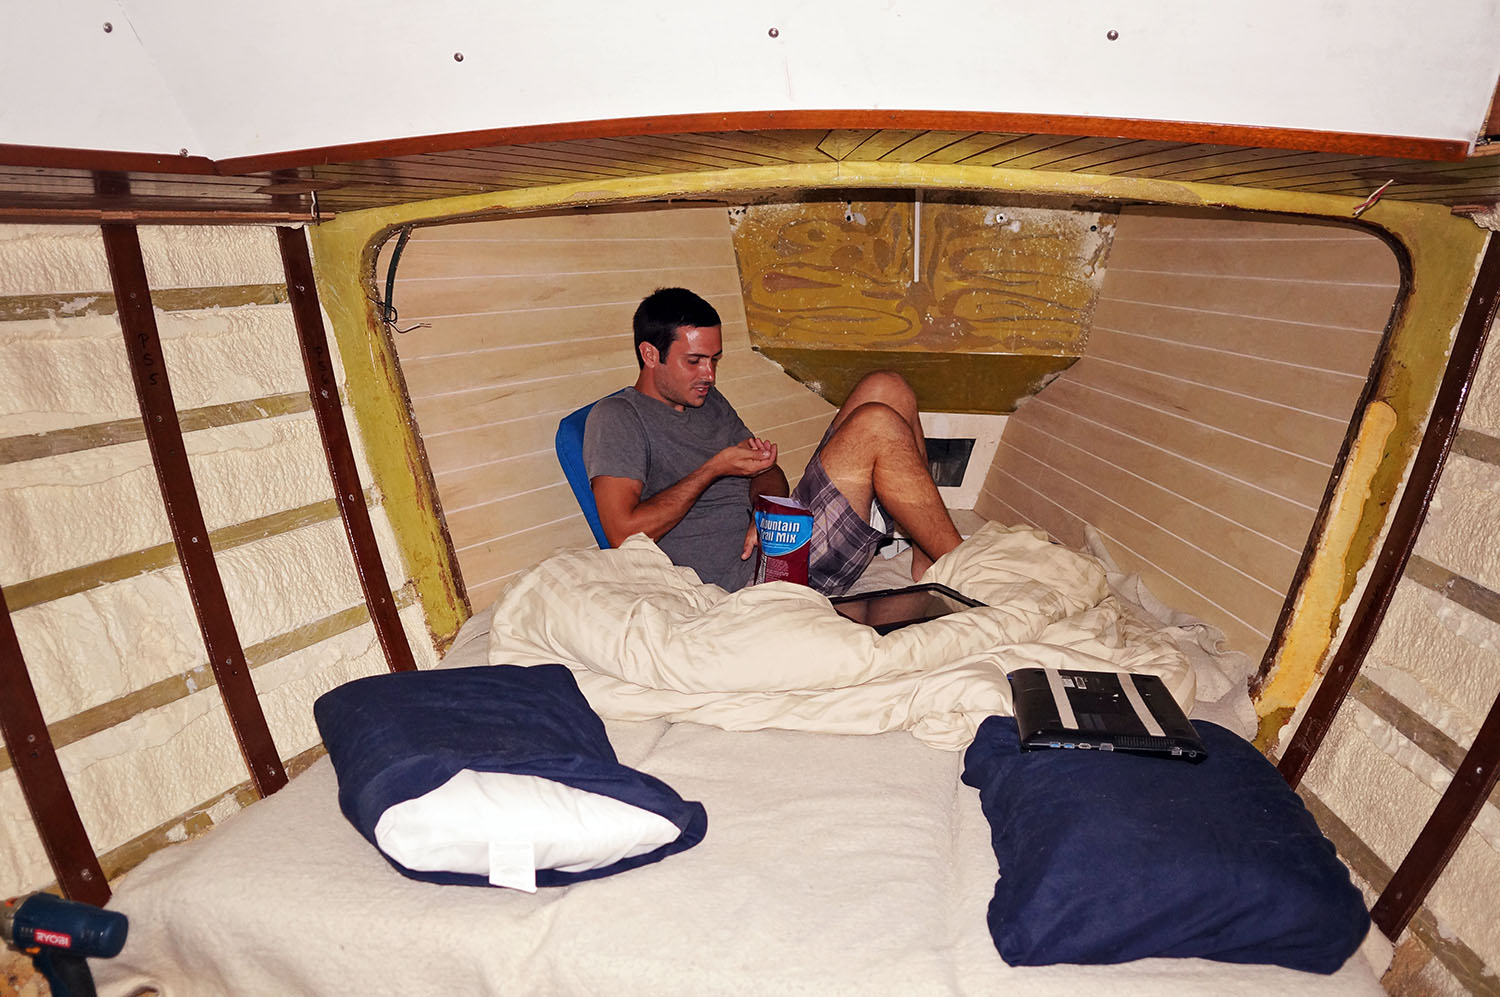
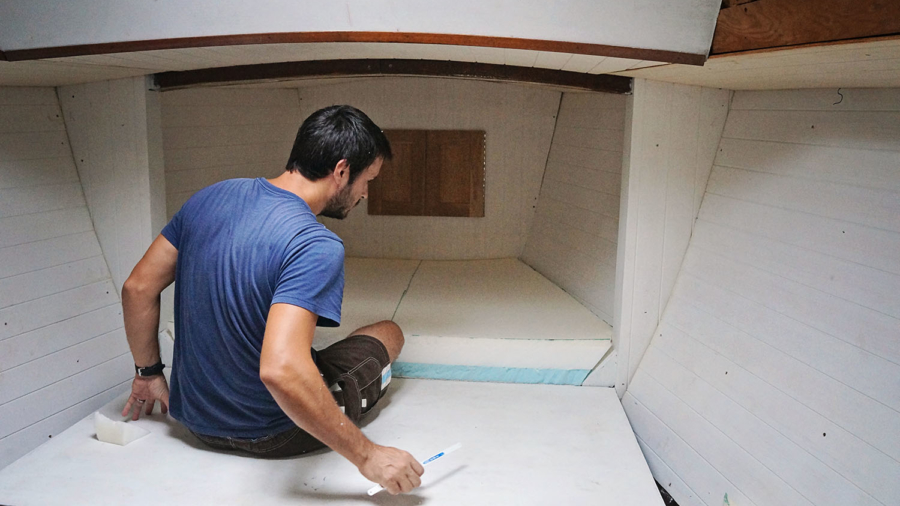
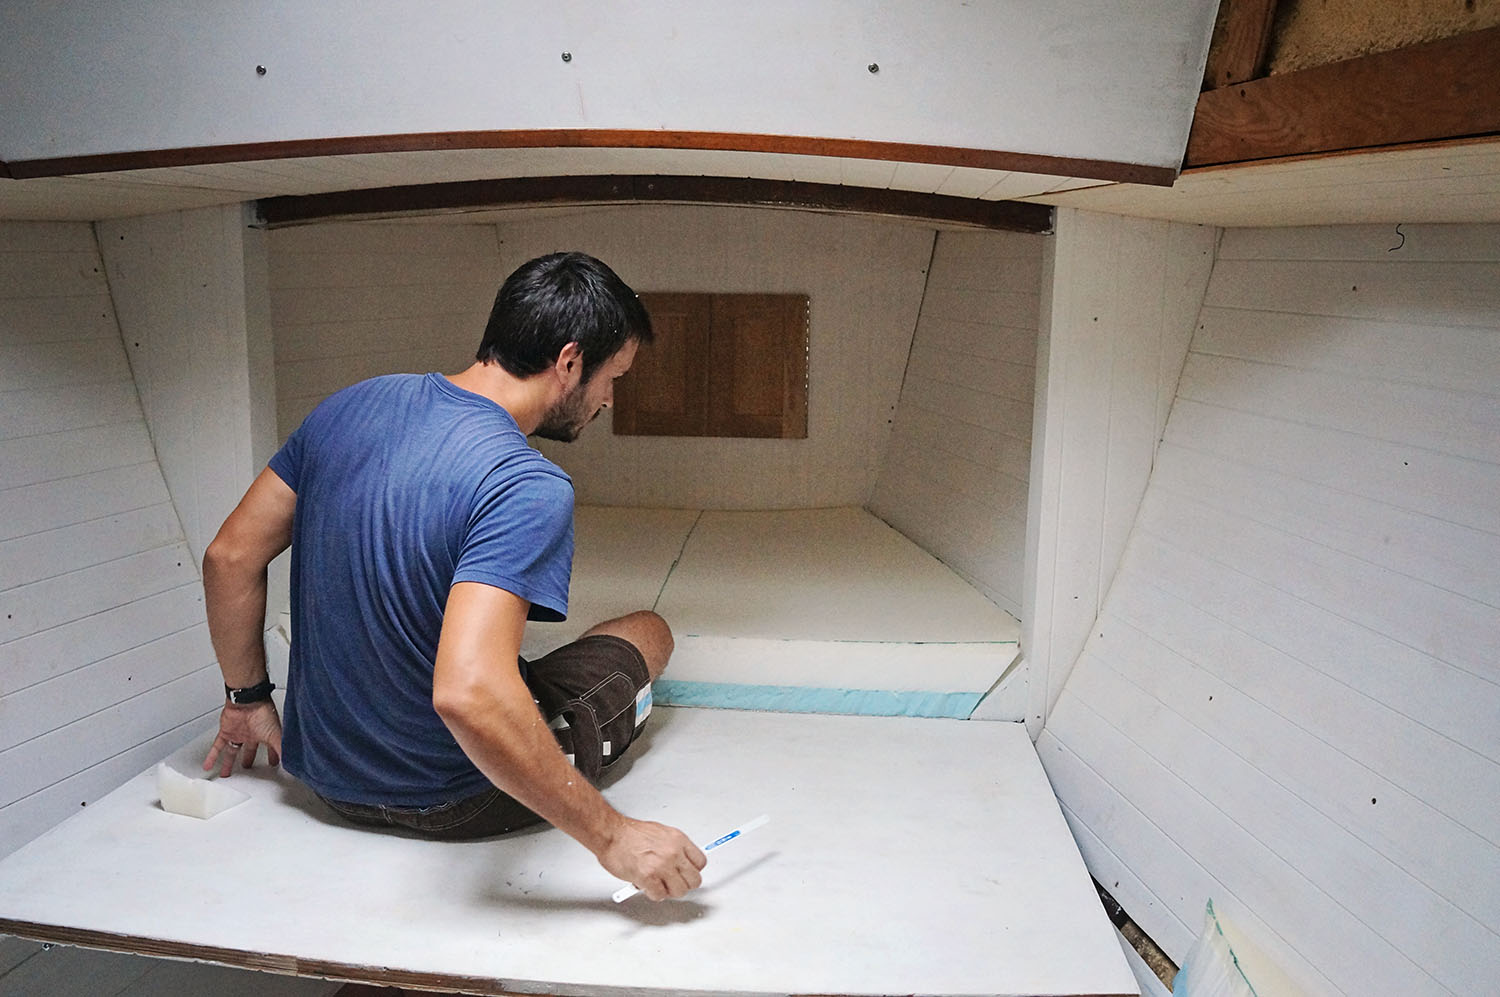
But today, after staring at the two cardboard boxes of foam we’ve been hiding in storage for nearly two weeks now, we were able to bring them back to the boat to make a comfortable sleeping spot for ourselves.  In total, we have three different pieces of foam which together add up to a thickness of 6″.  Two inches of a firm foam on the bottom, three inches of a medium foam in the center, and one inch of a soft pillow topper to rest on top. To elevate the quality of sleep, products like a mattress pad warmer might do so much wonders.

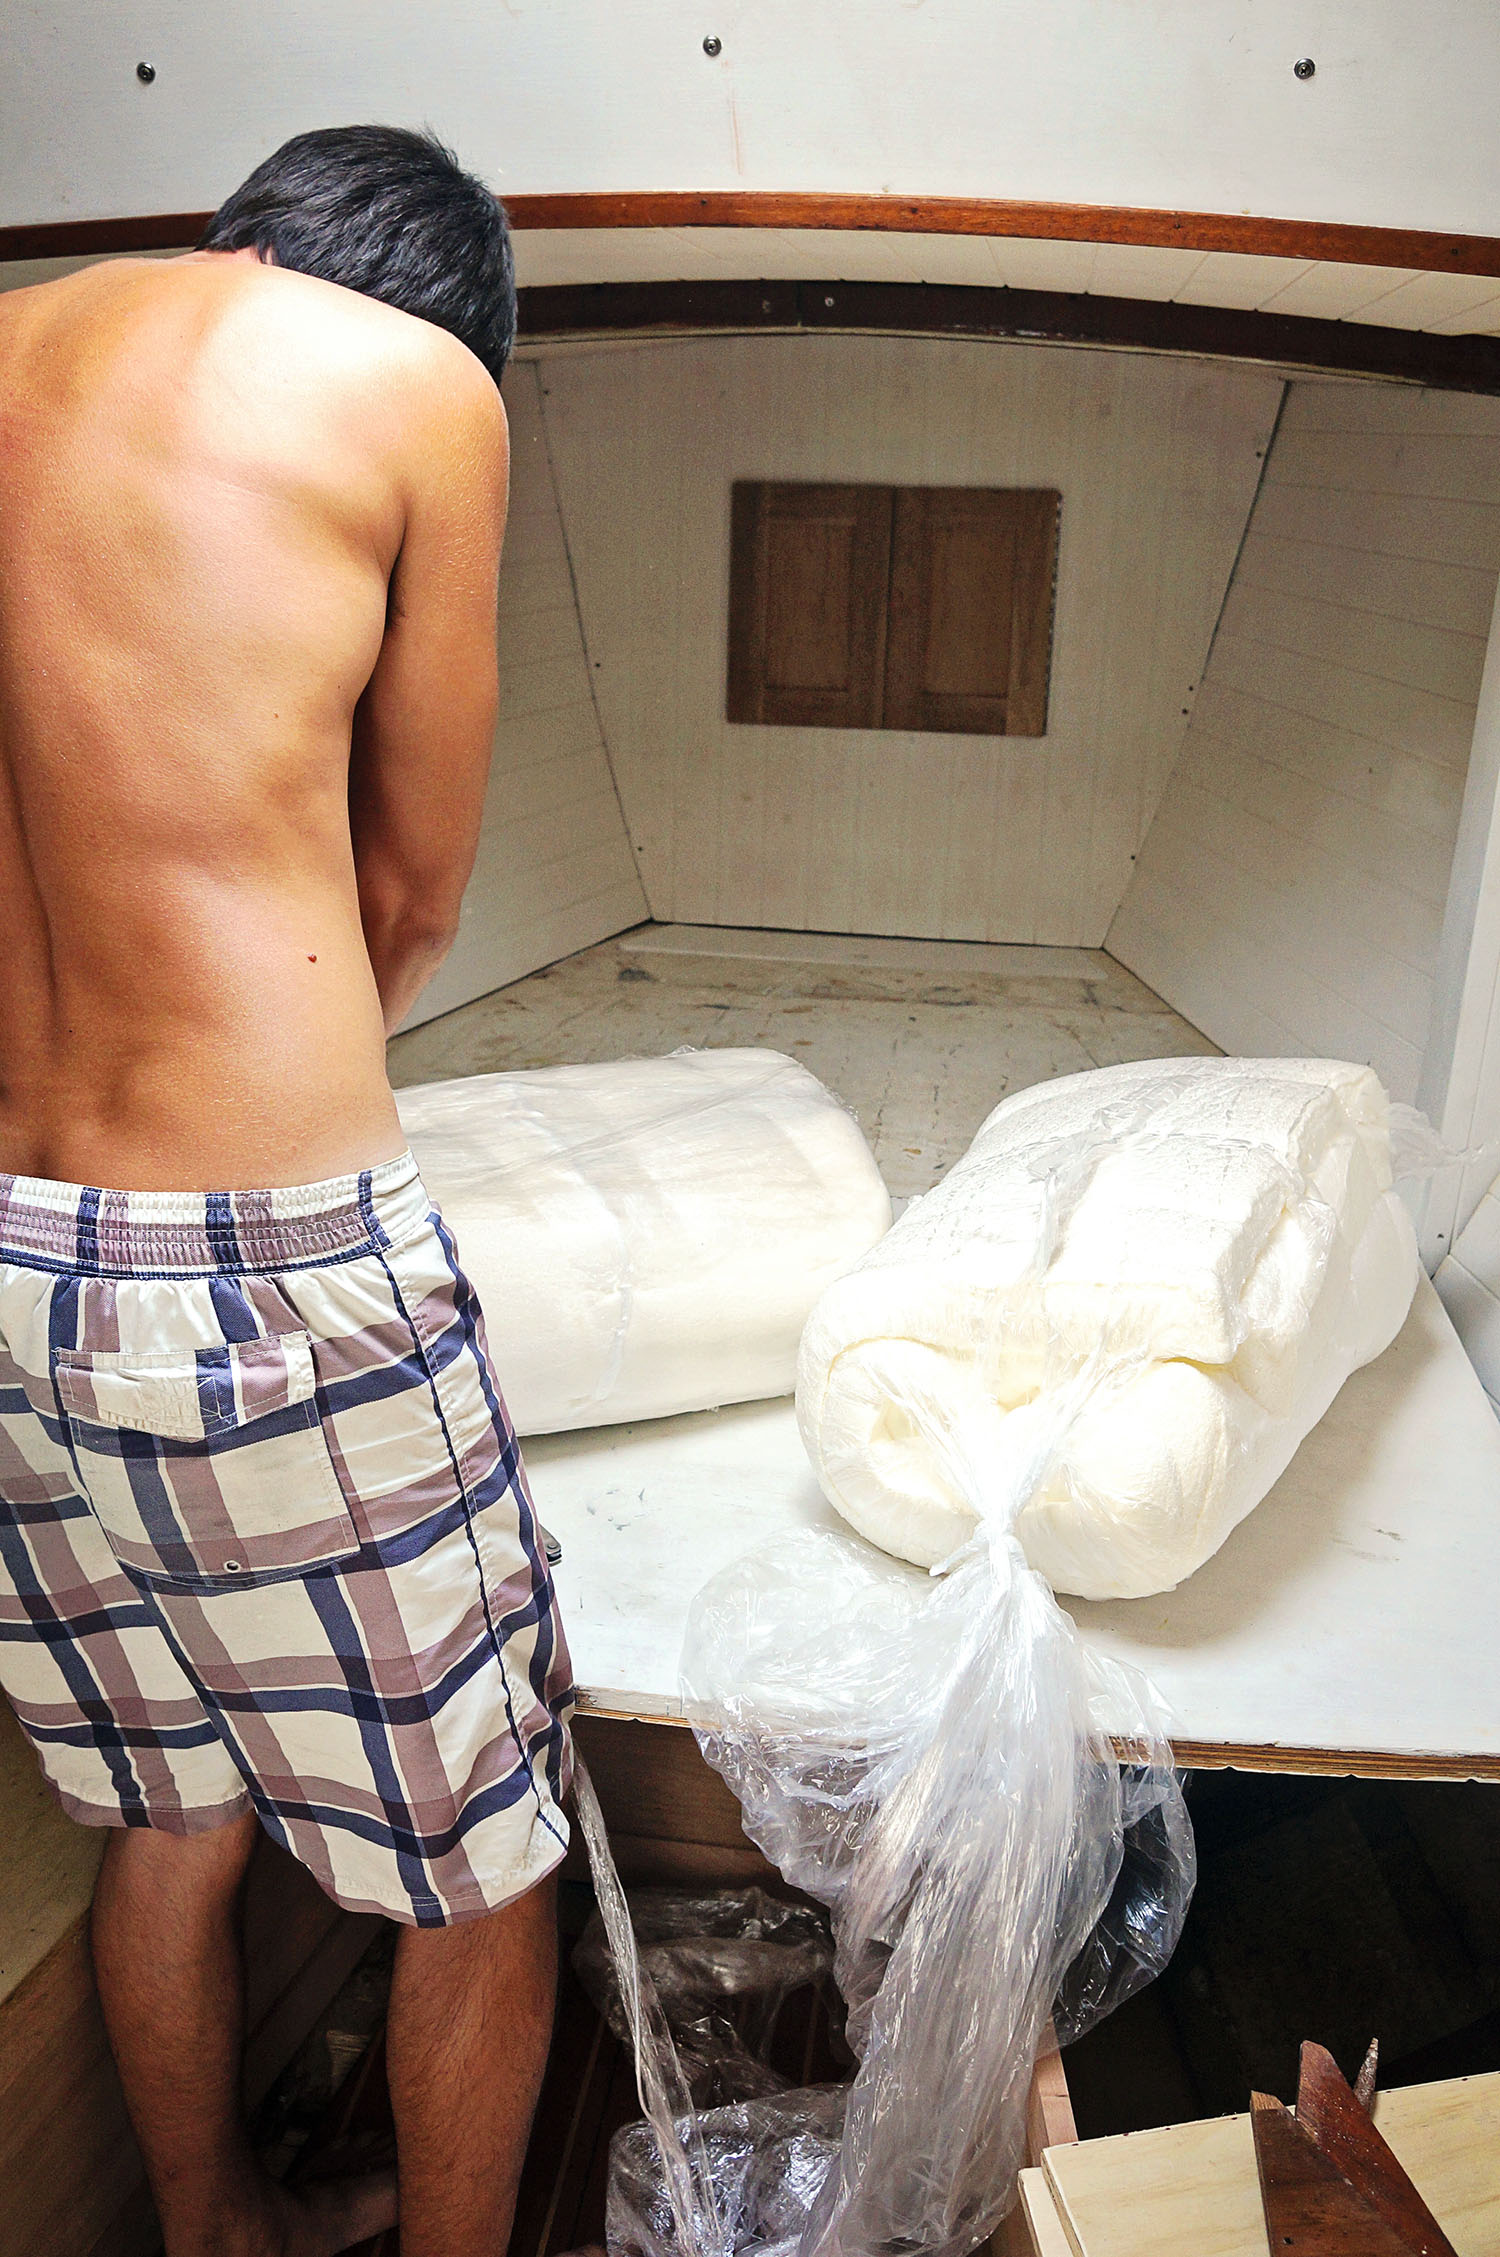
Each of these sheets of foam is 80″x60″, so in order for them to be shipped to us in a somewhat tiny package they were vacuum sealed to suck out as much air as possible. The real fun part was watching them expand as the tightly wound pieces of plastic containing them were cut free.  In mere seconds these tight packages blew up to their full size and we went through the process of trying to neatly layer them on top of each other.  Not without a few swan dives into our new cushy bed first of course, just to test it out.

Since we were trying to get a section of material that was 60″ wide into a space that eventually runs down to 36″, we knew it would not be a smart move to try and perfectly line the foam pieces up and glue them together while parts up them were running up the wall in v-berth.  Spraying together the half of the foam that was able to stick out onto the flat board of the murphy bed, we attached the three pieces together using a spray adhesive from 3M specifically to include foam.  Waiting 5-10 minutes to fully let it dry we rotated the foam 180 degrees to line up and glue the other side.

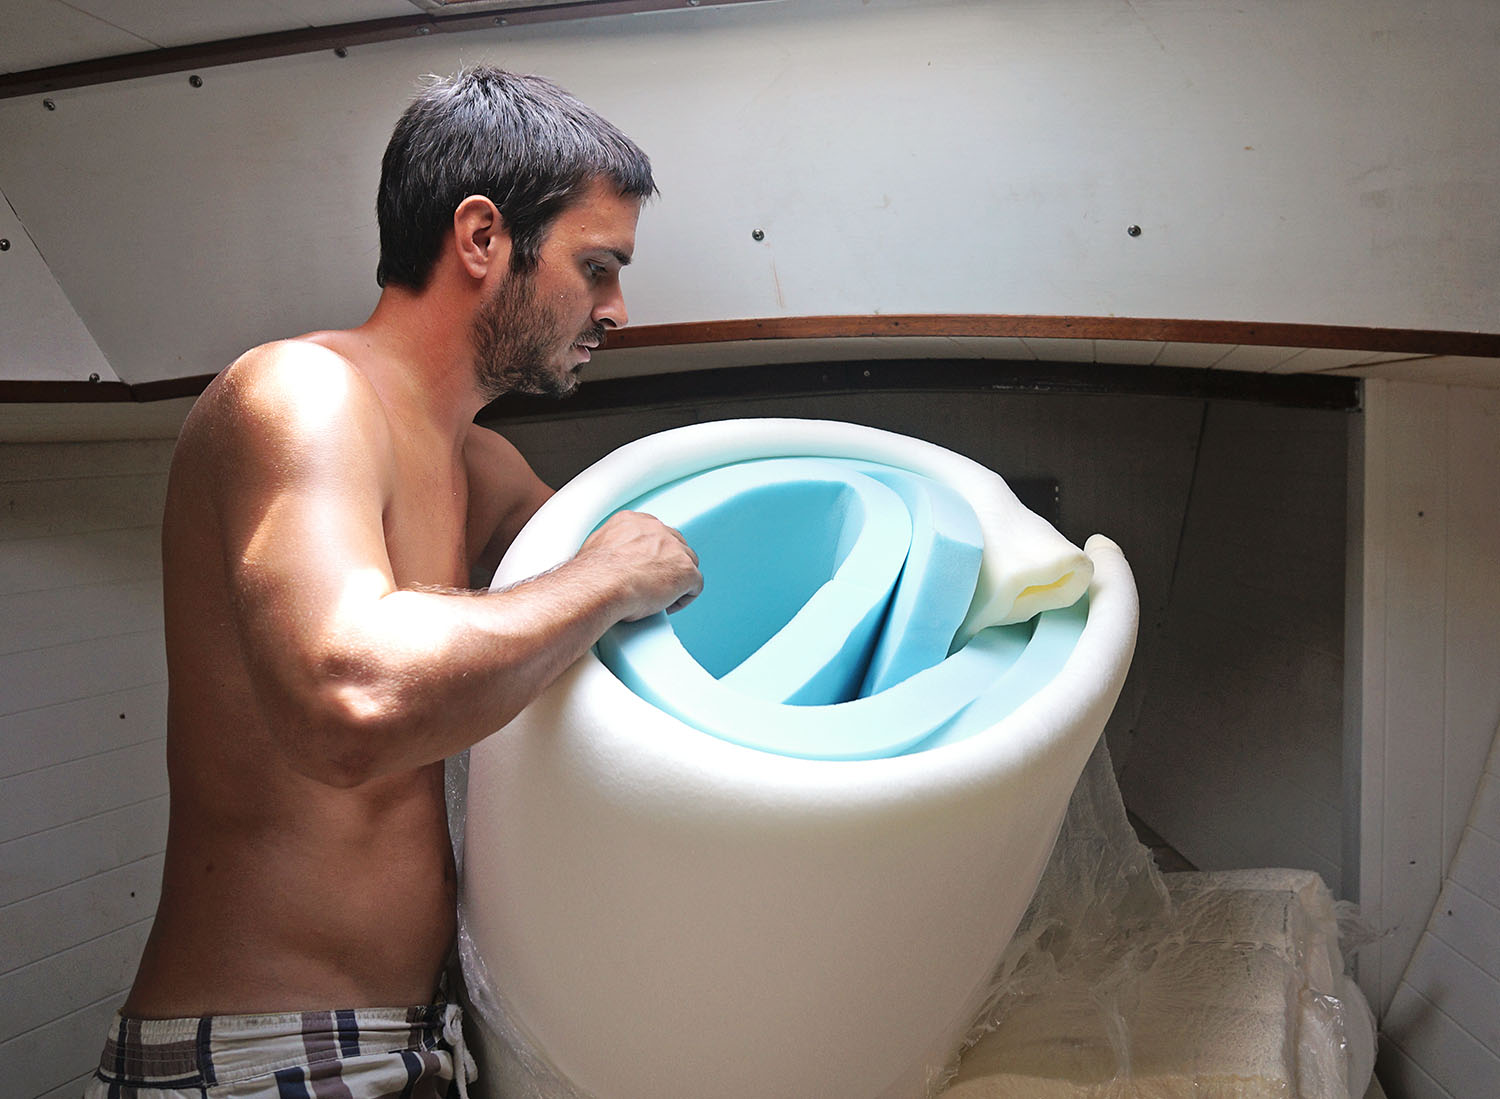
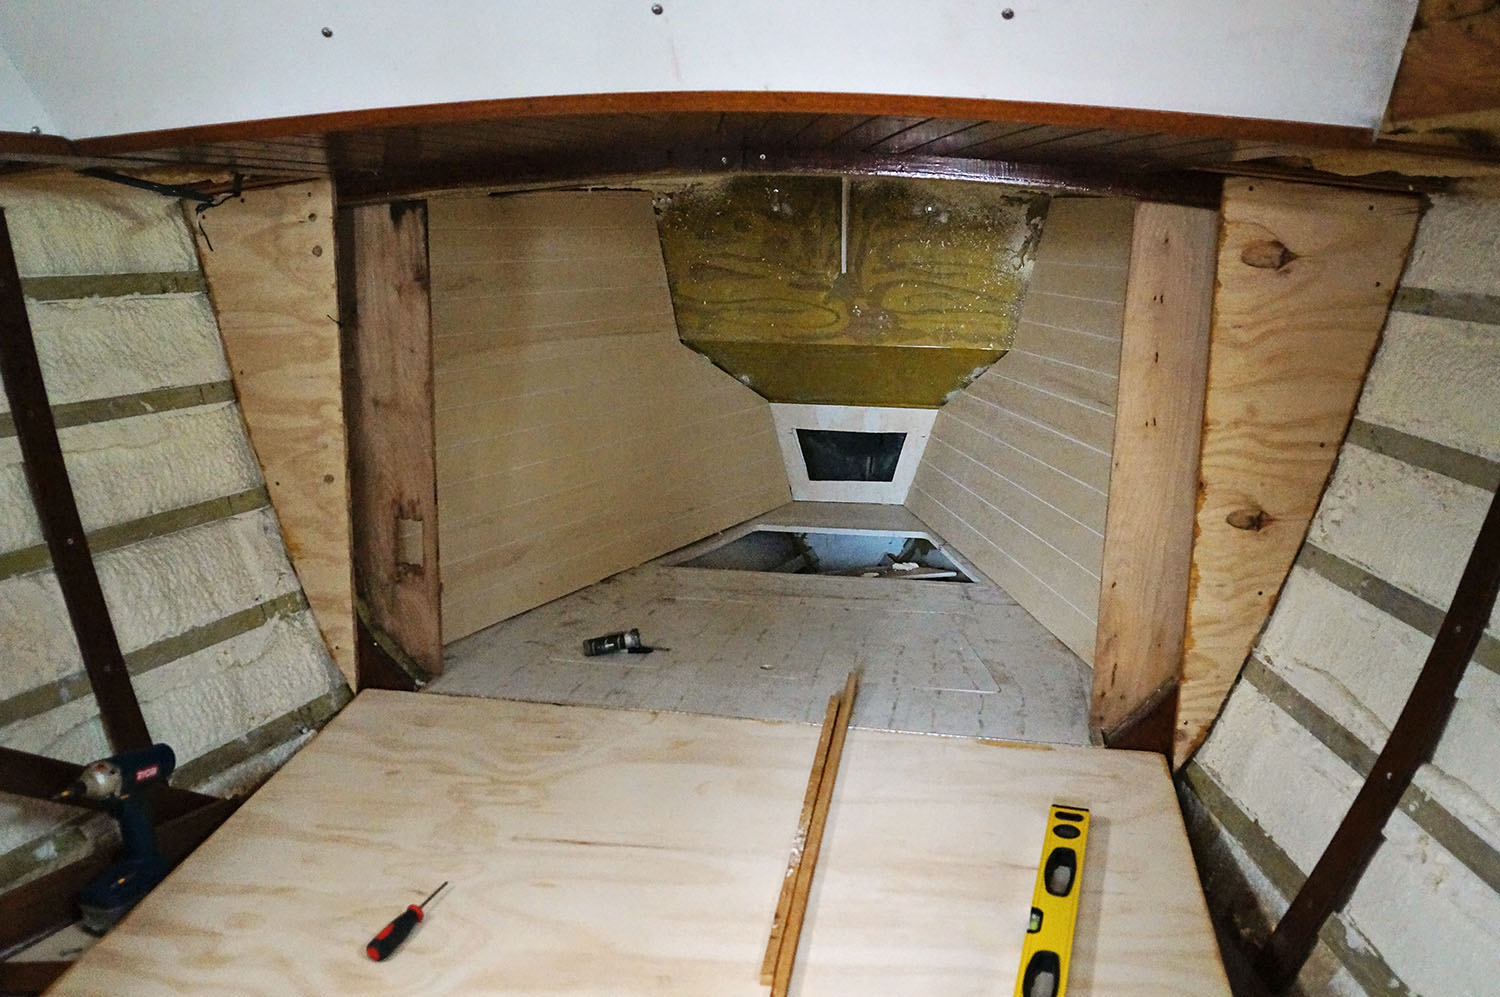
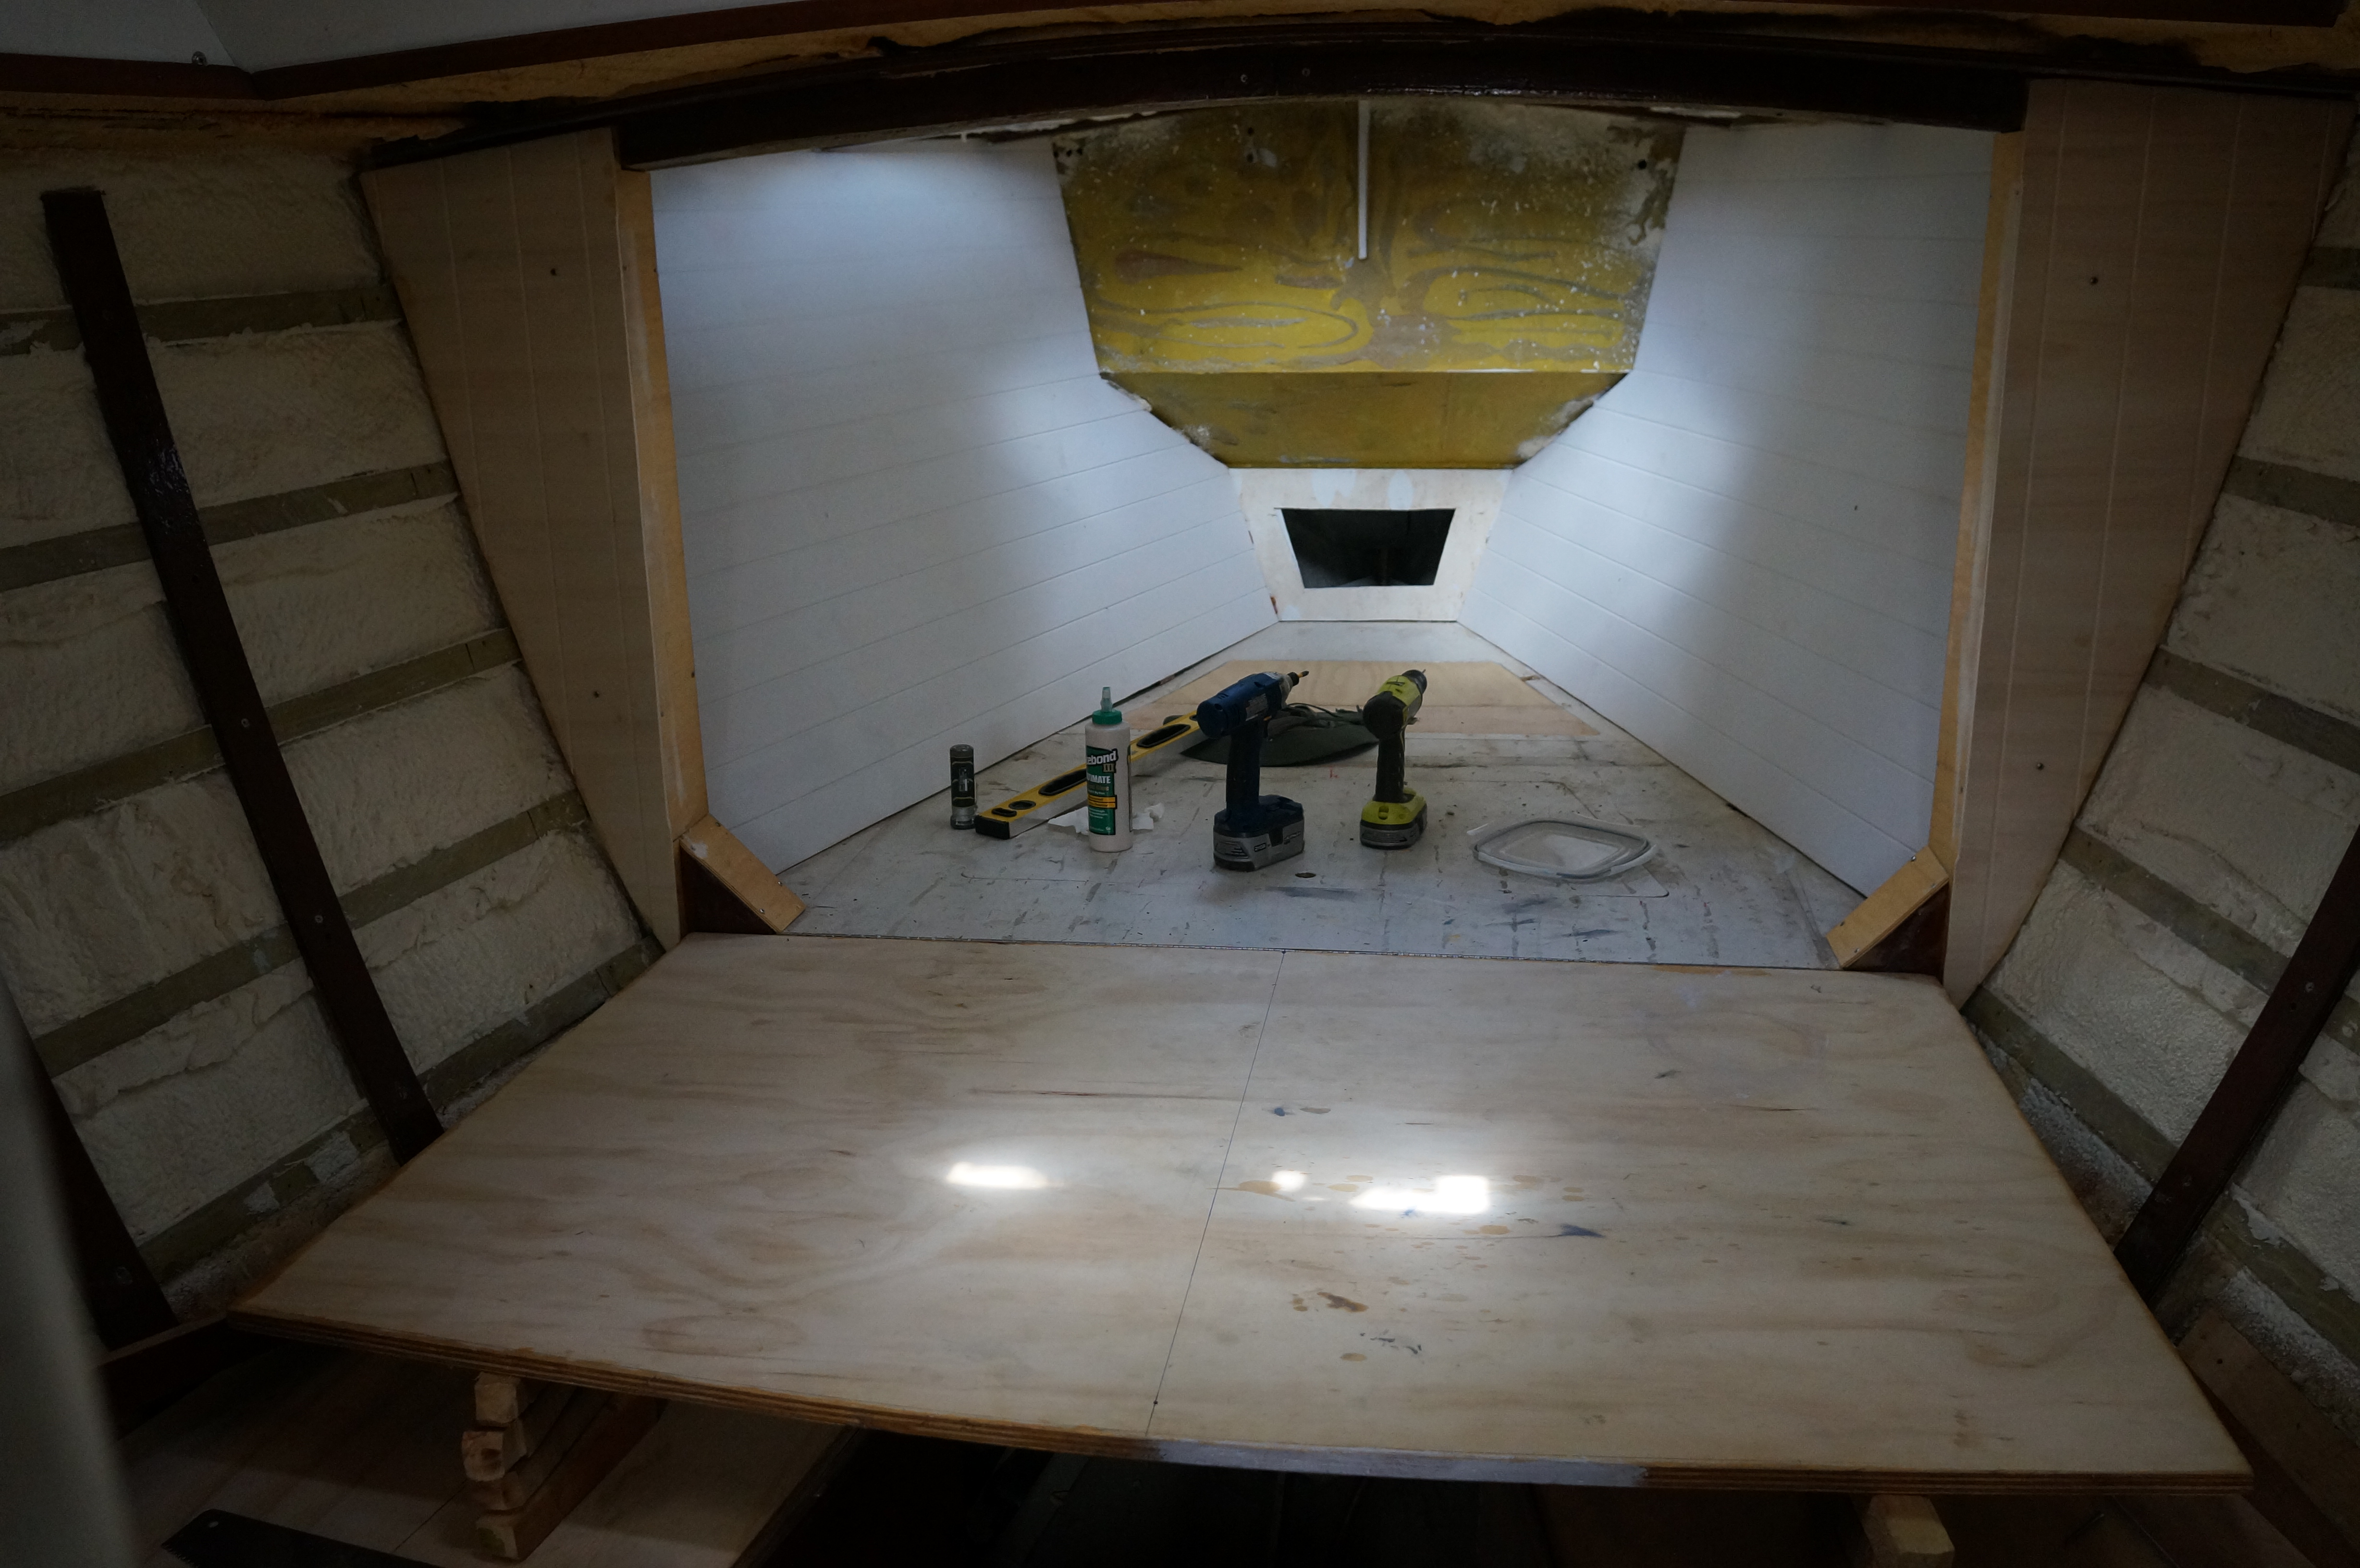
The only thing left to do now was to cut them into place.  We couldn’t leave it as one big piece overall since when we go to flip up the murphy bed, the piece that sits on the ‘wall’ would not fold well into the area since the foam is so thick. Measuring from the tip of the v-berth up to the hinge where the wall folds up and down, we made one cut horizontally to give us the two pieces.  Since the wall of the murphy bed is so wide now, that piece was all set.  Using a sharpie to mark the angle of the v-berth, Matt then used the hacksaw to shave off the edges of the second piece and get it to fit snug into the v-berth.

For the time being the cushions will be left uncovered with fabric as we didn’t like what we had originally ordered online for them.  A clearance gray/silver fabric we thought was Brisa, but turned out to be some kind of off brand pleather that does not look very breathable and we think will get way too hot in the heat of the tropics.  So they’ll just get covered with our bed sheets for now and hope they stick together until we can encase them in a fabric we actually like.  I have to admit, I don’t mind putting off my sewing projects just a little bit longer.

Tonight I am looking forward to the best night of sleep I’ll have had in about a month and a half, now having six inches of pure heaven underneath me.  No more stiff as a board sport-a-seats or cockpit cushions so thin you can feel the plywood underneath us.  All we need now is a finished galley (and possibly lights) and I think we can live comfortably on this boat.

opening foam from package

opening foam cushions

foam cushions expanding

resting on new foam

half of v-berth cushion installed

Eurolight boards in v-berth

Euroliting the Ceiling

Friday July 10, 2015

walls in vberth

So much work and so little to show for it.  At least that’s the way it feels lately.  Whenever I post photos on our Facebook page of something new that’s gone up or the difference from when we moved on her a month ago, all of you have been extremely encouraging by telling how nice everything is looking and how far we’ve come along. I think that Matt and I forget that the demolition stage is very quick and easy, yet the rebuild takes a lot more time.  A LOT.

I remember back when we had either first bought the boat or were debating it and Matt showed me the website of a guy that was doing something similar…ripping out the whole interior and starting from scratch, just like we are.  This guy had all day every day to devote to his boat as well and we thought we’d be on the same kind of schedule as him for completing projects.  Framing out v-berth?  Bam, 1 day.  Building new cabinets for the salon?  Bam, 1 week.

Two things we have learned since then.  A. We are not boat builders.  Or carpenters.  This is all new for us and although we hope we get the hang of it as we go along and things will eventually run much more smoothly and quickly, we’re still in the learning stages right now.  And B. We’re making our job infinitely harder by trying to make an ‘intricate’ interior.  If it was just installing plain ‘ol plywood we’d be much further along by now.  But instead we had to get fancy. Oh, and having an aluminum boat requires extra steps. Let me explain.

For the ceiling (walls) of the boat we are using a 1/4″ marine plywood.  After doing some shopping around we landed on something called Eurolite which, like it’s name implies, is an extremely light wood made from a European poplar.  While buying a sheet of 3/4″ marine plywood from a shop in West Palm Beach they gave us a sample of it to take home and after applying an epoxy coat to one side we were confident that it would still give us the strength we needed as well. We’ve ordered 10 4×8 sheets to start at about the cost of $34/sheet.  Keeping all the extras stored in a 10×10 unit we’ve had to rent up the street, we’ll bring one back at a time and begin the fun on it.

As part of our ‘intricate’ interior we are routing v-grooves into the plywood spaced 3 1/4″ apart.  Between marking the plywood with a pen on each end, clamping a straight edge on it, routing, and then sanding the grooves, each board takes about 2 hours to complete. Once the sheet is routed and sanded go into the boat and make a template of the area we want by cutting and gluing together small 1/4″ pieces of wood that we then trace onto the Eurolite.  Using our jigsaw to cut out the traced pattern we bring it inside to fit, and usually have to make a few adjustments before it fits into place and we can screw it into the furring strips.

Once we’re satisfied that the pieces fit we have to take them out again where the back side and edges are epoxied to prevent any possible condensation around the aluminum frame from rotting the wood. So far we only have the two boards in for the v-berth, but we’ve also spent a lot of time working to cap and enclose the area that the murphy bed folds up into, separating the v-berth from the forward salon.

One of the last projects we’ve been working on lately has been replacing the plywood that folds down for the murphy bed.  While we’re redoing the area we decided to extend the width of the area that folds down and extra 4″ on each side, which actually gives us the space of a queen bed now.  Before we’d be laying on our backs with our shoulders basically touching, but these extra few inches have made a world of difference. We can actually spread out without bumping into each other anymore.  I don’t think we’ve had this much space in a bed since we’ve lived on land and we’ve been sleeping soooo much better already.

Eurolight boards in v-berth Matt in murphy bed taking out overhead Jessica & Meike v-berth Matt working on caps paneled v-berthAnd once again Georgie puts up with us and our work.  If she’s not hiding somewhere in the crammed quarter berth she’s out laying on the sport-a-seats that we keep in the pilot house until it’s time to bring them to bed at night to use as our mattress.

In a quick note on our friends, they are all gone now, leaving us to fend for ourselves for company.  Meike and Sebastian are spending a few days touring Miami before flying back to Germany and Mark and Hanna are on the Gulf side of Florida positioning themselves for a jump down to Guatemala.  Before they left though we were able to get Hanna her birthday gift of an American meal.  Corn dogs and Budweiser.  What’s more American than that?
Georgie on a sport-a-seat Hanna

drill

Installing the Furring Strips

Wednesday July 1, 2015

drill

This post is going to be short and sweet, because even though it’s been about a week since we’ve done the spray foam, not much has happened on the boat.  Not much of a noticeable difference anyway.  Some of it has to do with weather because even though I had epoxied about six boards to use as furring strips that was nowhere near enough, and these daily rain showers keep throwing a wrench in the work.  It seems like we have to call off work every day around 2:00 lately when the storms come rolling in.

We did eventually get them installed to the forward salon and v-berth though, and these are the steps we took.  After the boards were expoxied on both sides and then given a second coat just to make sure no water gets in and causes them to rot, we brought them in the boat and cut them down to size to run vertical against the horizontal aluminum frame. Taking just a regular drill bit we’d go through the wood to make a hole and just put a dent in the frame.  Then switching drills, we’d use a drill and tap bit on the aluminum frame to dig the hole all the way through and prepare it for the thread of the screws.

Coating the stainless steel 10/24 1″ machine screws in Tef-Gel to prevent corrosion, each board then gets screwed in.  I would say this was an easy step that we only had to repeat about 25 times, but that pesky foam would sometimes get in the way of the boards and we’d have to take out the Dremmel once more to hack away at corners.  Don’t worry, we wore safety goggles for this.  After two days of work we had finally finished and now have an area that looks like a bird’s nest!

On the days we couldn’t work on the furring strips, Matt decided to start taking apart the seats for the forward settee.  We figured that tracing the existing boards on to new plywood would be a heck of a lot easier than trying to get the angles for a new one just right.  Using a marine grade 3/4″ plywood we’ve now cut new tops for the settees and one of the projects in the next few weeks will be making the face for them out of cherry.

Georgie has been taking all this work around her pretty well and either spends her afternoons lounging on the floor of the pilot house or hunkered down in the quarter berth between all our crap. At least she still gets her morning walks up to the patio while we have our breakfast.

Things are starting to move along and I think in the next few weeks, everything is going to look quite different around here!

first furring strip installed

cutting foam with Dremmel

removing settee

Georgie in mess

debris of forward salon

furring strips