7.30.16 (7)

Prepping for Paint

It never fails that as soon as we get a few walls new up, and I get excited and gung-ho to get a  nice white coat of paint on them, only to find that project is going to be pushed back about a week for other things first.  Not only that, it’s usually for one of my least favorite projects on earth.  Using filler, and then sanding that filler down. Some experts like top local exerior painters New Haven, can do an excellent job in this respect. However, it is fun to work with adhesive, smooth spreading and quality paints like evercoat ez ultra lite.

For all of our areas that are not overhead panels, basically meaning the ceiling, we would like them permanently fixed in the corners instead of solely using trim, and so we’v been stuffing them with an epoxy filler which then gets sanded down smooth.  And who gets to sand down these areas with peaks so hard and sharp they’ll slice open your finger if your hand skips off the sandpaper?  Ding ding ding, this girl here! However, before going through this process, it is important for customers to know How Much Does It Cost To Paint A Ceiling ?

Ok, so this round in the pilot house wasn’t so bad because I was able to use  the palm sander for a good portion of it, and there were only a few corners that needed to be done by hand.  A Sharpie wrapped in sandpaper helped to do the trick in those areas, and for once I was left asking, “That was it?”.

Remember last fall when I had the horrible task of sanding all the seams inside the head?  At least these areas, for the most part, are a little easier to reach.

Taking the palm sander to the remaining boards to smooth down the surface for the initial priming, the job actually went by pretty quickly.  Sure there was another day added so we could go through and add a second filler that had better sanding qualities, covering the screw holes and any seams that may have had indents from the first round.  After about three days, I was let loose with my paint brush and hired Cincinnati Interior painters to finish the job.

7.30.16 (1)

7.30.16 (2)

7.30.16 (3)

7.30.16 (4)

It was a long day, but I was able to get two coats of primer on all these boards in one work day.  Notice I say ‘work day’ because I will still throw in the towel at 5 pm even there is plenty of daylight left for working later.  I would say the next day where I did a hand sanding, as to not take of everything I’d just done with the palm sander, as well as put a coat of paint on a good day too, but I was suffering a massive wine hangover.  A side story that will be saved for a later post, but Will and Cat from Monday Never met up with us at the patio while they got ready to sell their boat Paradox, and after the few glasses of wine that Cat and I had, combined with the insufferable heat, and we both had headaches until 5 pm the next day.

In any sense, I kept pushing past the fact that I thought my skull was going to rip out of my head, because I was determined to get an actual coat of paint on that day.  The hand sanding took me from breakfast until a late lunch, and the painting was much easier.  Our semi-gloss Valspar just glides right on, although I do have to be careful about my brush strokes.

All this work did take me about an hour past my quitting time, but it was completely worth it.  Look at the difference it’s made in this space.  Pretty soon we’ll have the walls up on the port side as well, and once I’m forced to go through the hassle of filler and sanding once more, those too will be painted.

Gahhhh, I’m so excited to see how all this is coming together!

7.30.16 (6)

7.30.16 (7)

Jamel getting raised by crane

Changes to the Top and Bottom

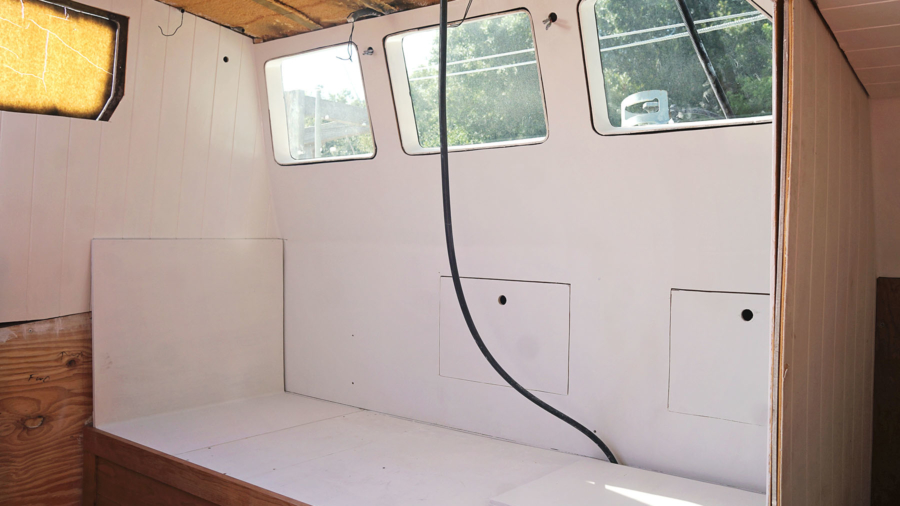
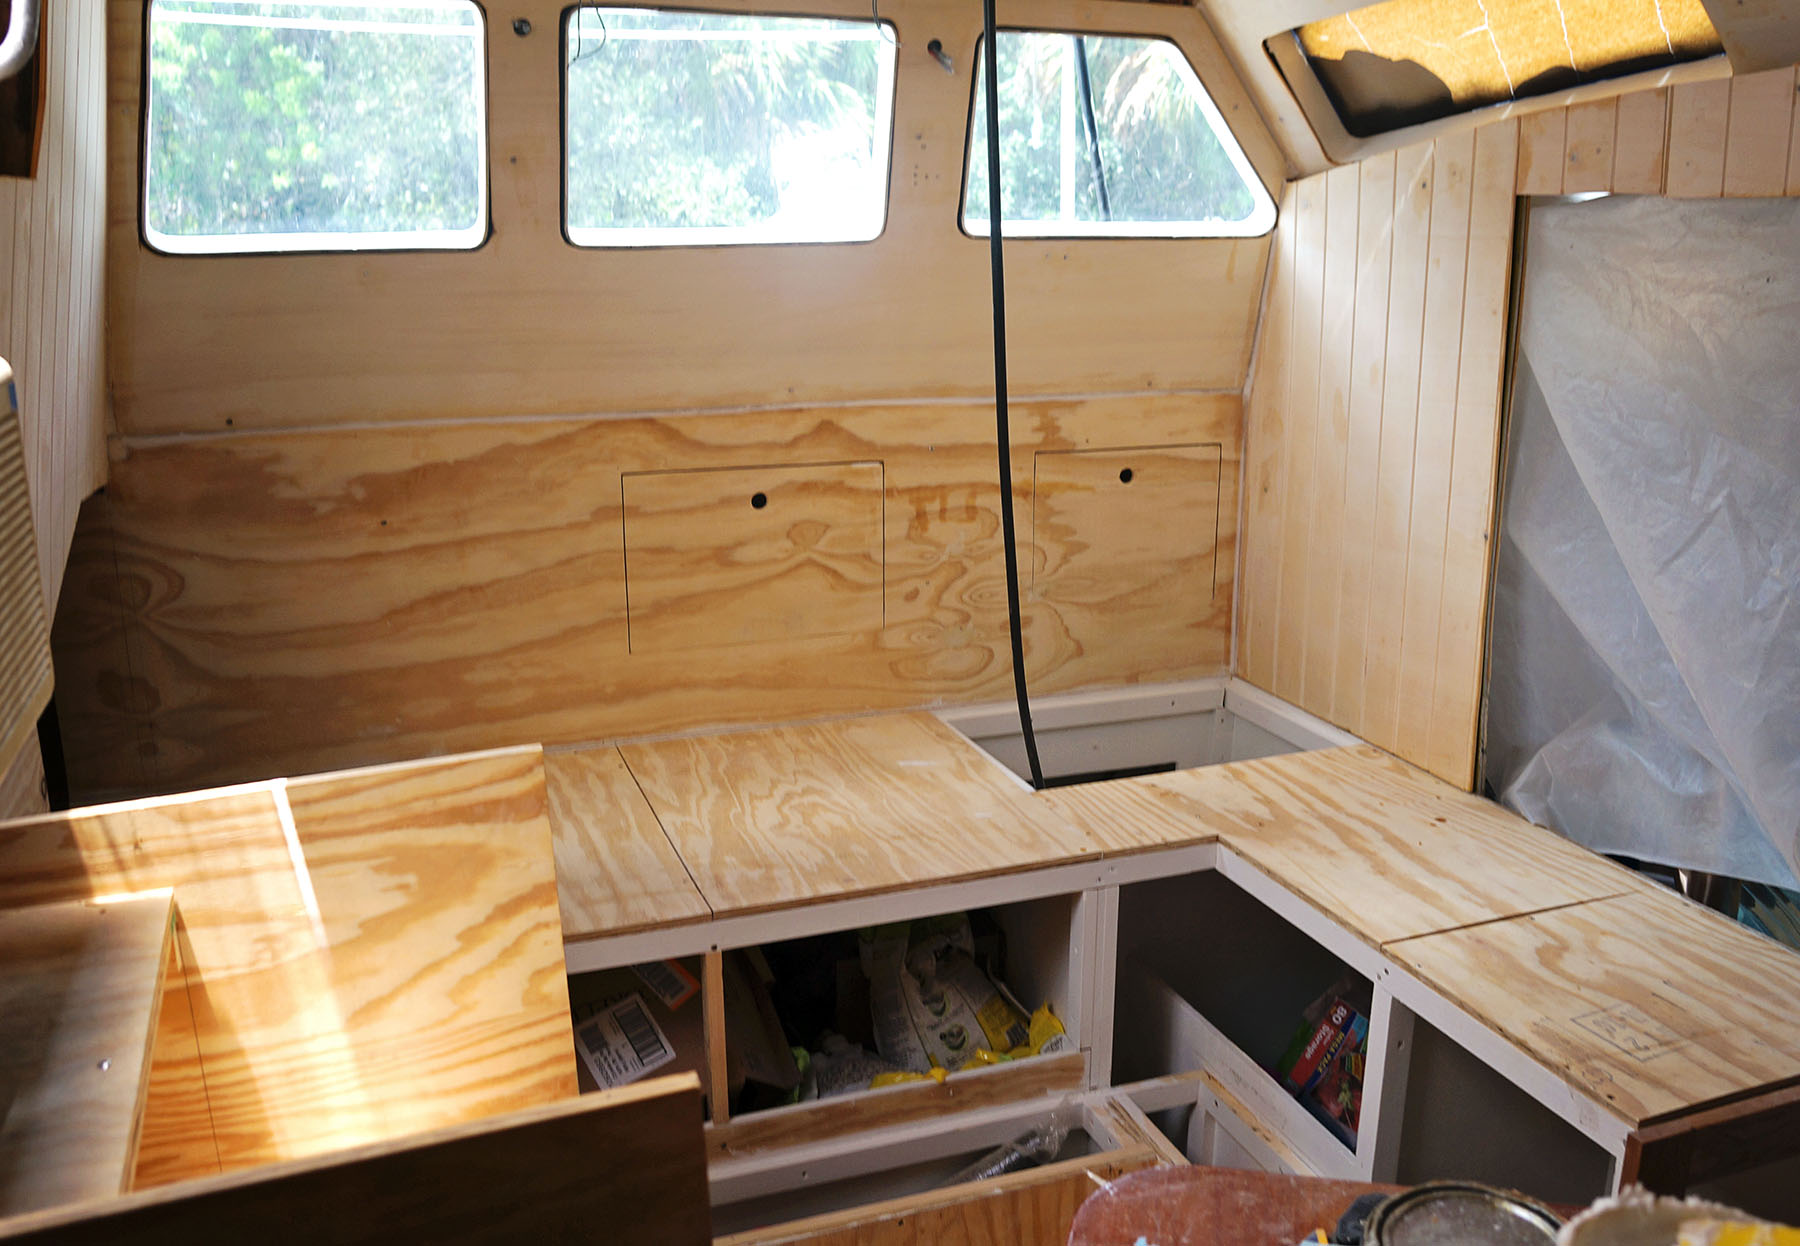
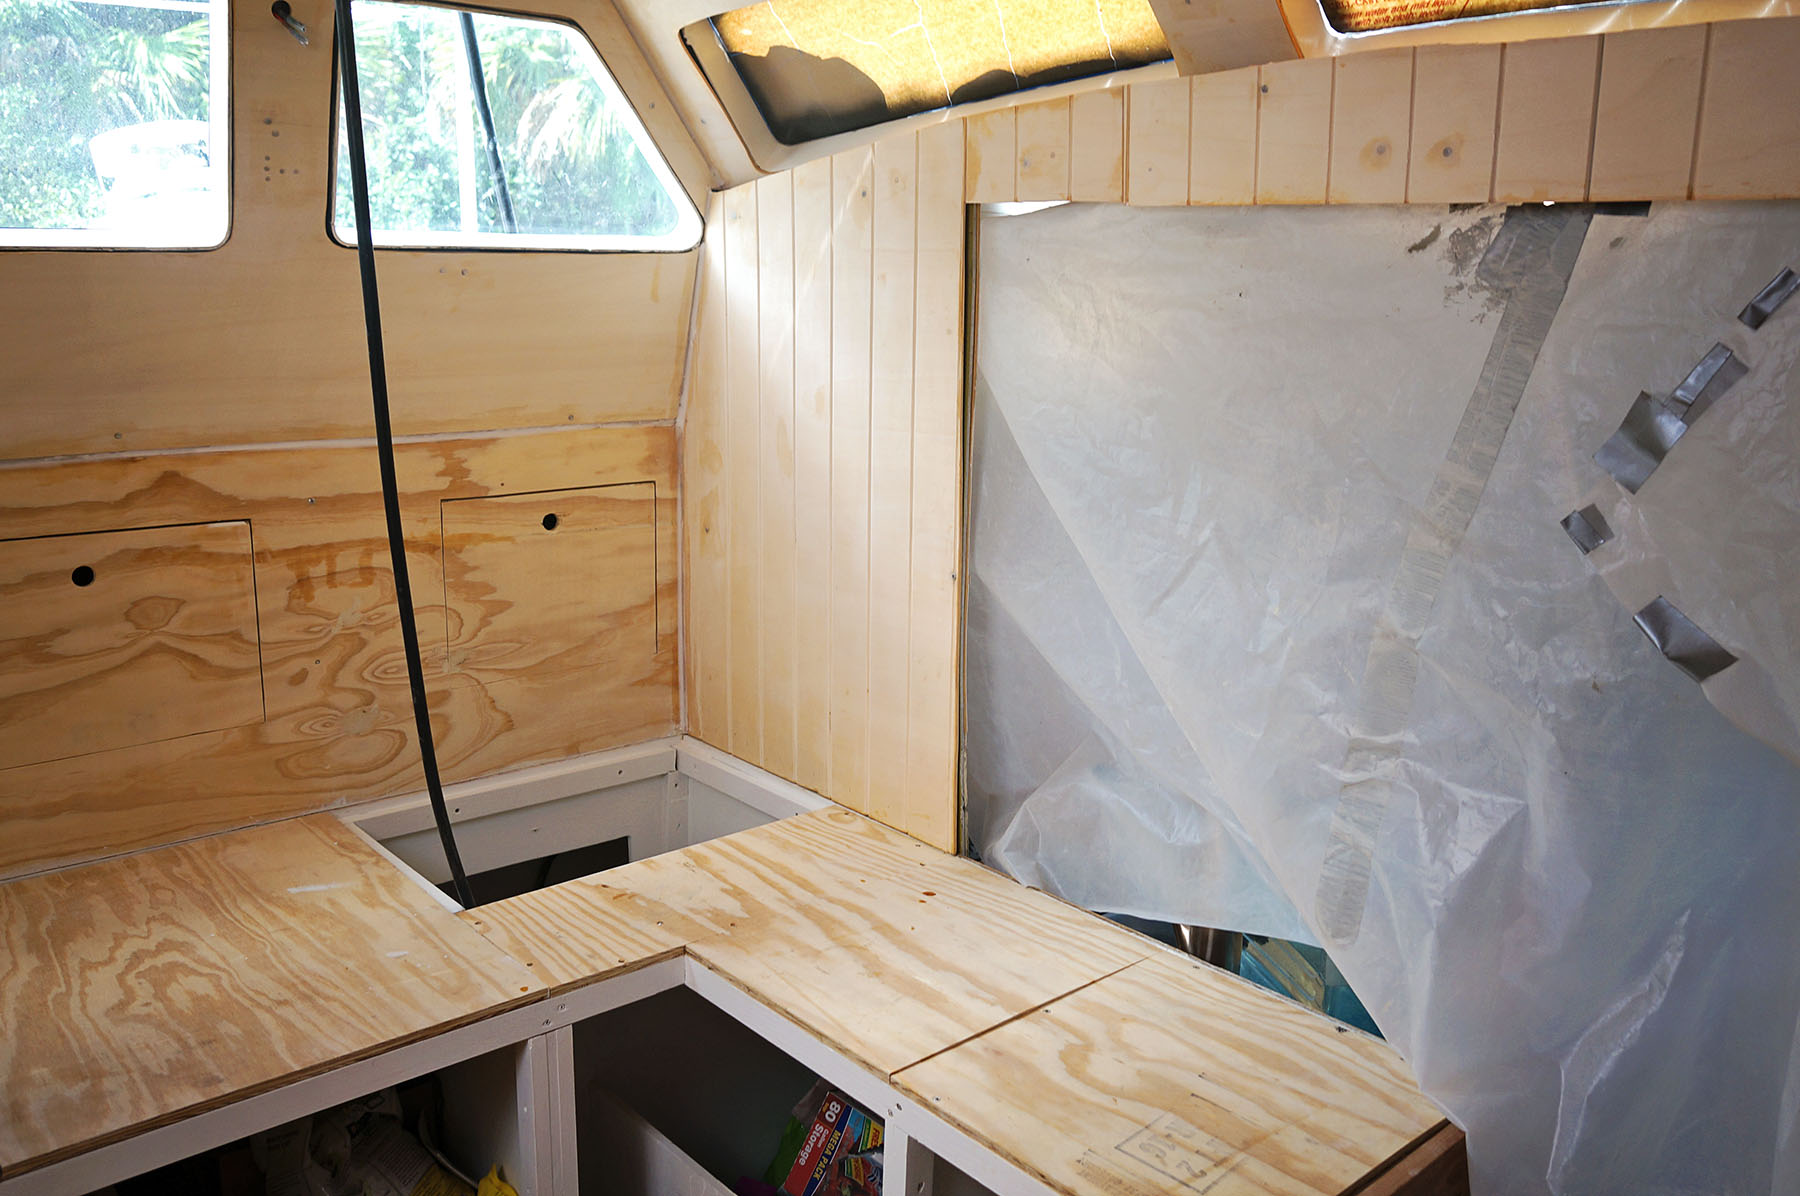
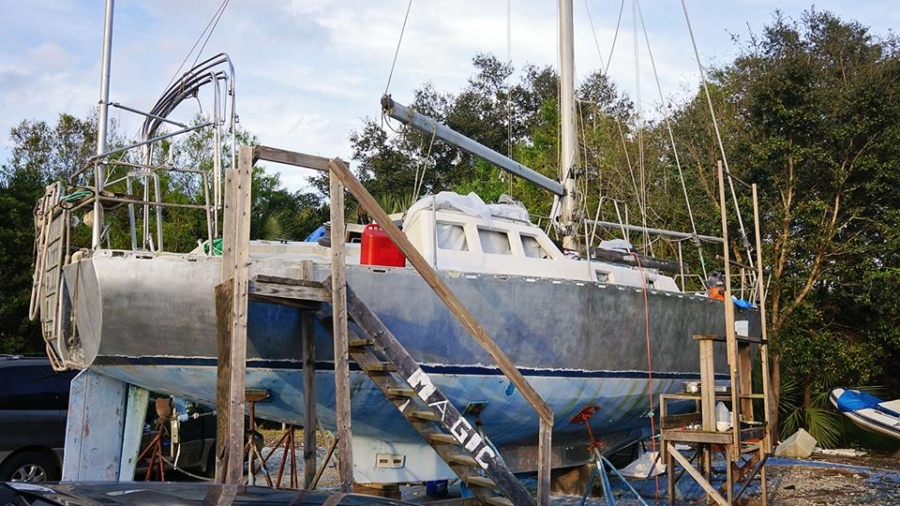
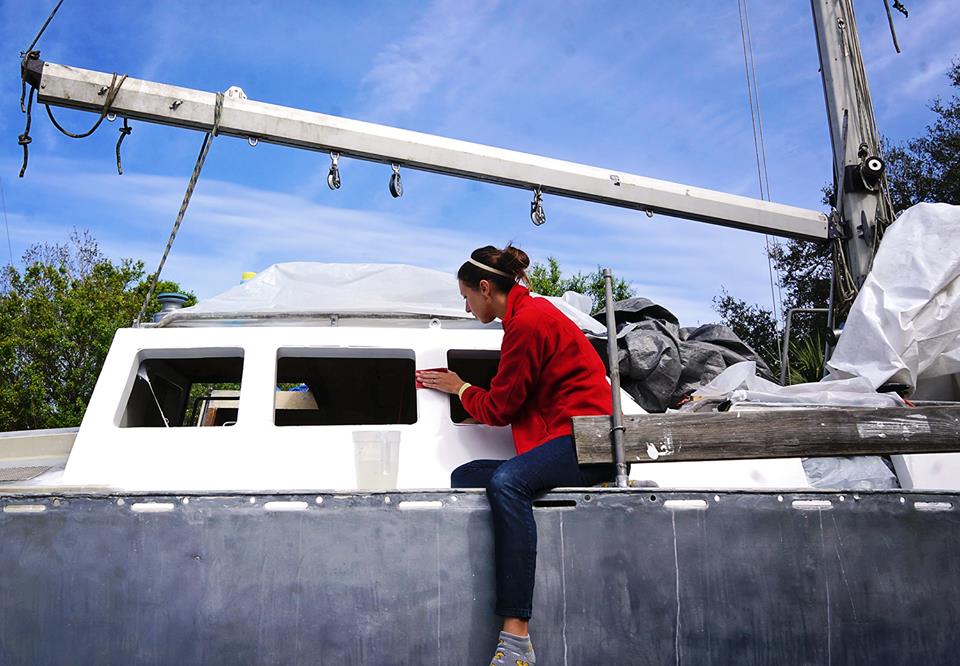
Everything seems to be about the exterior of our boat right now, but that is ok.  We’d prefer to sit outside in the sun when it is merely 82 degrees instead of waiting until August when it is trying to break 95.  Most of the work on our interior has come to a screatching halt, but we figure we’ll be able to pick it back up in a month or so, our deck covered by a sun shade and two 5000 BTU air conditioners blowing cool air onto us as we work to complete all the projects inside.

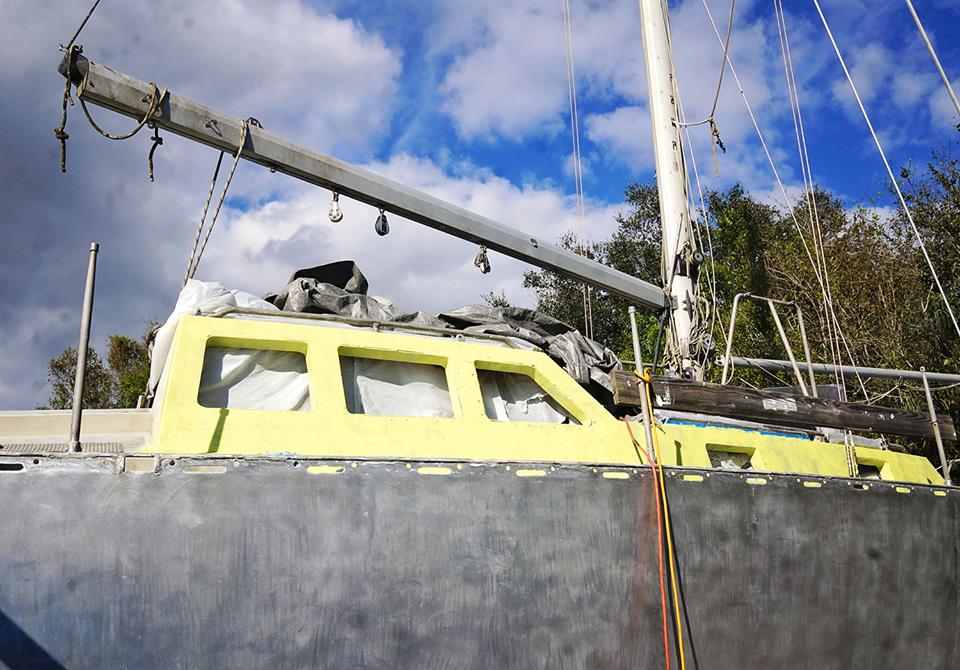
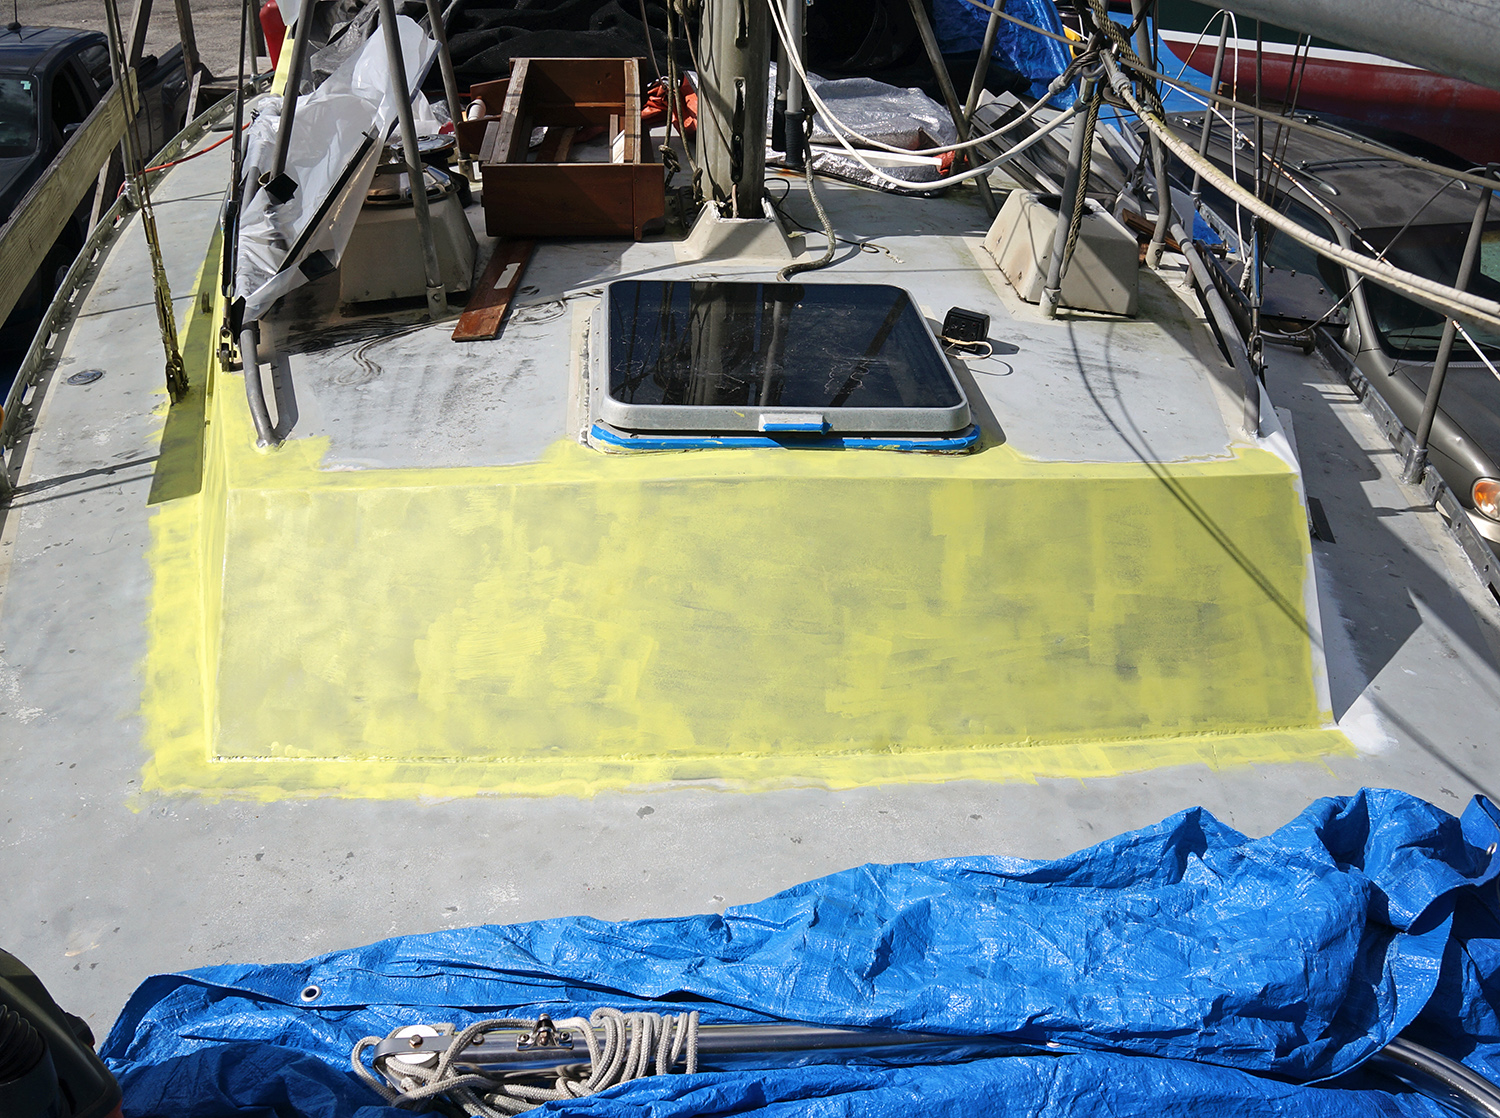
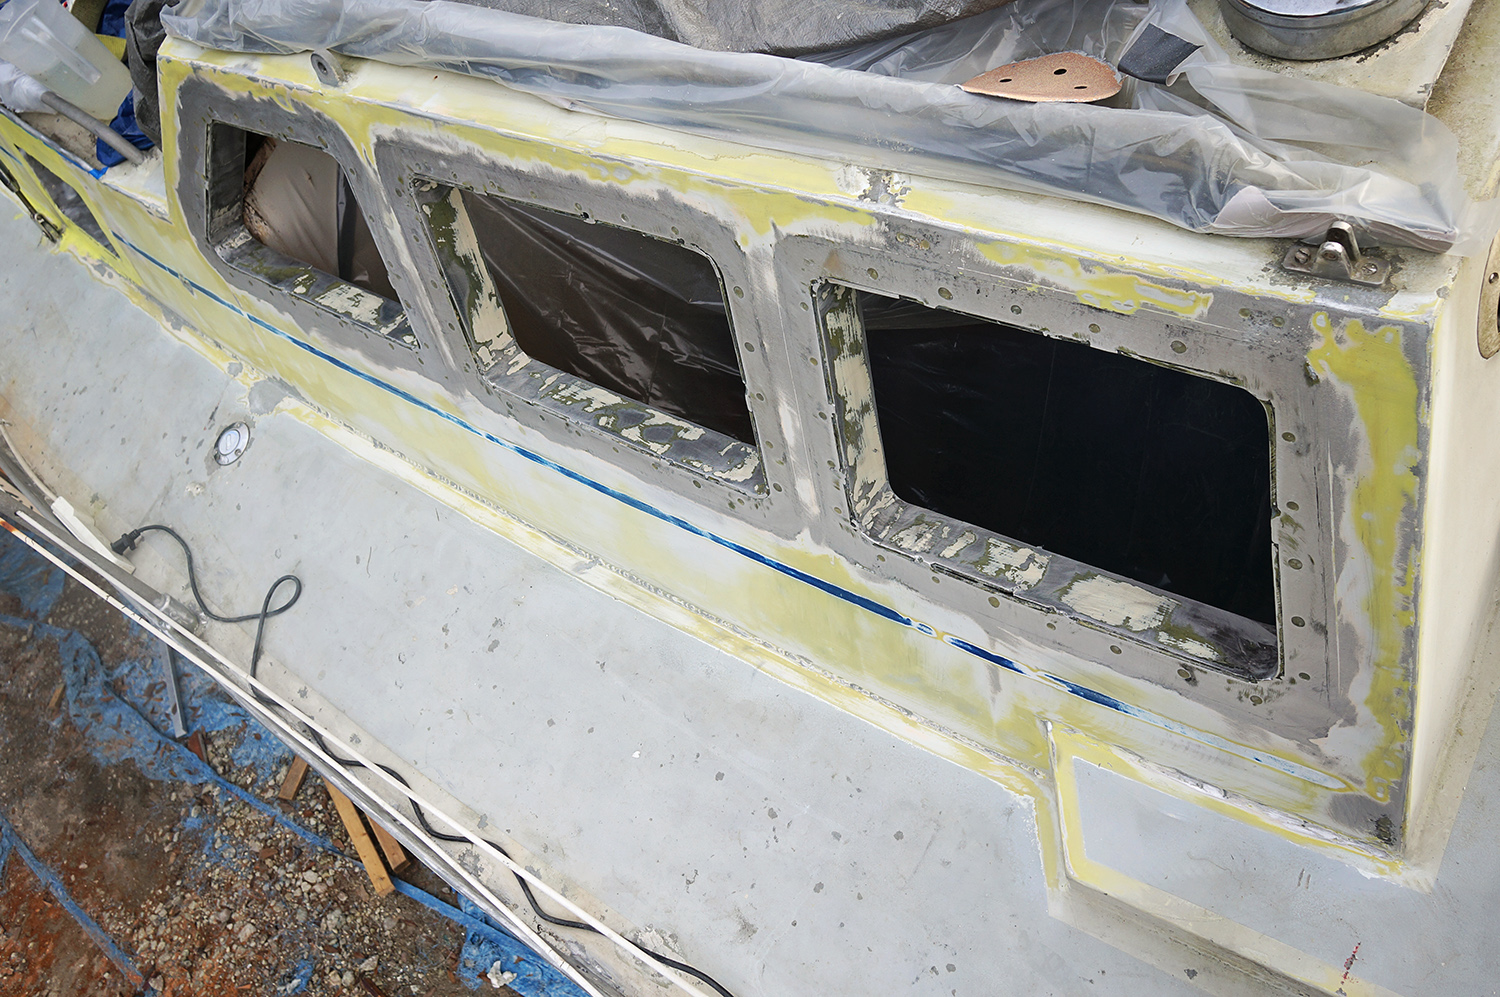
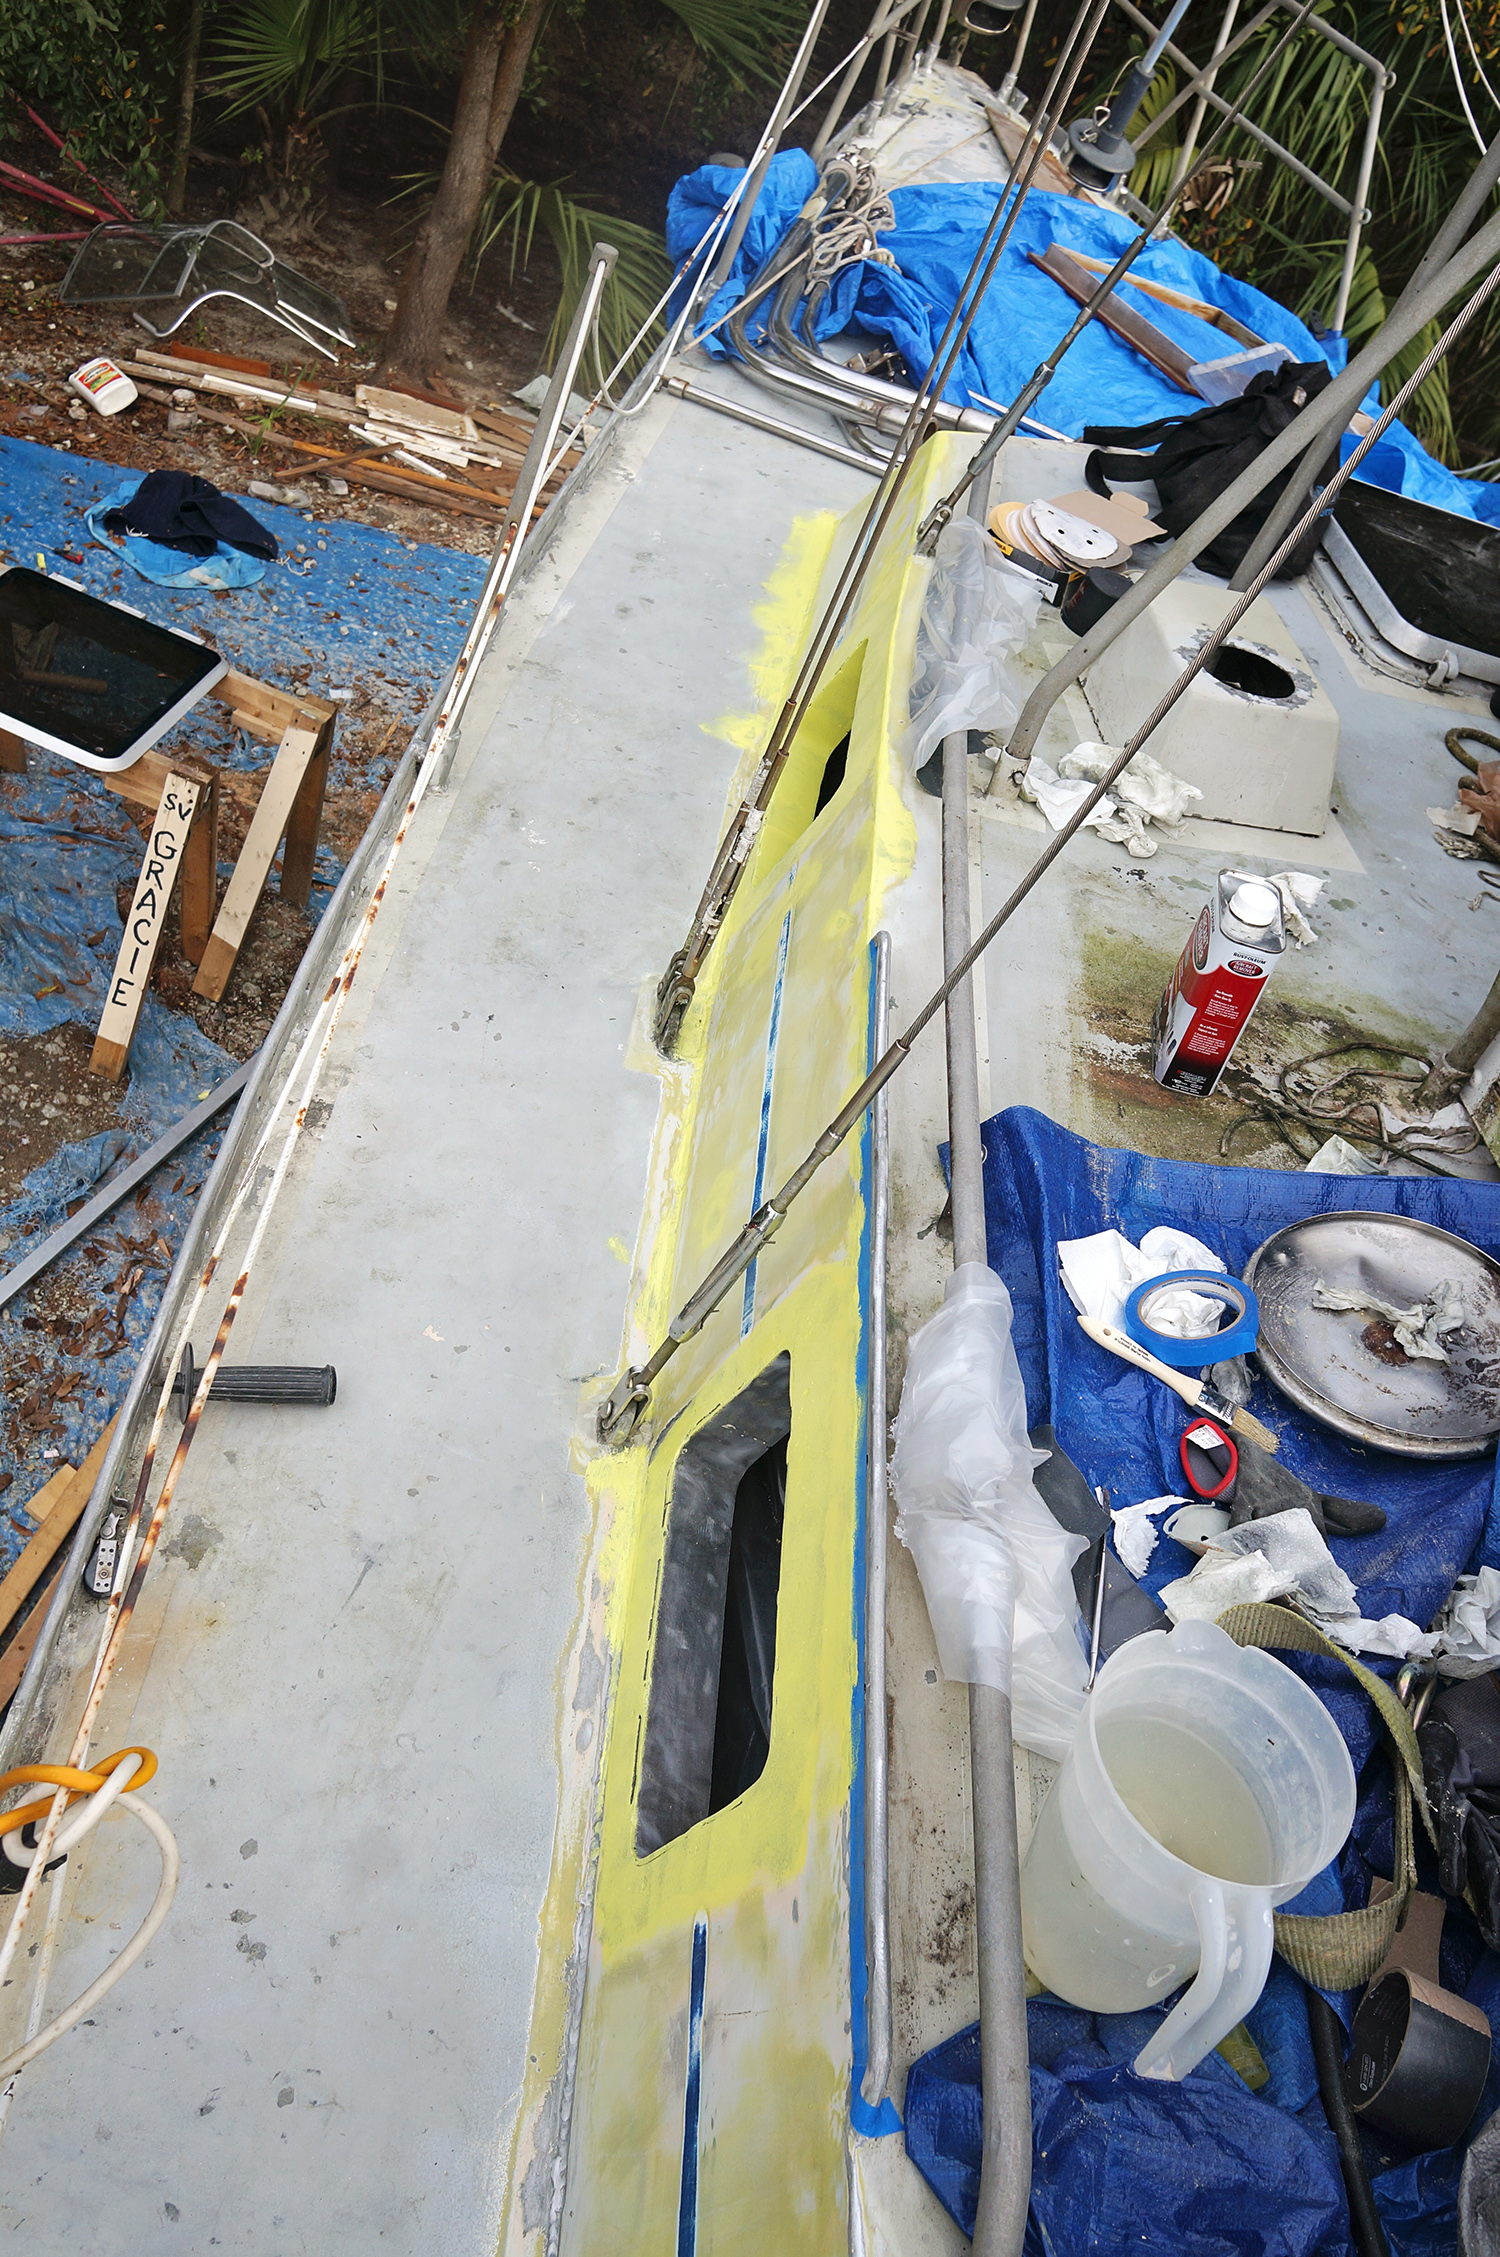
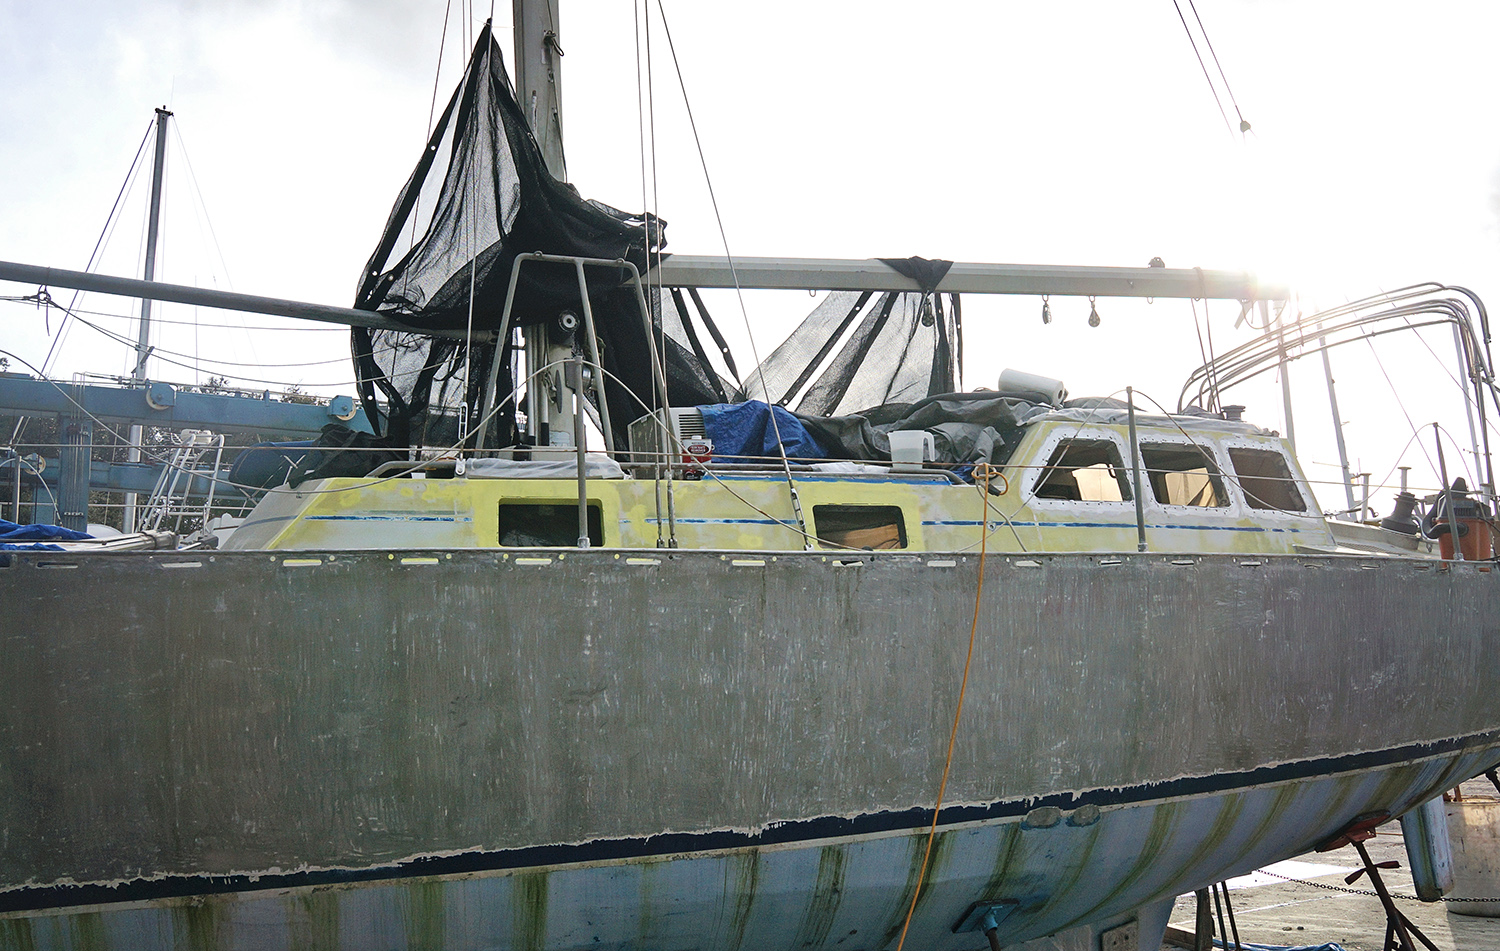
Other than the paint and plexiglass which had been taking up most of our time so far on the deck, we’ve had two other major changes to the exterior.  To the upper most and lower most parts of Daze Off.

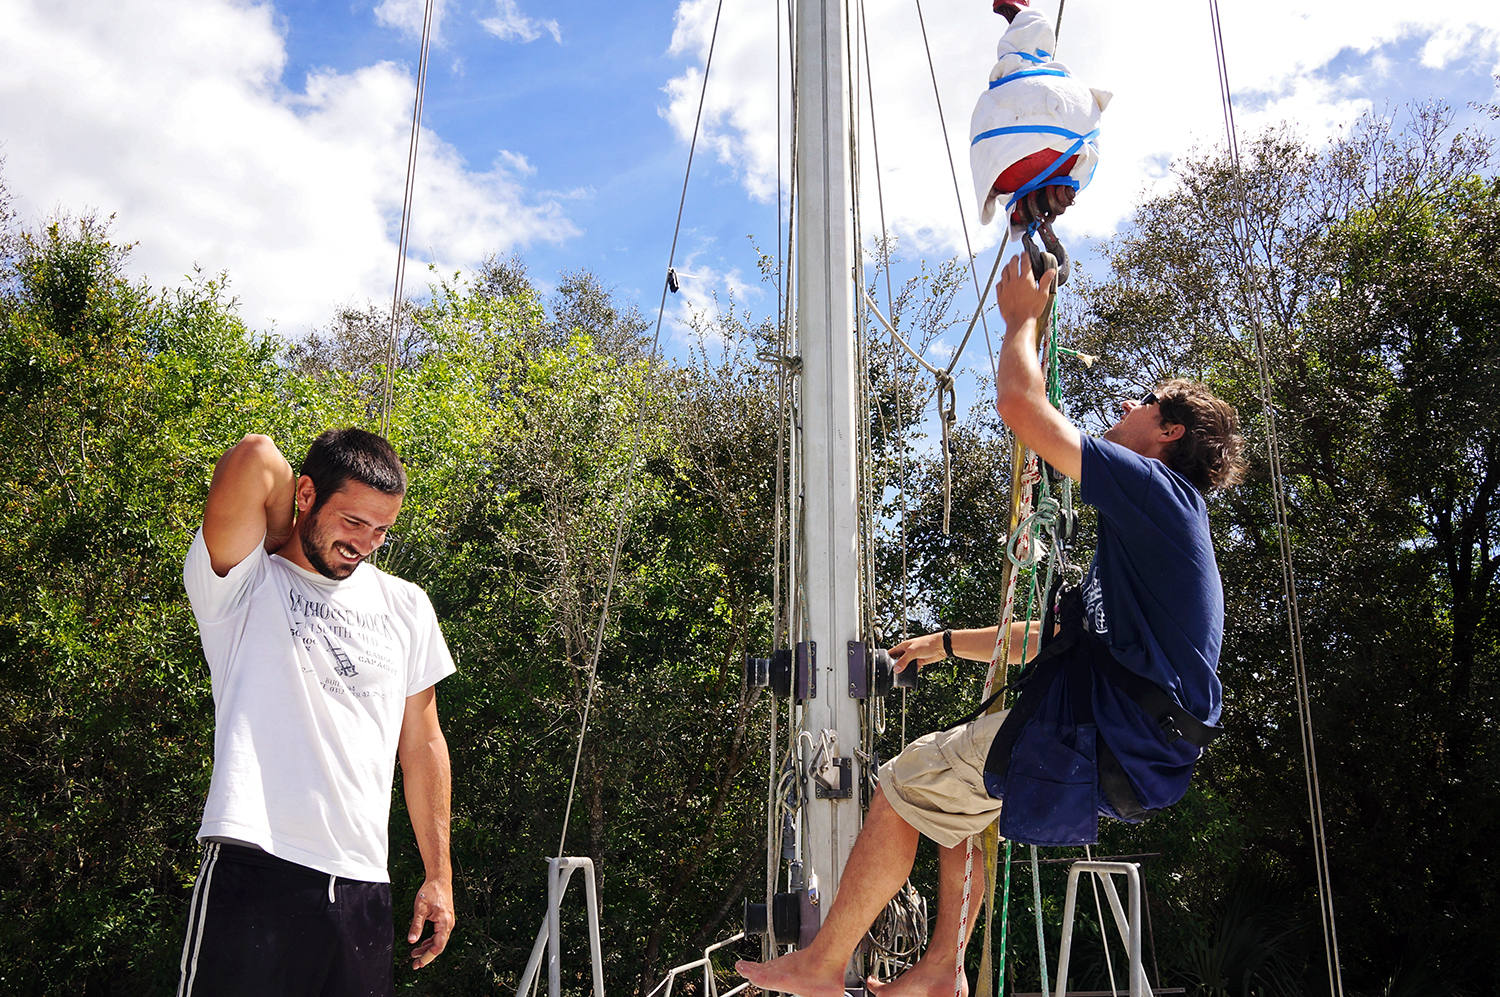
The first project/change is one you all knew was coming.  Or at least those of you that have been following us since this post when I originally talked about it.  Our mast has come down and is currently resting on jackstands in the open area next to our boat.  When we originally purchased Daze Off we had been hemming and hawing on if it would be a good idea to bring the mast down.  Yes, she would need a new light attached to the top.  Yes, there were a few new wires we’d like to run up the mast that were probably not of consequence to the previous owners.  But did we want to pay the fee of $500 to have her stepped and then raised again?

Unfortunately the decision was made for us when we were taking apart the overhead surrounding the deck step for the mast and found that one of the previous owners used an ORANGE EXTENSION CORD to wire it.  Whaaa??!!  We were speechless.  Who was the idiot that thought this was a good idea?  So yeah.  The mast would have to come down and be completely rewired.

This of course had not been a top priority on our list and was a project we had been planning on saving until near the end….until we learned a few things.  If you have your mast raised or lowered at the same time as someone else in the yard and the crane only needs to make one trip out, each party saves $50.  Ok, so all we needed to do was find a friend that needed a crane for theirs, and we’d go at the same time. And although we did have some friends in the yard who we thought were a month or two away from putting their mast up (and so we agreed to go together), we struck gold when another set of friends came into the yard and needed theirs lowered.  Best part was he used to be a rigger for Mack Sails and knew this process inside and out.

We figured our mast would be down for 3 weeks or so while we rewired, ordered new rigging, and then Bam, we’d still be in time to have it go up along with our other friends that were getting  ready to raise theirs.  Win/win.  The new friends in the yard happened to be the friend of a friend sort.  We’re both friends with Ren and Ashley of Evolve Freediving, and when this couple had come to the yard in September to put their Bayfield 32, Rainbow Connection, in the water, we chatted for a little bit, made plans for a weekend sail in Stuart sometime (which unfortunately never happened due to our lack of taking  days off), and kind of lost contact.  Until they came back to put their new/traded boat in storage (Long story.  Or short.  They traded Rainbow Connection for a Rival 39).

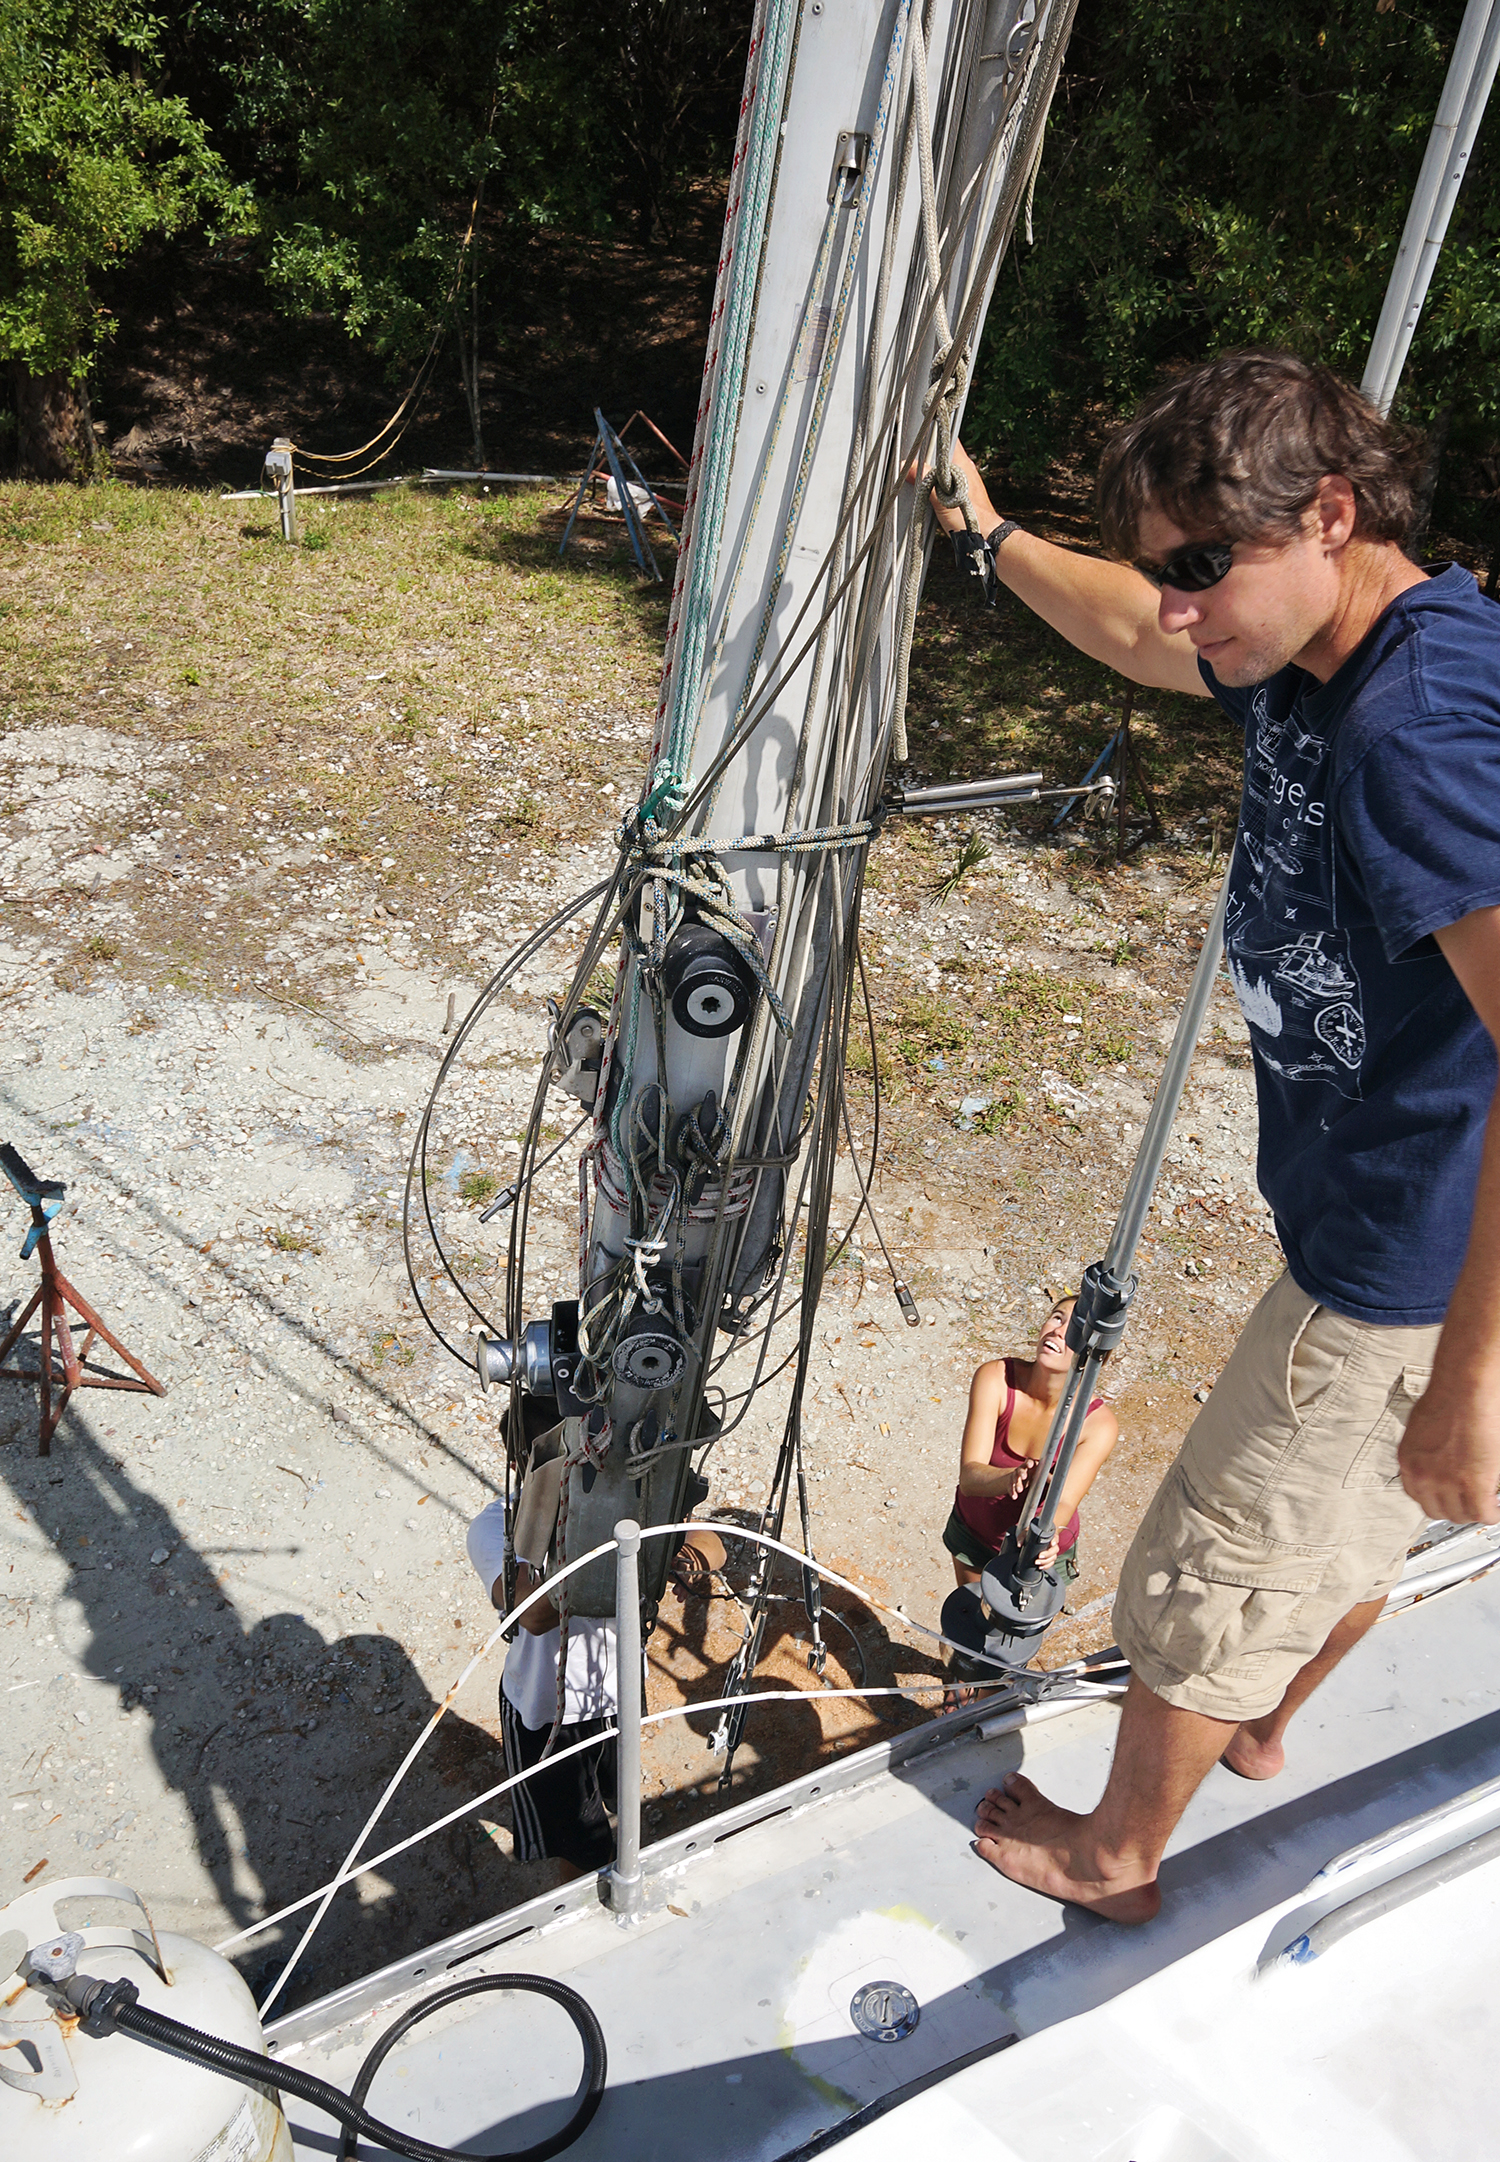
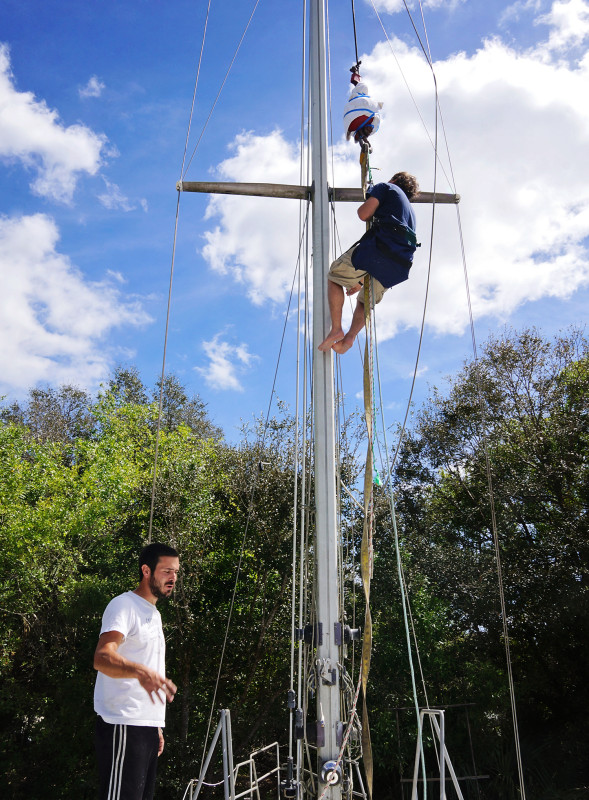
But when our new-ish friends, Jamel and Tania, came back to Indiantown, we were glued to each other.  Afternoons spent checking out one another’s boats, and evenings in their salon (cause who would want to be in ours?), eating  delicious meals Tania made, or even Little Ceasar’s takeout.  And when they mentioned they were taking their mast down before they went into storage for hurricane season, we were quick to jump on the opportunity and shout “We need to too!”.  Letting them choose the schedule since their timing mattered more than ours, we settled on a Monday morning to have A+ Crane services come out and bring both of our masts down.  Unlike previous years of storage in Michigan, you needed to do all the work yourself here, other than operate the crane, so we were especially happy to have a rigging specialist at our side.

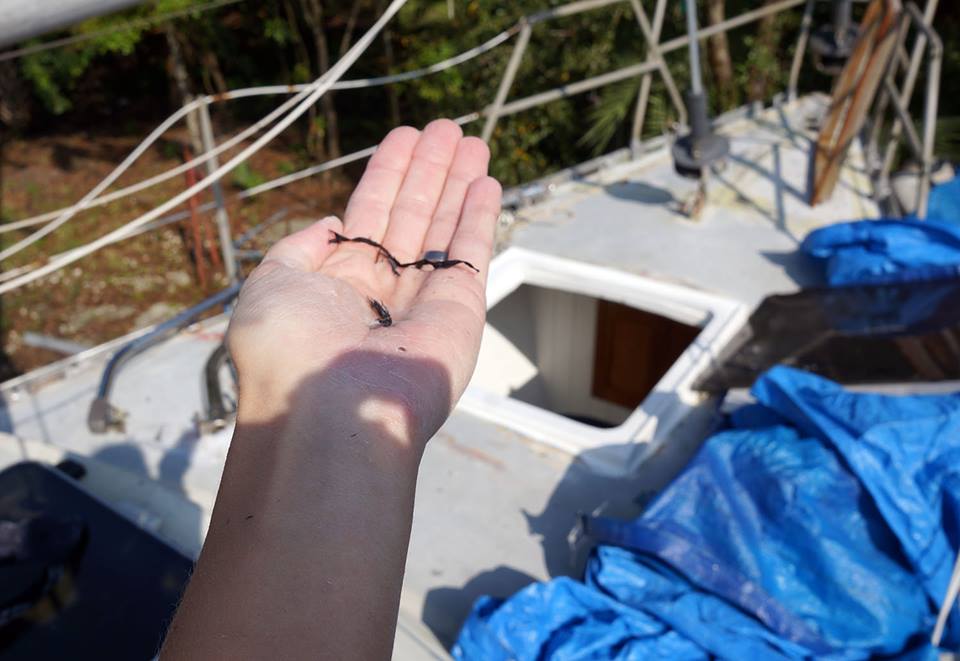
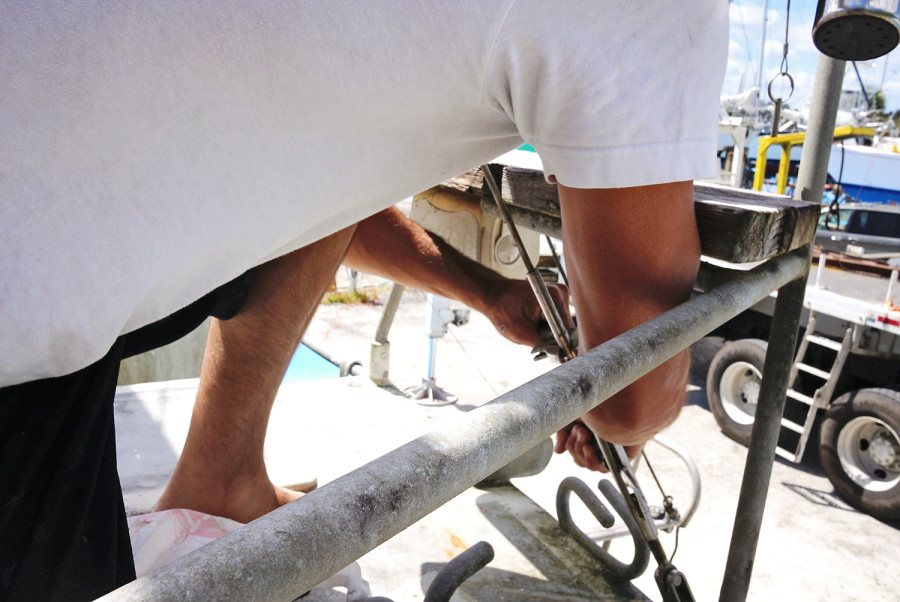
Quickly getting through Jamel and Tania’s stepping first, we were over at Daze Off, and Jamel was riding a bosums chair up to attach the hook and a strap to the top of our mast.  Since I still know next to nothing on rigging, I let these three knowledgeable people around me unscrew the turnbuckles and bring the standing rigging to the mast to later be tied, as I ran around and tried to help them in any way I could.  Handing over screwdrivers, crescent wrenches, and sometimes vice grips to help them get our rigging (which hasn’t been touched in almost a decade), lose from our deck.

Because we had these friends with us helping out with a job that I know would have ended in a lot of short fuses if it was just the two of us, we soon had the mast resting on a set of jackstands next to the boat, and we paid the crane operator and sent him on his way.  One project down, but a lot of little projects left before it will be ready to go back up.

Jamel getting raised by crane

Jamel up the mast

Matt loosening the rigging

stepping the mast

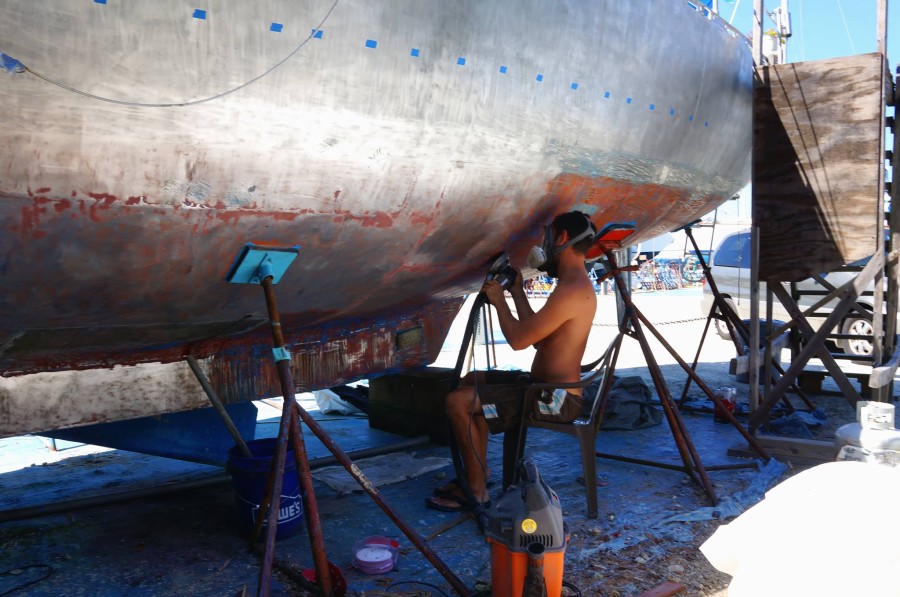
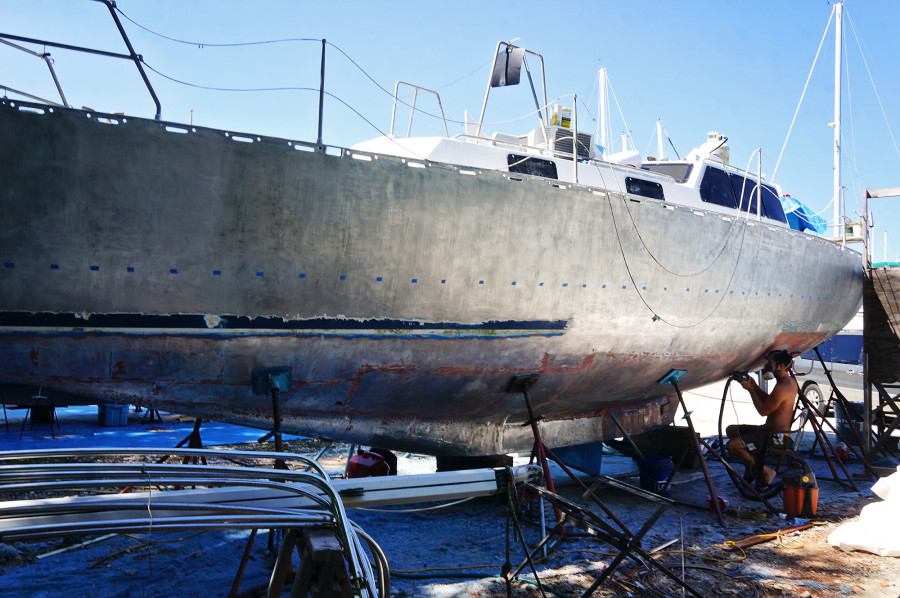
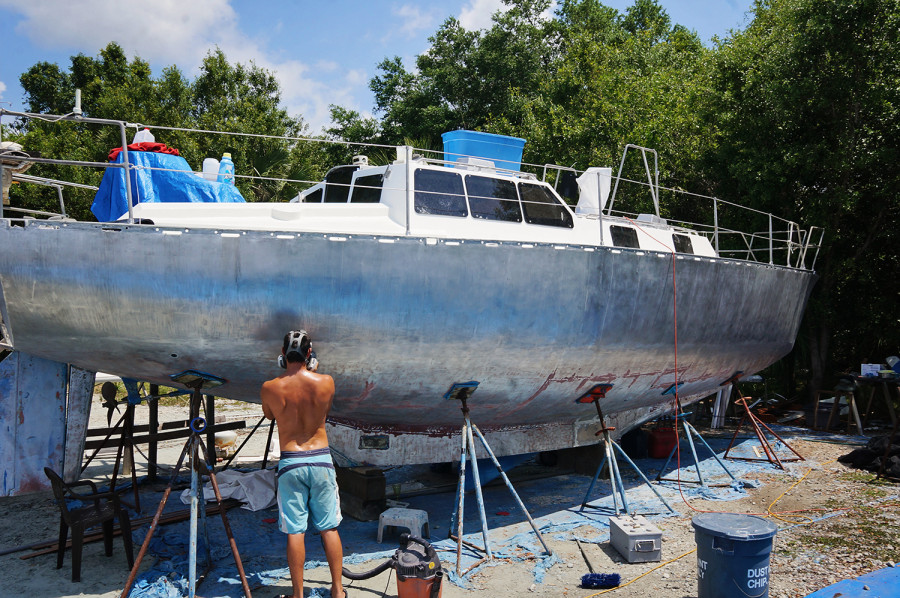
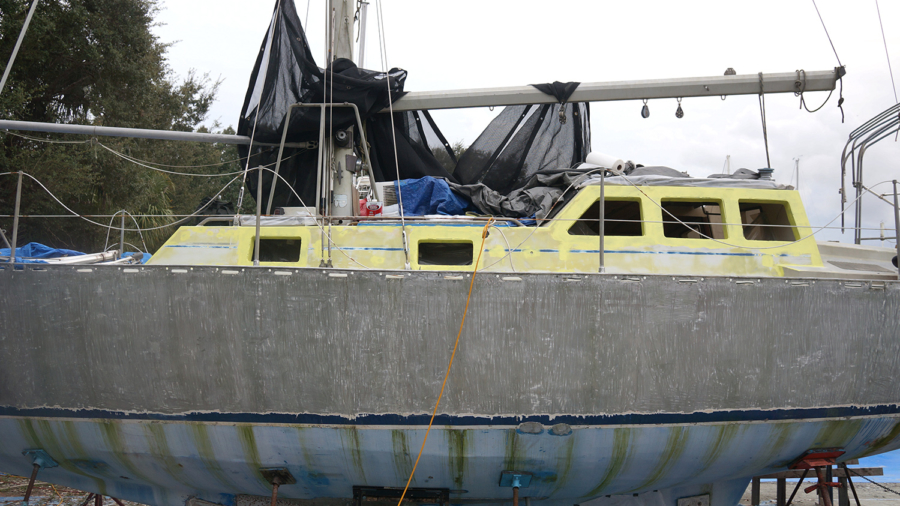
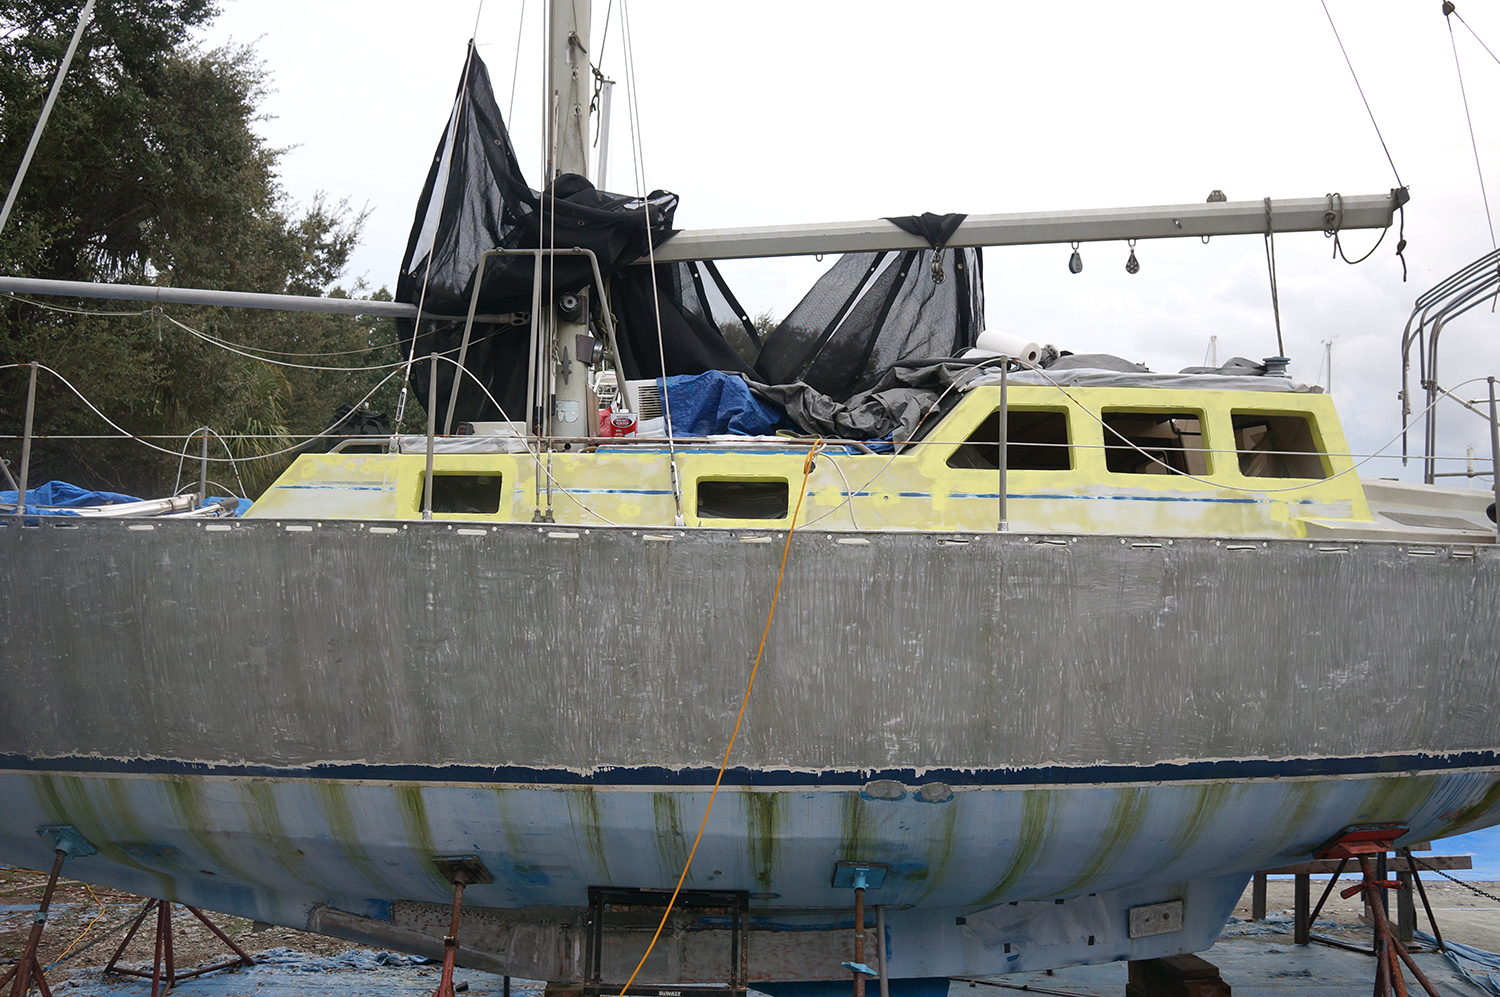
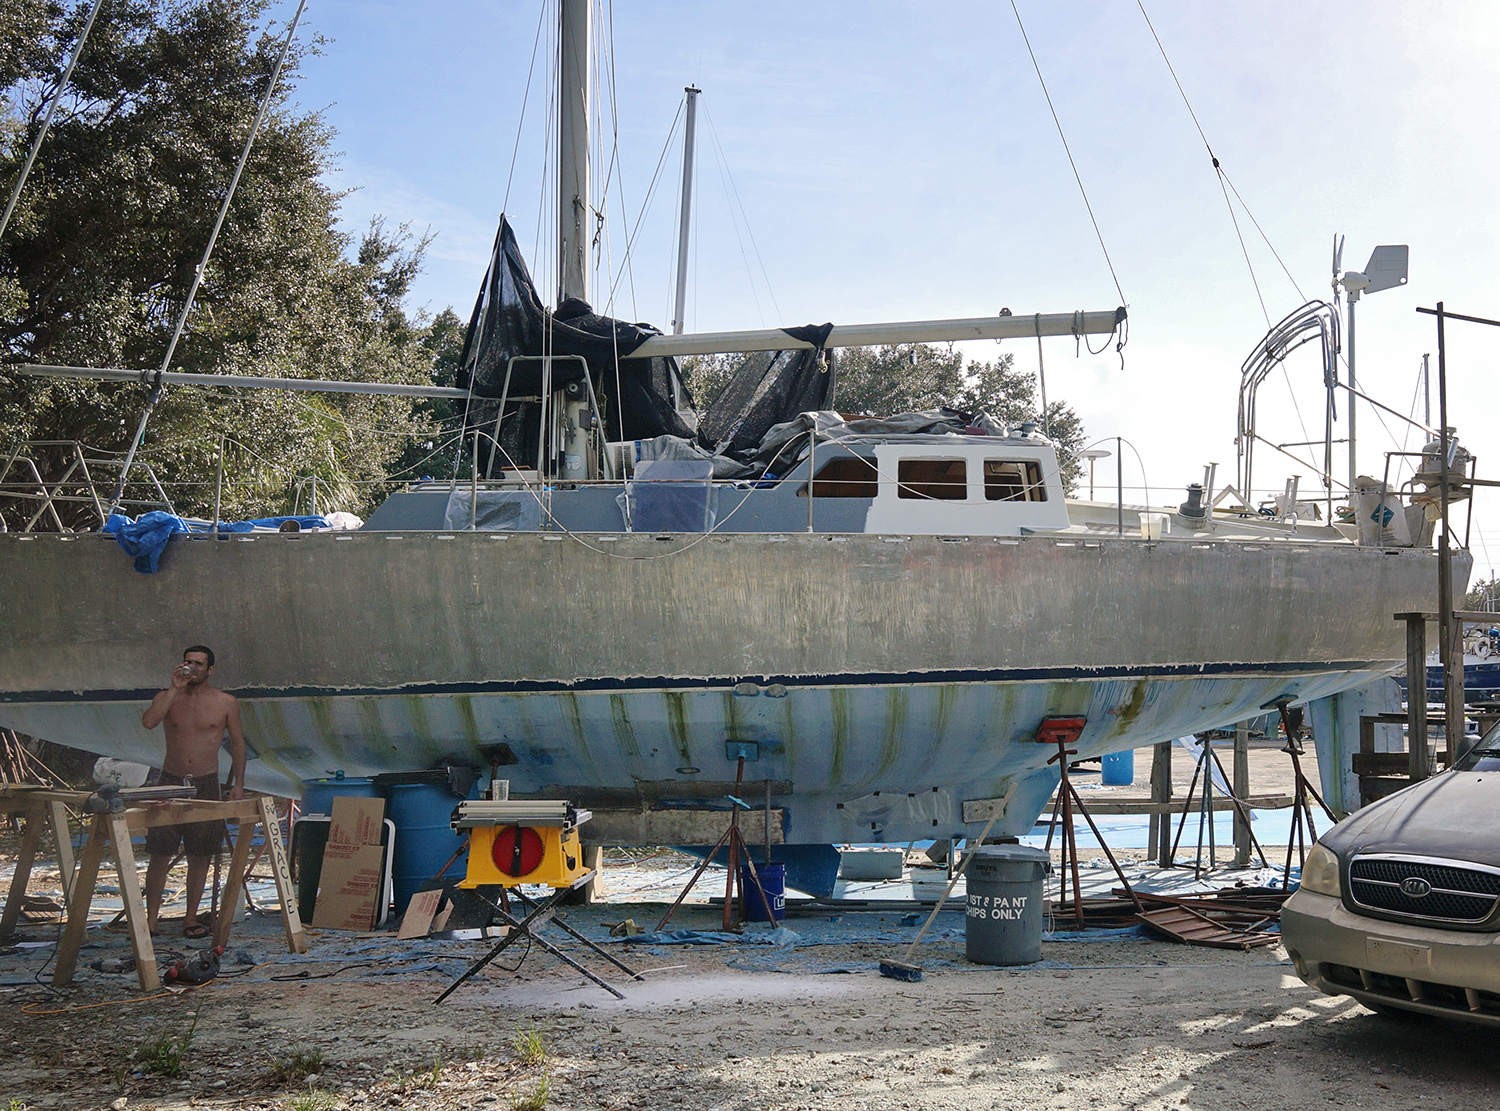
The other change had to do with what we wanted to do to the bottom of the boat.  Not that we’re going to get as far right now as putting a coat of anti-fouling on, but we would like to have all the barrier coats built up so just before we are ready to go in the water, we can spend one quick day getting the anti-fouling on and be done with it.

This was the decision before us: Do we leave the previous barrier coats on, the ones that have been sitting there for at least 10 years now, (although doing a great job of holding up, it looked like), and just sand off the light blue anti-fouling coat and add a new one when we’re ready; Or do we take everything  off, getting  all the way down to bare metal, and start from scratch.  Both sides had their pros and cons.

By only taking off the top layer of anti-fouling that exists, we had the pro that it would be a cheaper solution, only having to buy 2 gallons or so to complete the bottom.  Even though it was old, it seemed to be holding up extremely well.  Would we make it worse if we attempted to start all over ourselves?  The negatives to this plan were that while going through the storage inside the boat (while trying to make this decision, actually), we found that the current bottom paint had tin instead of newer copper-free. To get a new bottom paint on that works with the aluminum, we’d have to heavily sand this layer, and in other areas, all the way down to bare metal.  A special primer would need to be applied, and then barrier coats….we were starting to realize the time and money we were saving ourselves didn’t put us that far ahead.

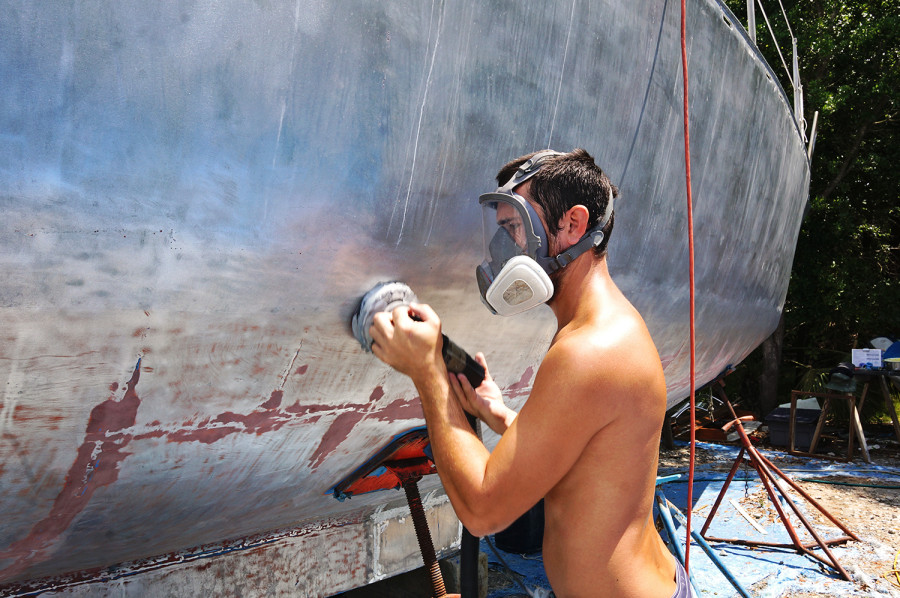
Then there was the option of taking off all the existing paint, bringing the bottom down to bare metal, and build it all back up again.  The negatives were of course spending what we expected to be about 10 days stripping the paint off, and then the multiple days of applying coats of primer and barrier coats.  Just like the top of the boat, any bare metal needs to be hit with our Aluma Protect before the metal can oxidize, so we have to work in small areas for that, grinding and priming within an hour of each other.  Then there’s the days spent building up the barrier coats, about 4 days, to get it to the point where it will be ready for anti-fouling this fall.  Plus, what if it somehow doesn’t end up as strong as what was already there?  What if we go to check it out in a year or two and find out that areas are flaking off?

Eventually the positives of this outweighed all else.  Yes, it was going to be at least 2 weeks of extra and unexpected work.  Yes, we’re  going to have  to buy another gallon of Aluma Protect and about three gallons of InterProtect.  And hey, let’s throw in another 2 gallons of paint stripper to get off everything that’s already on there.  But when we thought about it more and more we realized that if we went with the first option, we’d only be putting off the inevitable.  Eventually the bottom will have to be stripped and repainted, and who knows where we’ll be when this comes up on us.  Right now we’re already out of the water, in a DIY yard, and have easy access to all the supplies we need.  It may be a headache to go through all these extra steps here and now, but it could be a much bigger headache if we wait a year and have to do it in some remote island in the Caribbean, or while freezing my butt off while wintering over in northern Europe a few years down the road.

Matt has been doing a great job of getting all the old paint off and so far has been moving at a pace much faster than both of us expected.  In less than 10 days he’s been able to not only scrape both sides clean, but to sand off any remaining remnants.  The days have been a little hot and sweaty, and he completely ruined a set of lightweight Helly Hanson foulies he got off the free table a few months ago, making sure that none of the paint stripper came in contact with his skin.  He’s a real trooper though, and in the next few days we’ll getting the new waterline painted on.  I do have to say this this has benefited me in one big way….all these hot days of work under the boat actually has Matt craving beer at the end of the day, so guess who was able to pick up 2 cases during our last visit to Sam’s Club?!


Matt sanding off bottom paint

sanding off bottom paint

Daze Off, looking bad ass

Matt sanding the hull

bare hull and bottom

Interlux Interprotect Primer

Topcoat Paint

There is a final coat of paint on our boat!  It may only be the pilot house and it may only be on one side, but it still feels like a huge success.  This also means that we can now put windows in on that side.  No more trashy tarps for this couple.  At least on that side.  Although we do have to wait 7 days for the paint to fully cure before we apply those windows, so maybe I shouldn’t speak too soon.

After the whole debacle of trying to find the right paint, things began to go much smoother.  Starting the process all over again, we ground the old barrier coat off and once again got all the way down to metal.  Still starting out with a coat of Petit Aluma Protect , this time we used Interlux Interprotect as our barrier coat.  This applied much easier and once it dried, we found it sanded down the way we wanted. Plus this time we correctly purchased the white (instead of gray) which not only looked much better when applied, but helped the blend in with the next coats.

To be on the safe side we applied two coats of the Interprotect and after each coat I sanded the area down to a smooth surface using 100 grit sandpaper.  I won’t lie, that part was a pain in my butt.  For some reason it would take me a full day just to do one round of sanding, but we’re both kind of being perfectionist about this whole thing.  Every time I think I’d be finished I run my fingers along the side of the boat and find that one area was still a little bumpy, and then I’d have to go back and smooth it down.  By the time I’d actually finish, I swear it felt as smooth as silk.

Aluma Protect

alumaprime on boat

Interlux Interprotect Primer

After the barrier coat was applied and smoothed, the same exact process would follow with the primer.  For this step we used Interprotect Epoxy Primekote.  Once the epoxy primer was on I would switch to a 220 grit sandpaper and also do a wet sand instead of a dry.  The sanding on this round wasn’t quite as labor intensive to my arms, this coat went on a little smoother, ans we also switched to foam rollers which I think helped to create a smoother surface to start with.  The time to sand was still the same though, because the next thing to come was the topcoat and no mistakes would be hidden under that paint.

Jessica sanding pilothouse

It was surprising just how long all of these steps took before we were even at the point where we could put on the first coat of top paint.  Between the grinding, aluminum primer, barrier coats, and primer coats (4-5 all together), and the days of sanding in between, it had already taken us just over a week to get to this point.  Then just when you think you’re ready to roll and begin with the topcoat, it begins raining ash on your boat.  No, I’m not joking.  All around the marina are sugarcane fields and lately they’ve been burning huge sections almost every day.  Sometimes we see nothing more than a big smoke cloud in the distance, and other times, like when we were trying to paint, the wind would be coming just the right direction and delivering all the airborne ash to our boat.  Grrrr.  So the painting had to be put off for another day.

sugarcane ash cloud

sugar cane ash

When we did begin that project it was time for Matt to join me again to work as this was a two person project.  Doing lots of research online and talking to other boaters in the yard, we’d found the consensus to be that the best application came from a roller, and with another person dry rolling behind.  We had originally planned on rolling and tipping, but we thought we’d give this a try and it seemed to work pretty well for us.

Using Pettit EZ-Poxy 2 part polyurethane marine paint, we spent a few minutes making sure we’d measured the 4:1 ratio correctly into the coffee tin we were using as our mixing container, and then added enough Pettit brushing thinner to get it to a point where it was dripping as soon as the mixing spoon was taken out of the mixture, instead of having a thick stream.  We’ve heard this makes for a smoother coat, although it did make us worry about how thick that coat would be.

With Matt going first, he would roll on a decent amount of paint, trying to spread it out enough so there were no runs.  As quickly as I could behind him, I would ever so lightly roll over what he had just completed to rid the surface of any air bubbles the original roller may have caused.  The first few minutes were full of cussing and deficient complaints toward each other that the other was not doing the process correctly, but after a few minutes we got in our groove and worked very well together.

We knew one coat would not be enough, so the next day I went back at it with another round of light wet sanding with 220 grit.  It seemed as if even my light sanding was taking off more than we liked, and when the second coat was applied we still weren’t satisfied with the finish.  It looked from certain angles as if we could still see the slightly darker primer coat underneath, and because we were new at it, the finish still wasn’t as nice as we were hoping for.  So once more I went back to lightly sand and we went through and applied a third topcoat the day after.

3 topcoats seemed to do the trick, and honestly, I just didn’t have it in me to go another round.  All I wanted was to get the new windows in and start on the next section of deck so we could keep things moving along.  Overall we’re happy enough with the job we did.  Again, we don’t know how much had to do with the product or the workers, but it wasn’t exactly what we’d hoped for.  From afar it looked pretty good, but up close you could see small ripples in the paint left from the rollers.  Because we started with the side of the boat that’s mostly shaded from the sun, it wasn’t until we did the next side we noticed how those ripples are more visible in sunlight.

Initially we had chosen the 2 part topcoat because it gives a harder topcoat and is less likely to chip.  The bad news with it, as we know now, it that it is a fricking pain in the ass to apply and goes on much thinner than a 1 part would have.  Also, because you need to mix the two parts together to make it….we’re less likely to go back and touch up chips until there’s a number of them that need addressing.  Oh well.  Live and learn.  I guess we’ll know for the next boat.

*Ummm…I forgot to take photos of the finished paint before we put the windows in.  And since I don’t want to ruin that surprise for you, you’ll have to wait for the next boat work post to see how it came out.  🙂

zinc primer around ports

One Step Forward, Two Steps Back

I wish this post was coming to you with the good news that the new ports have been placed in the port side of the boat, but unfortunately we are back to square one.  Minus the silicone and gunk removal that is.  Or filling all the bolt holes.  But we are back to square one as far as priming and painting goes.

Everything had gone according to plan for the first few days. Directly around the now open ports we placed a coat of Petit Aluma Protect, a 2 part strontium chromate epoxy primer. This is to give a proper barrier coat over bare aluminum, and comes in an awesome almost neon yellow color.  Although we started by coating only the area surrounding the ports that we had ground down to expose and fill the extra bolt holes, as soon as that was on and protecting that bare aluminum, Matt moved on to grind off all the remaining paint from that side of the pilot house and coachroof before the entire side was coated in the Aluma Protect. So far, so good.

The next stage was to place a barrier coat on, and what we had chosen to use was Petit Protect Epoxy Primer.  The first thing that went wrong with this barrier coat is that we had meant to get it in white, but when it came in the mail we had found that we’d accidentally ordered gray.  Turns out when we placed the order button online we had been paying more attention to the sale price instead of the color. Even though the next primer coat and final coat would be white, we weren’t sure how well it would cover the darker color underneath.  Not one to throw away a good deal though, we thought we’d give it a shot. What we hadn’t expected, but found out once we’d applied the two necessary coats, is that this is a high build primer and did not want to sand well for us.

If it was a barrier coat to the bottom, no big deal.  We’d just be apply the top coat after and not worry about any bumps or ripples caused by the roller.  The topside though…yeah, a smooth surface is pretty important to us.  As soon as we’d take any kind of sandpaper to it, trying out both 100 and 220 grit, it would automatically clump the paper and we’d be left with either a bare spot where it all came off or a still semi rough surface. Thinking that maybe the primer would hide some of these mistakes and we could then smooth that down to a dimple free surface we added the next step of Petit one part white primer, the same as what we used in the head.

As you’ve probably guessed by the title of this post, it hasn’t worked out for us.  After a bit of discussion and deliberation, we talked about continuing with the products we had, doing multiple rounds of priming and sanding until we had the smooth surface we desired.  Or, we could start fresh with different products.  So that is what we have decided to do.  All of our hard work over the past 5 days is now getting washed down the drain as we grind the side back down to bare metal and start from scratch.

We’ll be keeping the Petit Aluma Protect as our barrier for the aluminum, although after that point we’re switching to Interlux InterProtect for the barrier and primer coats. A little more time and money out the window, but what can you do? Being such a major focus of the boat we can’t do a slapdash job on the paint and hope no one we’ll notice.  We certainly would.

We’re sad the line of Petit products didn’t work out for us although we’re still using them for the top coat), and it’s possible the fault could have been all our own. Maybe I just have terrible ratio and mixing skills.  We’ll never know. The new products should be arriving any day though,  and we hope this time around everything goes much smoother.  Both literally and figuratively.

removing paint around ports

zinc chromate primer

Jessica mixing primer

ghost ship Daze Off

zinc primer around ports

barrier coat around ports