Sunday August 16, 2015
I feel so all over the place with this blog right now because none of our projects seem to go in order, and there’s usually the distinct possibility that we’re working on five different things at one time. Â Depending on if the welder is in for the day or if we have just a few hours to kill before the rain comes in, it seems like we’re switching up projects daily or even hourly. Which hasn’t always made it the easiest thing to track our progress on the blog or even know what to write about.
Welding? Â It’s been an ongoing project for the past two weeks now that is going to need so much more time before it’s finished that I’m not even sure what to write about it at the moment. Â Should I give little snippets as they come, or wait until the job is finished and center a post wholly on that? Â The clothing cabinets we’re trying to build in the forward salon? Â Don’t even get me started on those. Â Between odd angles and trying to cover up aluminum frames, that project has us scratching our heads and Matt playing out a million scenarios of what solutions we might have available. Â Most of which won’t pan out.
So while these other projects are still ongoing and will be for the next few weeks, I’ll take you through one of our smaller projects: routing and templating.
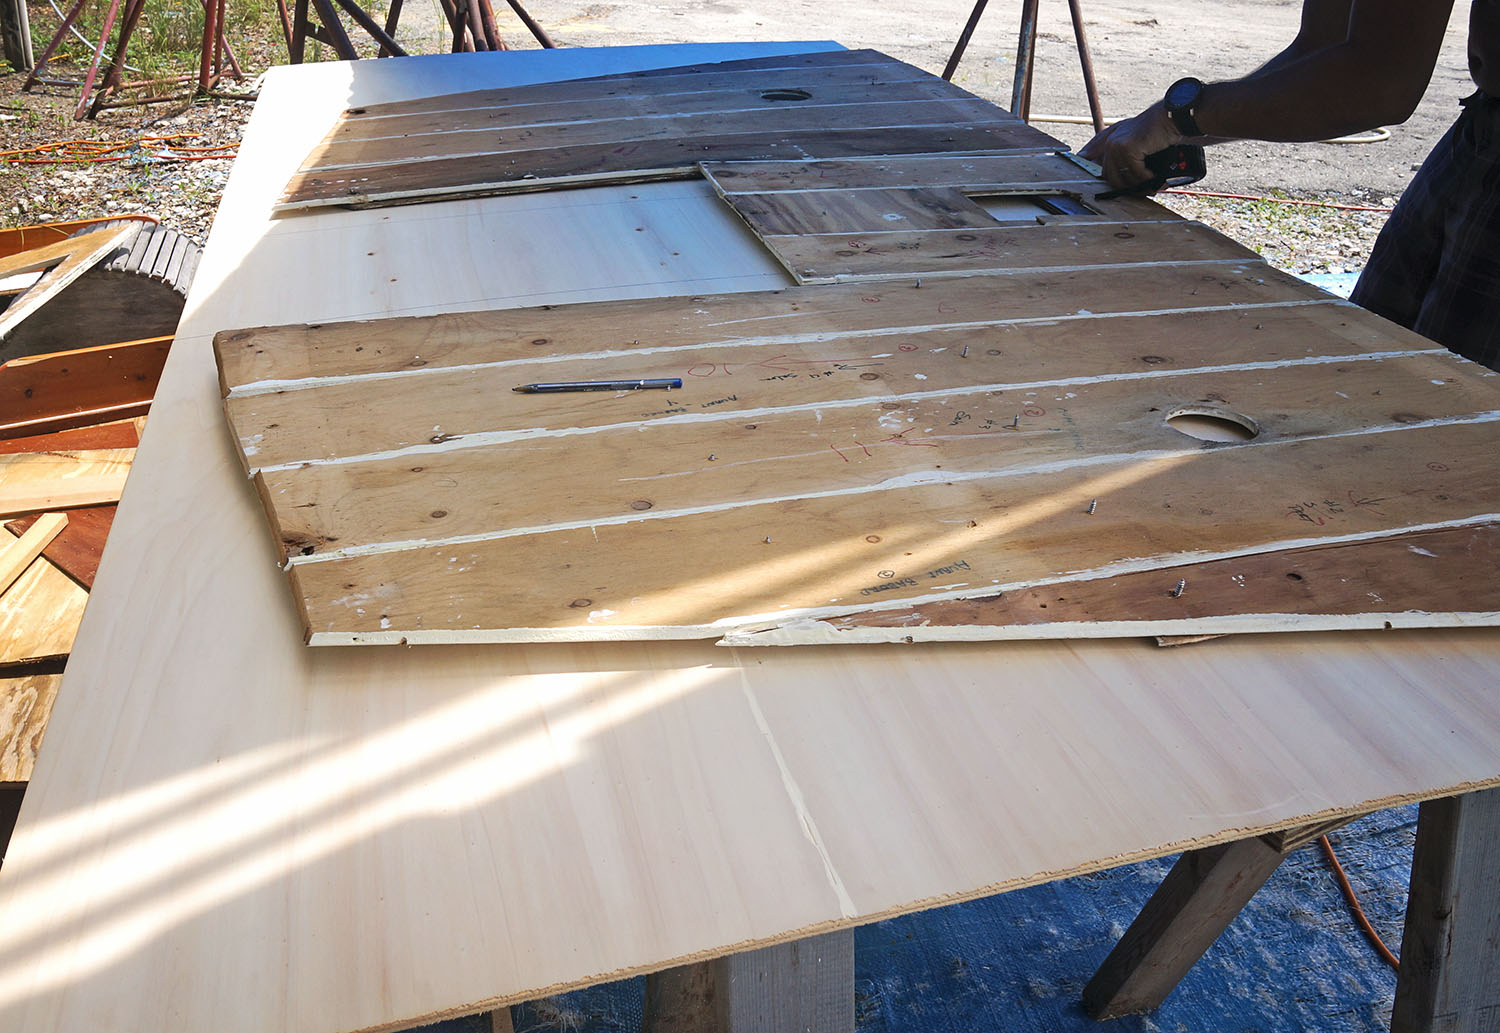
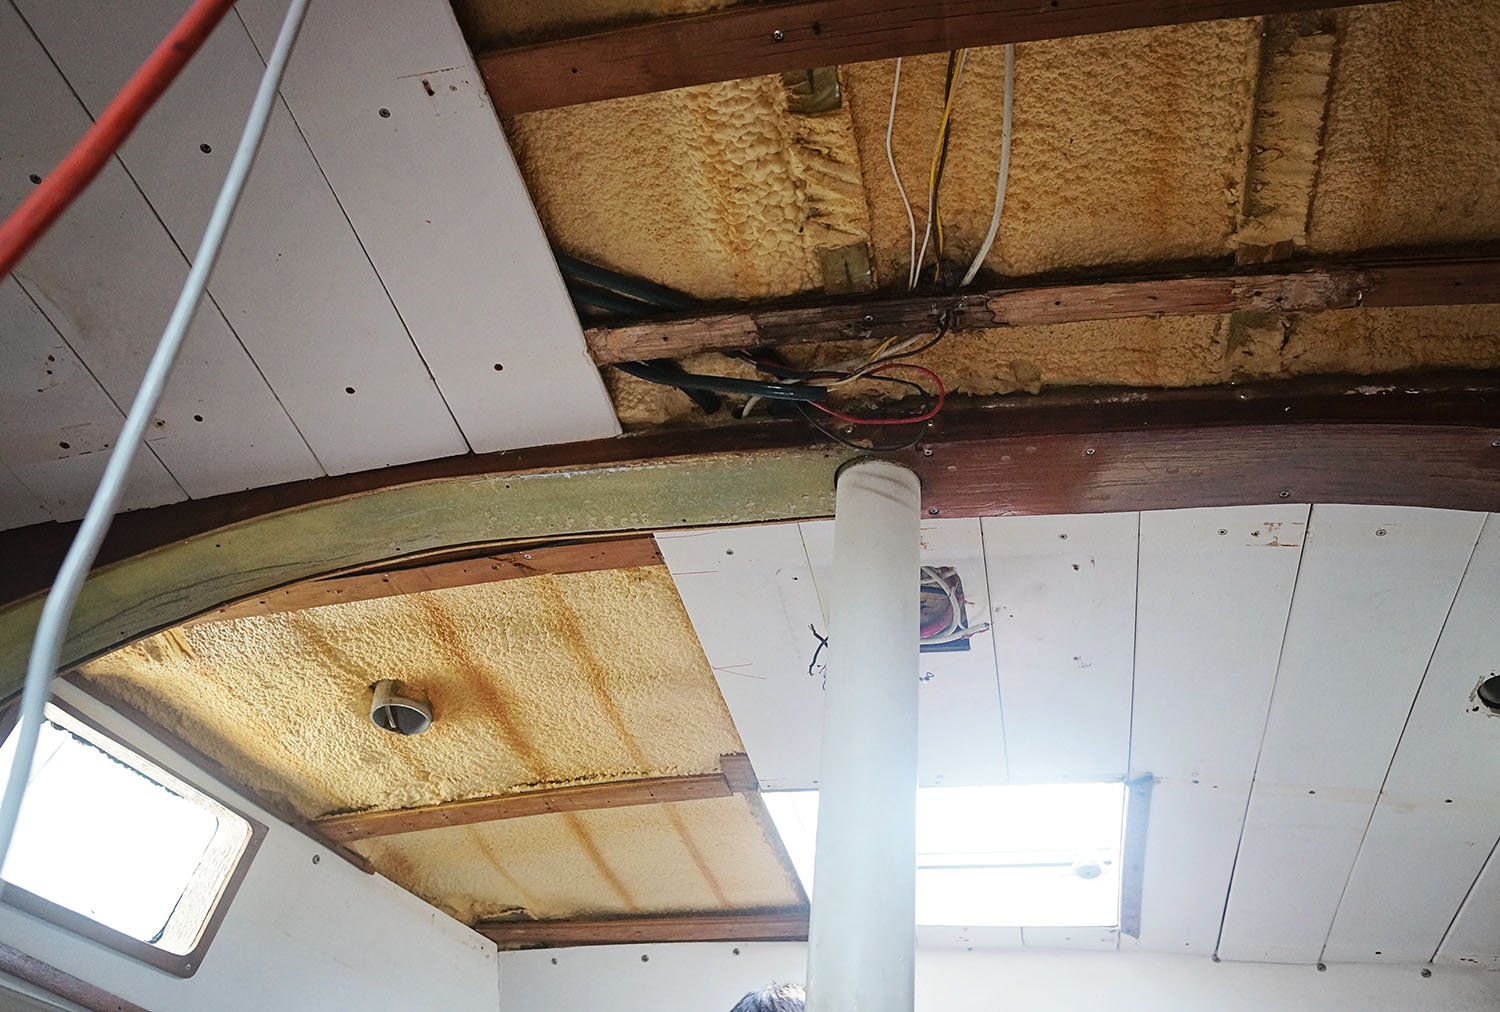
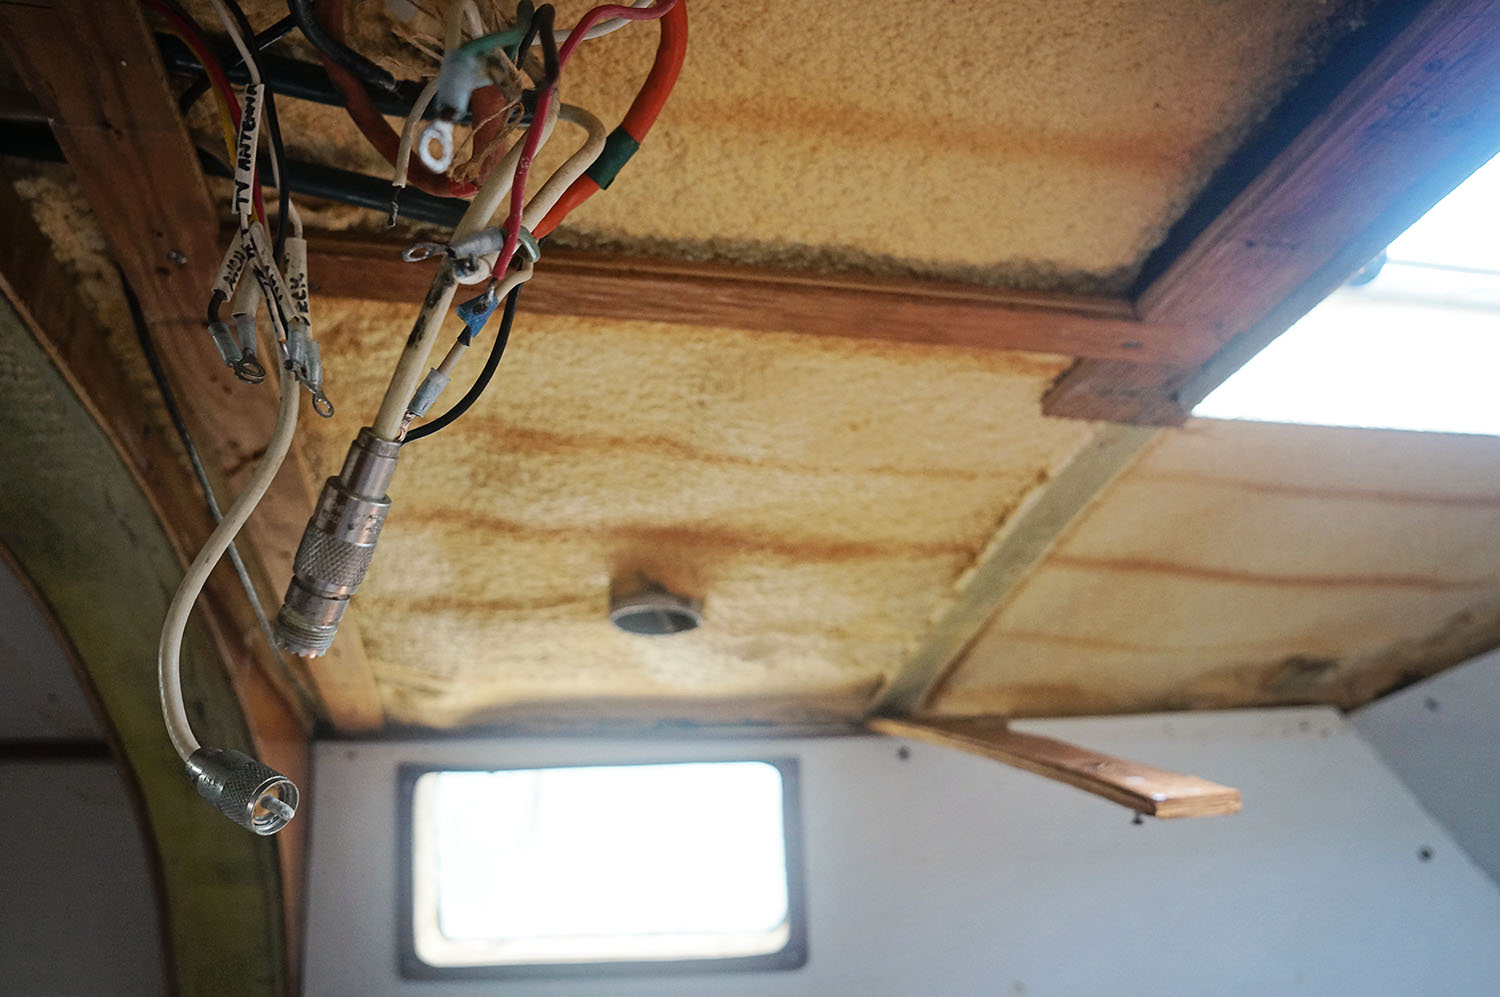
One of the areas we hadn’t touched yet in the forward salon was replacing the overhead. Â Previously in this area were long 5 3/4″ wide boards spanning the length, forward to aft, held together by some trim running abeam. Â Although these boards never actually looked that bad and probably could have been kept, we didn’t like the variance in size between the grooves of what we’re doing to the walls and would like to keep it all uniform. Â So for us to replace them is the same way we would do the walls, just placing it overhead instead.
If we were doing the walls we’d normally have to make our own templates out of scrap 1/4″ wood which is a pain in the butt. Tracing, cutting, and hot gluing these little strips together until they perfectly outline the space we want the new wall to be placed, but in this instance we’re able to keep the existing overhead boards in tact so we can trace them onto our Eurolite and easily cut out the shape we need.
Using much caution since the trim was the only thing keeping these boards together, we unscrewed them just far enough until they became unattached from the furring strips, and while I held the boards from falling down with my arms up over my head, we gently lowered them and brought them down the ladder to our work area until we were ready for them.
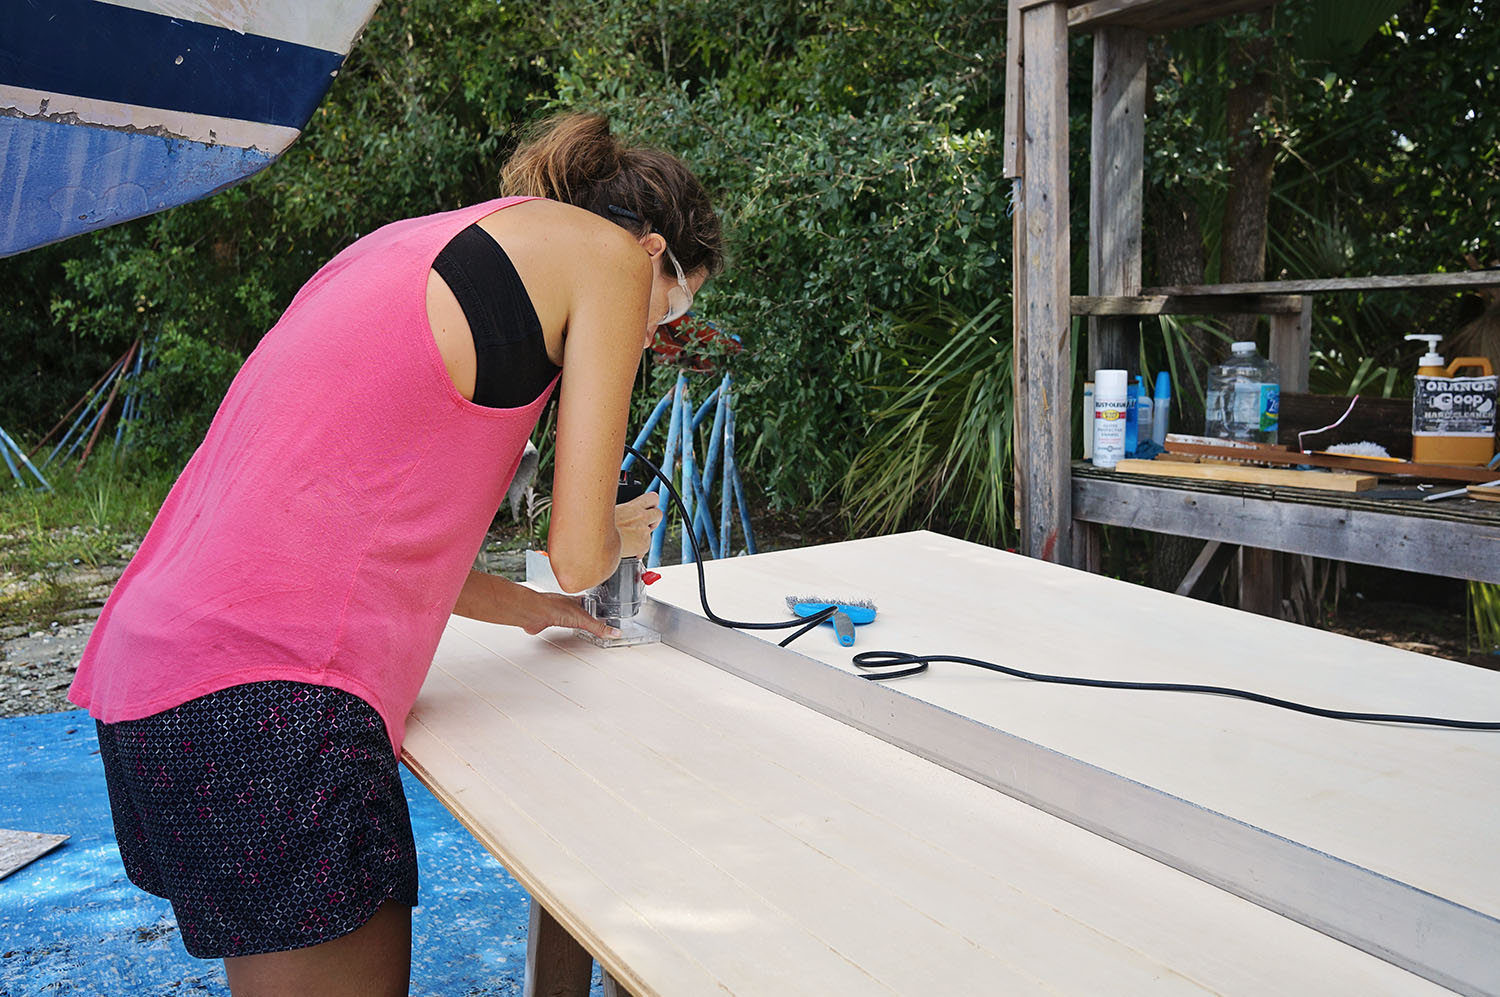
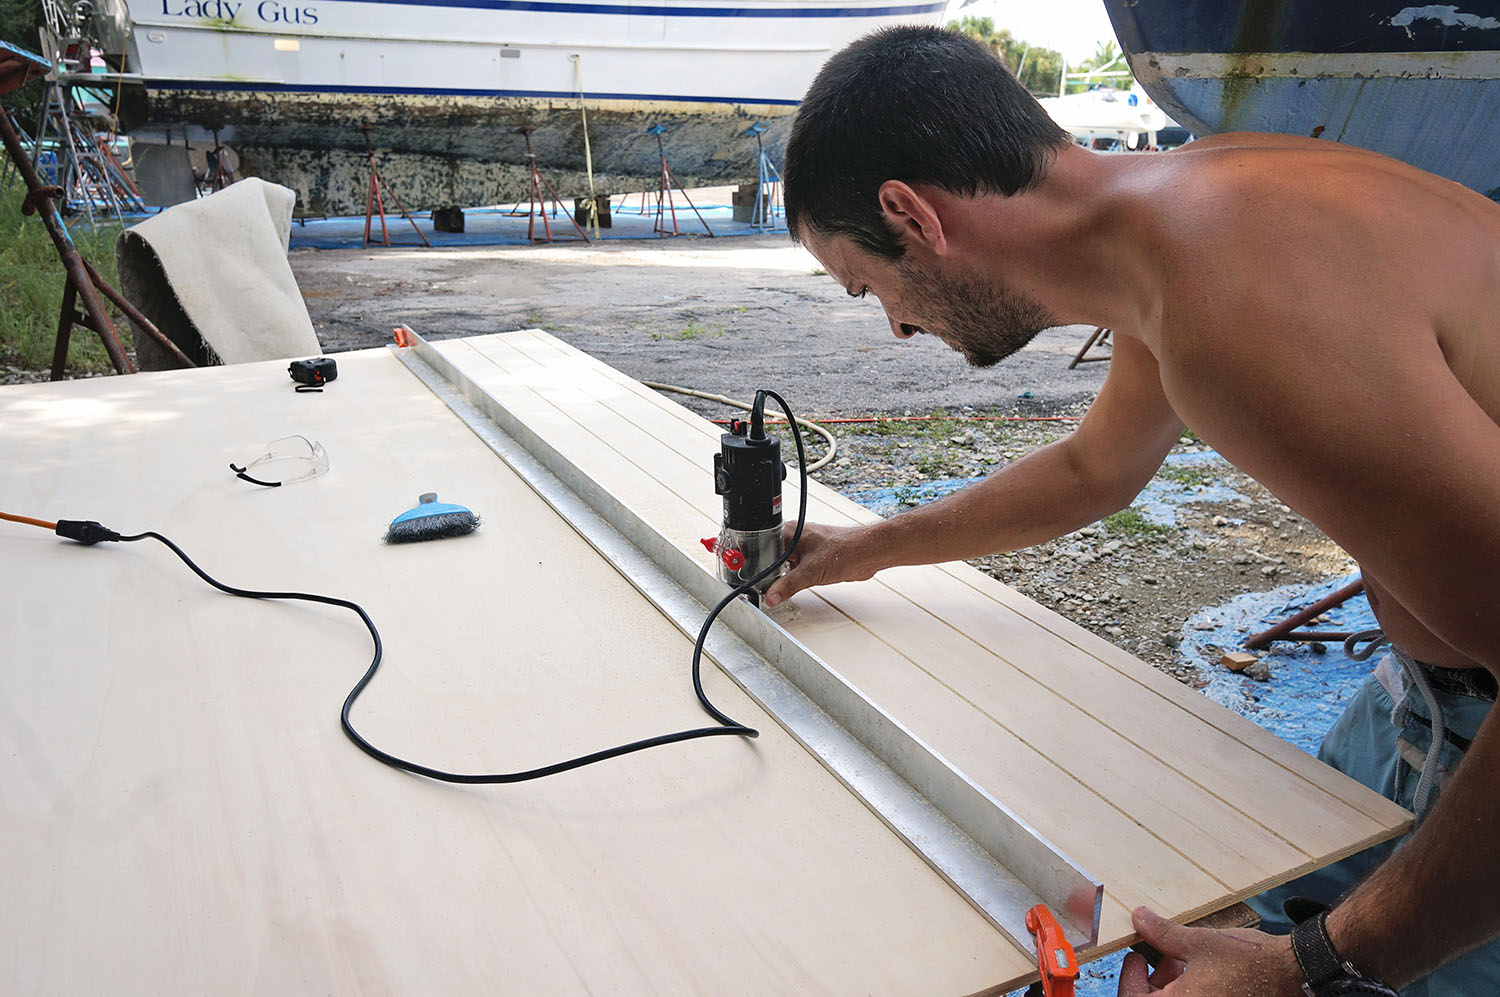
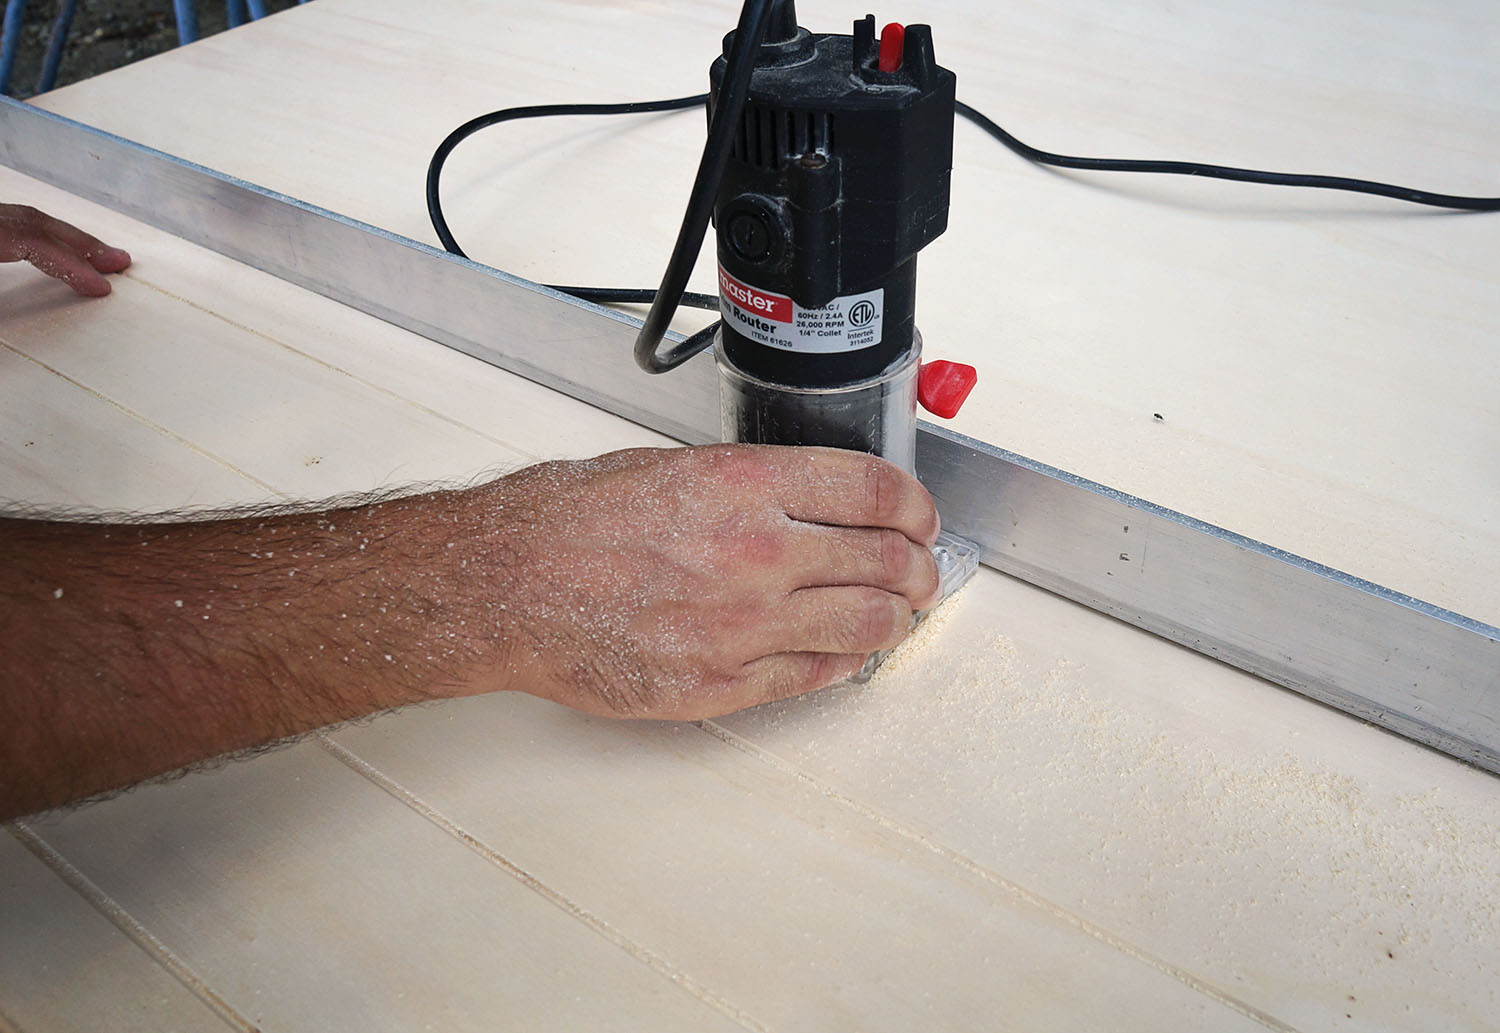
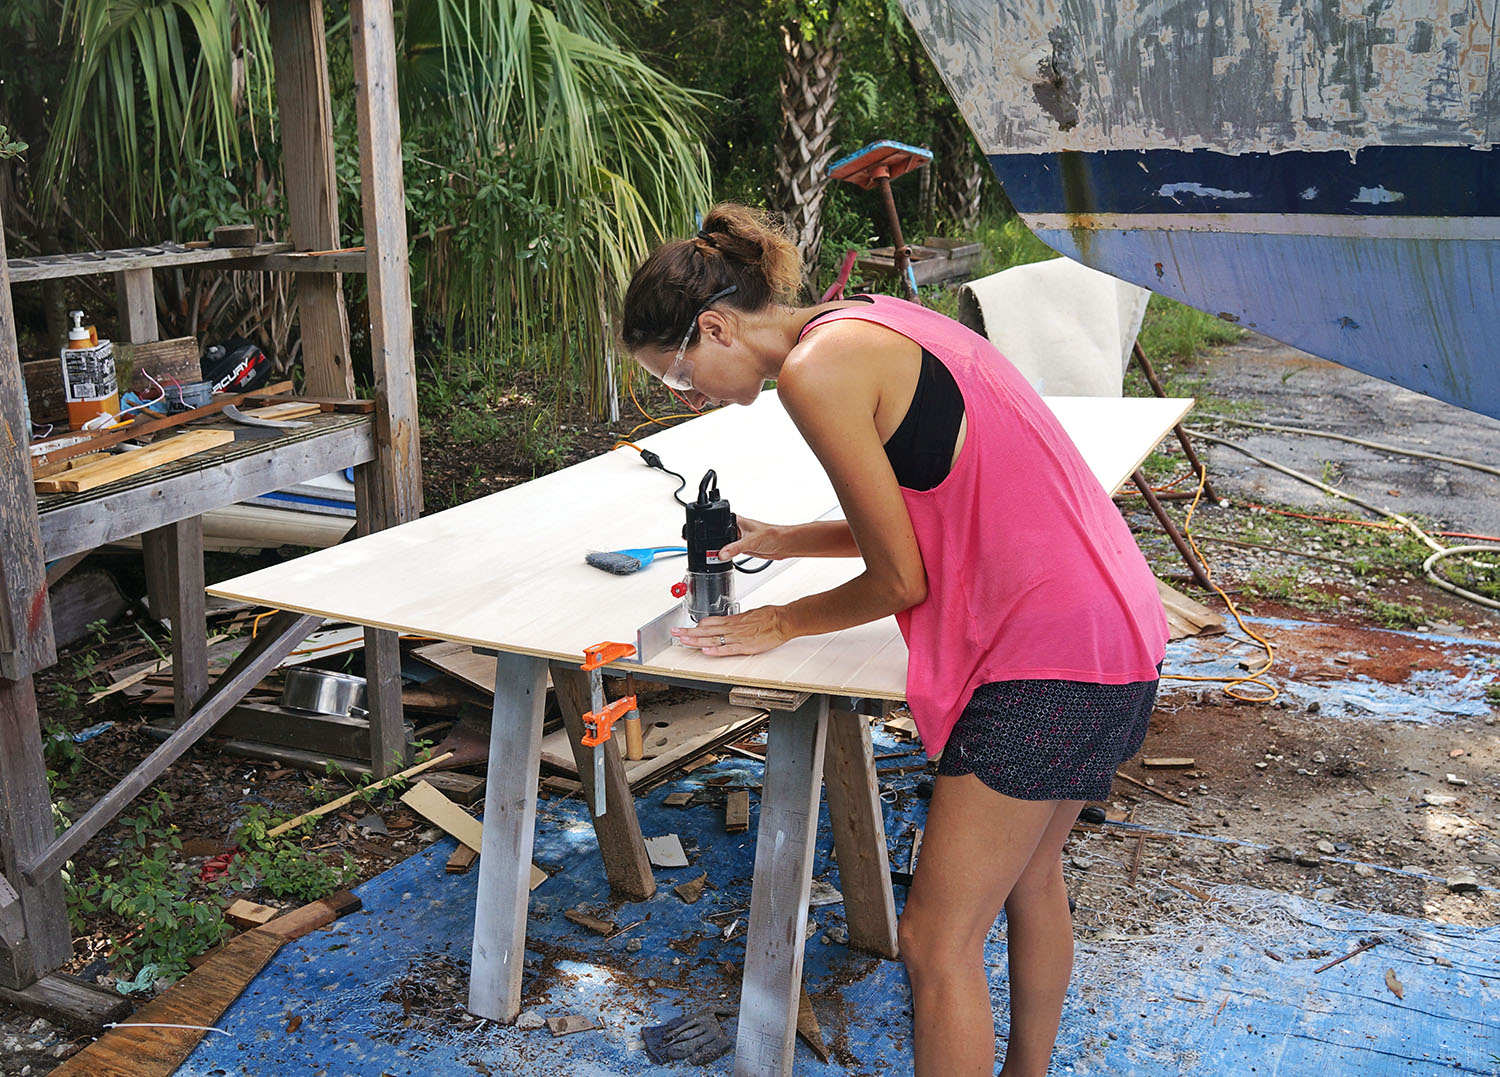
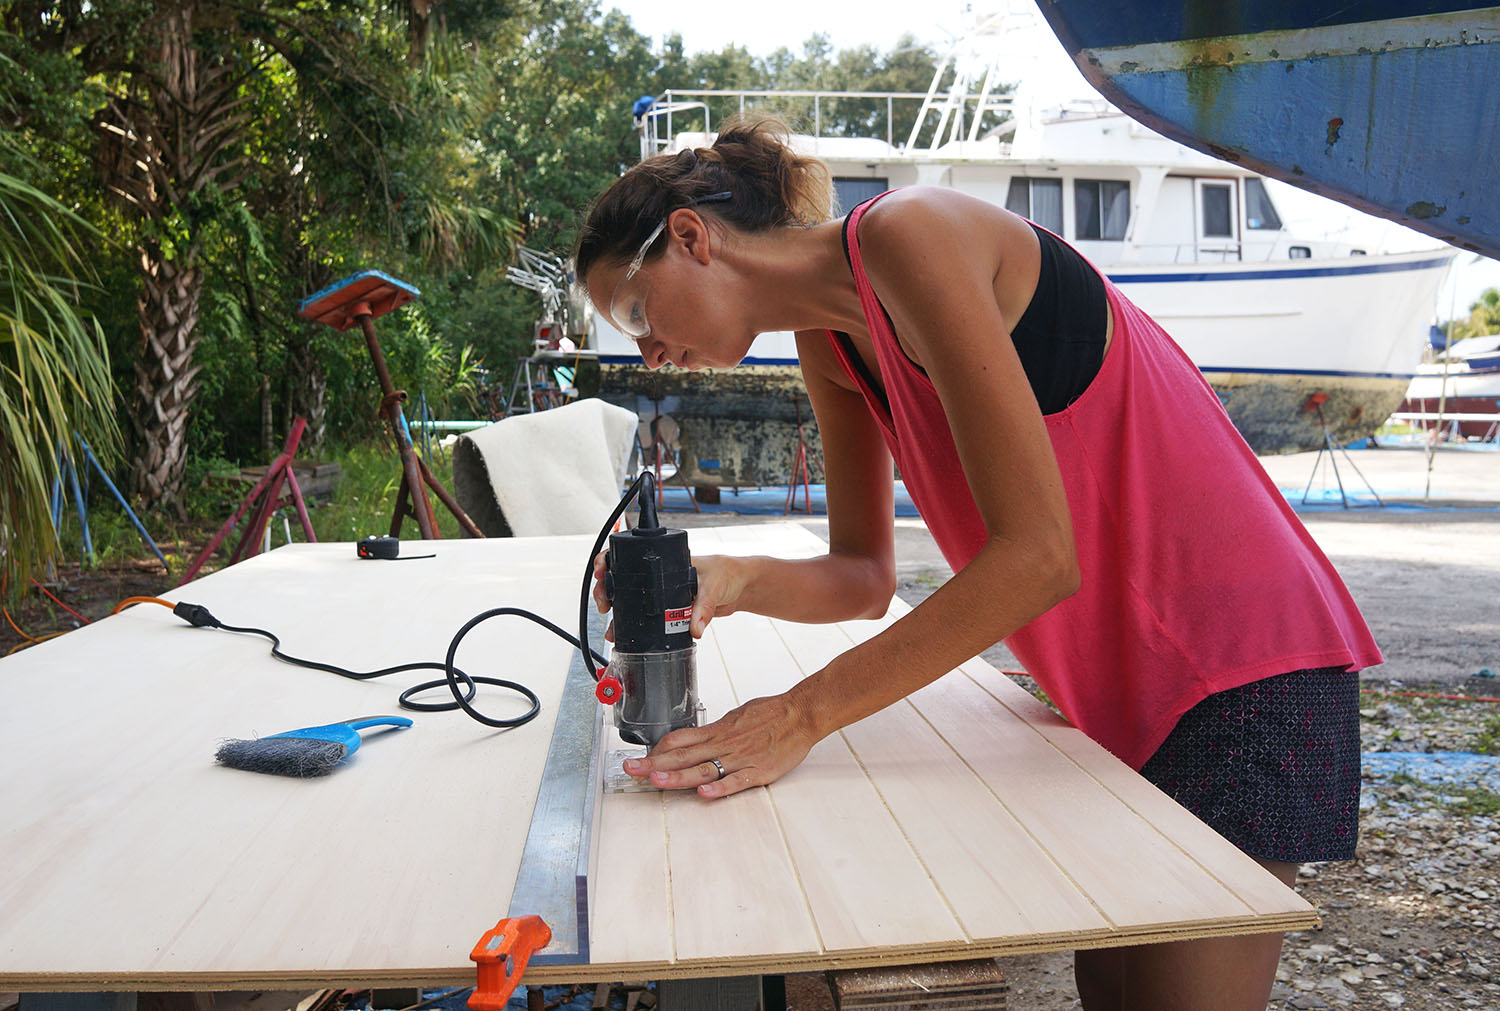
Since we were replacing such a large area we started out with a brand new 4′ x 8′ sheet of 1/4″ marine plywood Eurolite. Â Positioning it on our sawhorses in front of Daze Off, it was my job to mark the board every 3 1/4″, the distance between our grooves. Â I will admit there have been one or two instances where my measurements have been off before, resulting in sloping lines, so now I’m adamant to check each side 2-3 times now before we begin routing. Â You’d think I’d have the numbers memorized by now… 3 1/4, 6 1/2, 9 3/4, 13….but somehow after 26 I always begin to get a little confused and by the time I hit the 45″ area I can never remember if I’m supposed to be at an extra quarter inch or half.
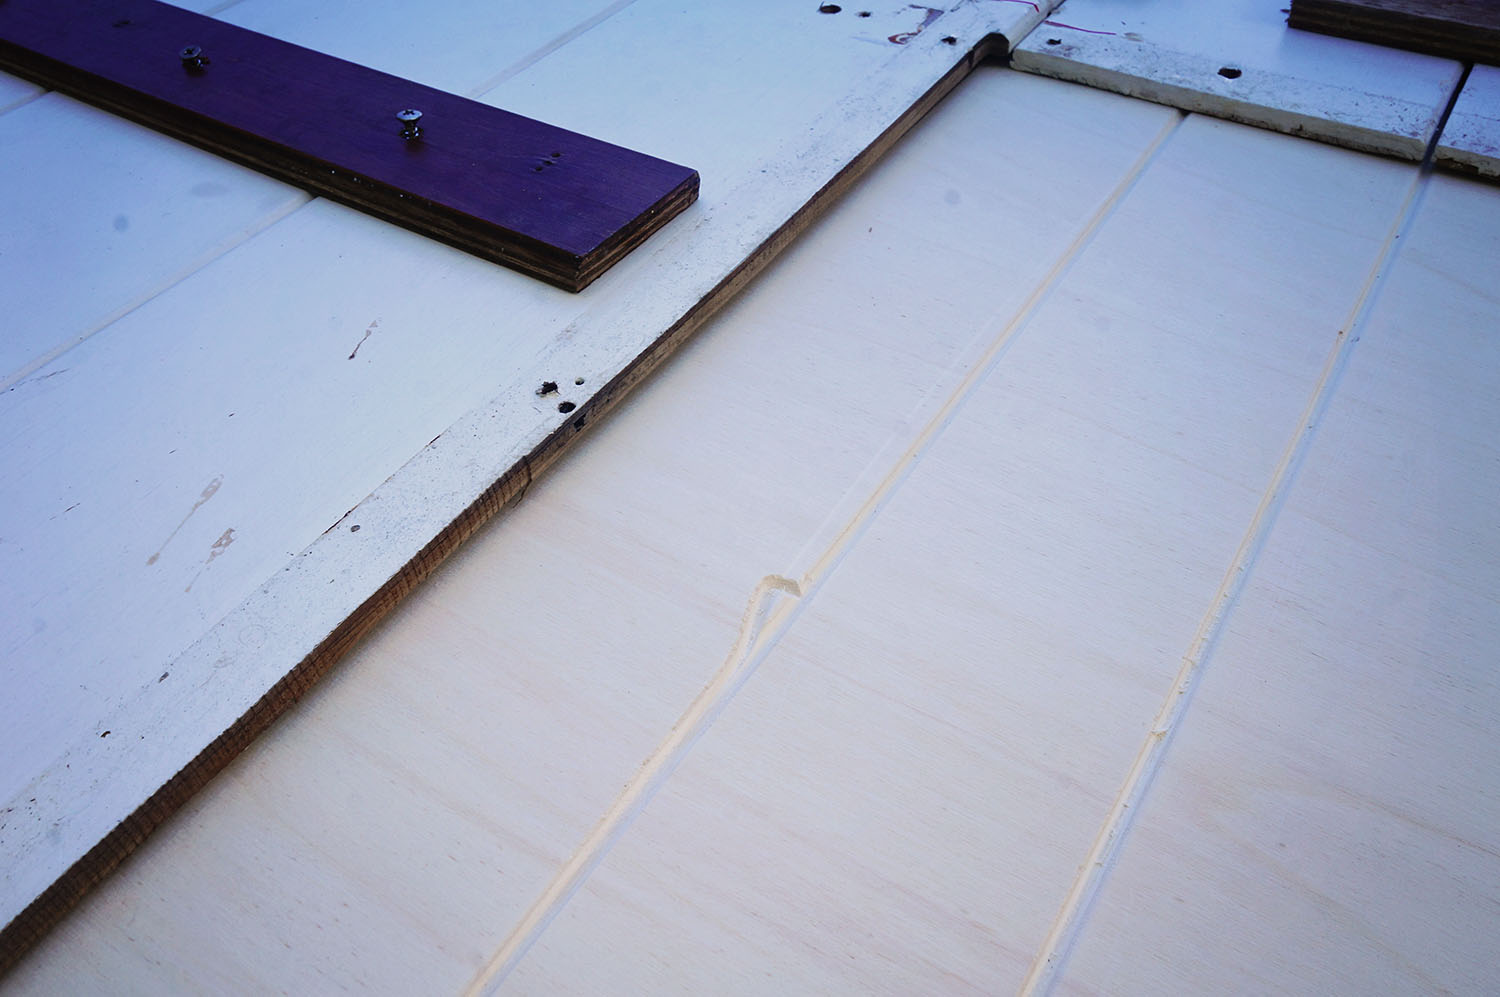
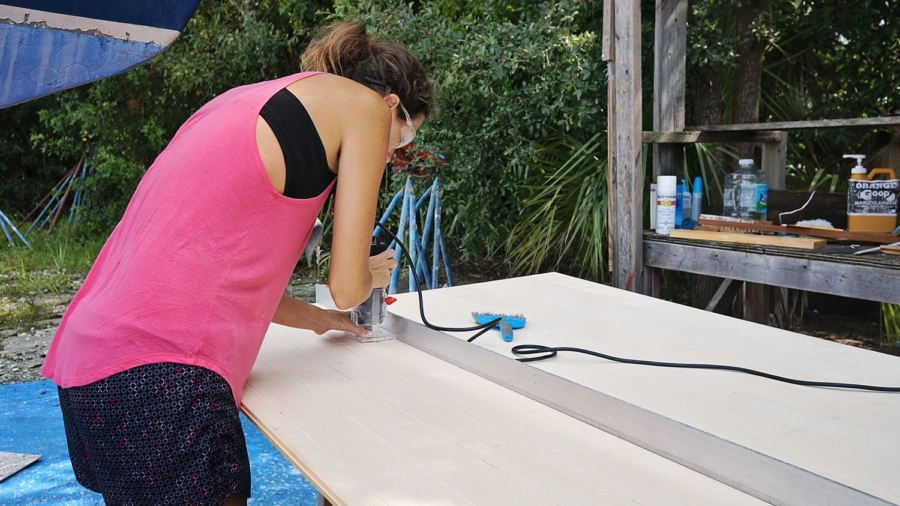
In any case, we now measure at least twice and cut only once. Â When I’m sure I have my numbers down we bring out our large straight edge, an 8′ long section of aluminum that we clamp down to the Eurolite exactly where I’ve made my marks. Â Either Matt or I (usually Matt) will then take our router with a v-groove bit installed, and run it down the length of the board making sure to keep it tight against our aluminum straight edge to ensure a straight line. Â The reason it’s not always me doing this job is I um…I’m not always so good at that part. Â Luckily we’ve been able to hide all my mistakes so far.
After each line has had the router passed through it we move the straight edge up to the next mark and so on and so on until we’ve covered the whole board. Â A large amount of sawdust tends to accumulate so I’m usually taking a little brush and cleaning the board after each sweep. Â From start to finish this part usually takes about an hour. Â Before we can begin tracing the template though, we do a good sanding of all the new grooves to take away the rough edges from the router and also give it more of a rounded transition into the board.
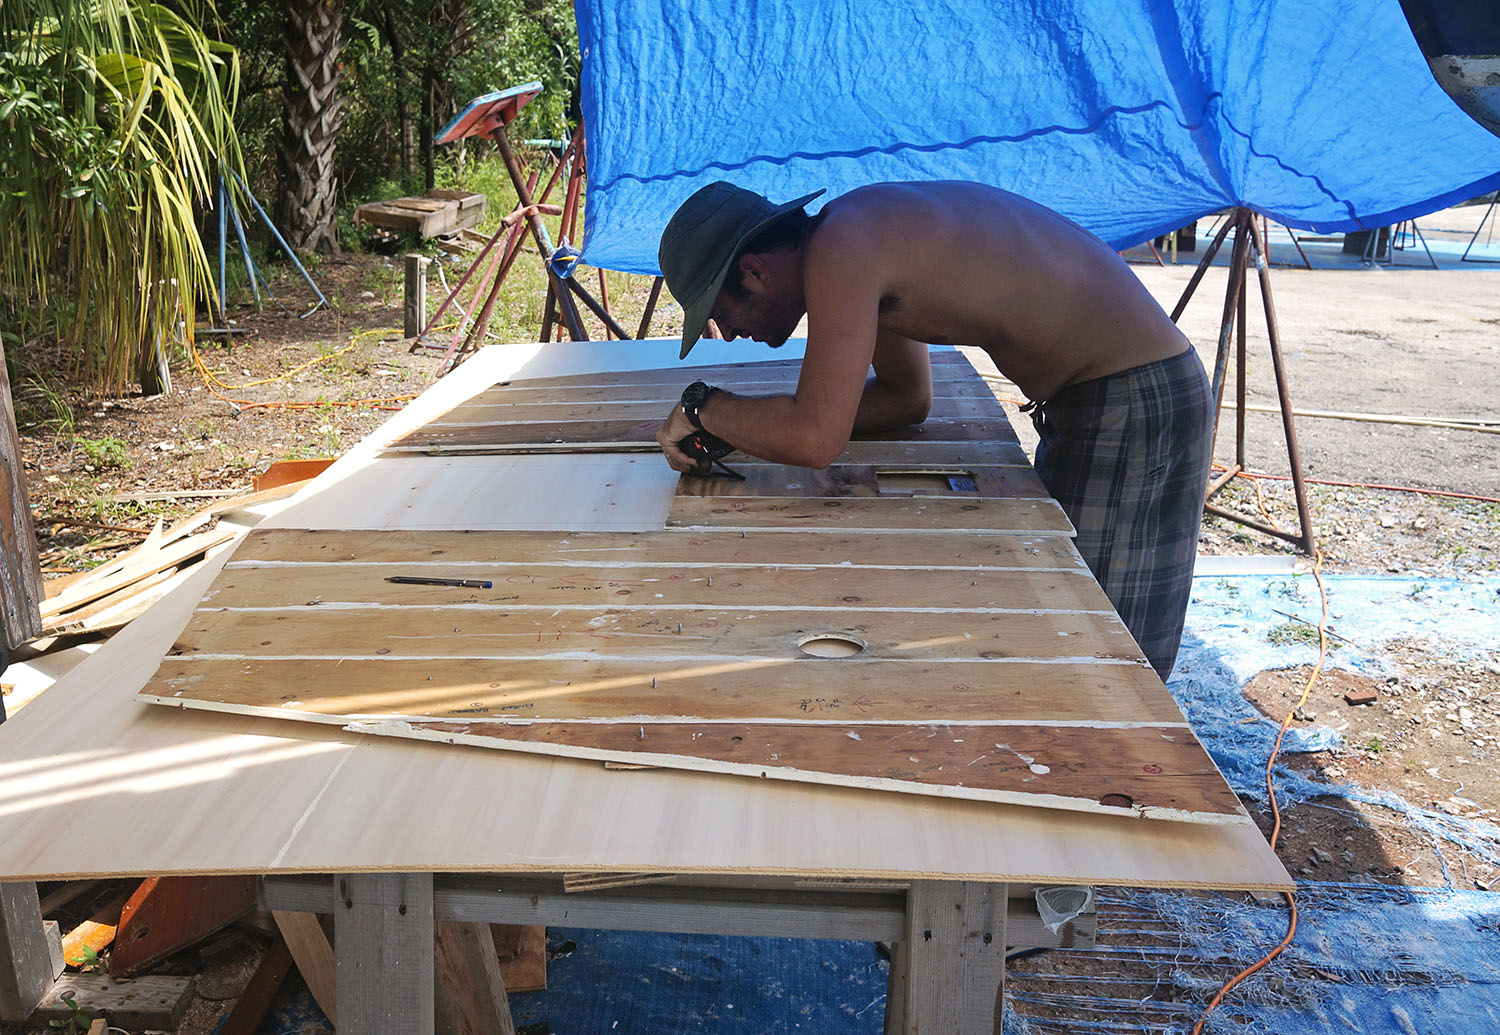
 The last step is to take our template, in whichever form it may be in, and place it on the board of Eurolite to trace and cut.  Depending on the area it is getting placed into and if it’s the first board in a section or a continuation of an existing board into another area, we have to make sure the routed lines match up and flow together so we don’t have one routed line butting up to the center of a strip when two boards are matched up together.  Usually we take extra care in this by starting with the existing board and taking a measurement of where the first groove is from the edge.  Then we know for the next board that we also have to make the first groove come in 1 1/4″ or so from the edge.
In the case of this overhead piece we also had to have our Eurolite board and template facing down so that both pieces had the lines facing the same way. Â One of our first times we accidentally had our Eurolite board facing up while the template was facing down and essentially cut our piece backwards and wasted that sheet of Eurolite. Â It was not a good day.
Lining everything up we added a little extra area to the template from where we noticed it wasn’t fully butting up against the wall. Â We’re learning it’s usually better to be a little large and cut down where necessary. Â Which also happens a lot in this process. Â I’d say that once we have the new piece of Eurolite cut out there are approximately four trips up and down the ladder with the new board and we try and fit it in it’s new space and then have to shave off 1/8″ here and there. Â Eventually though we do get it right and then it’s time to screw it into place.